
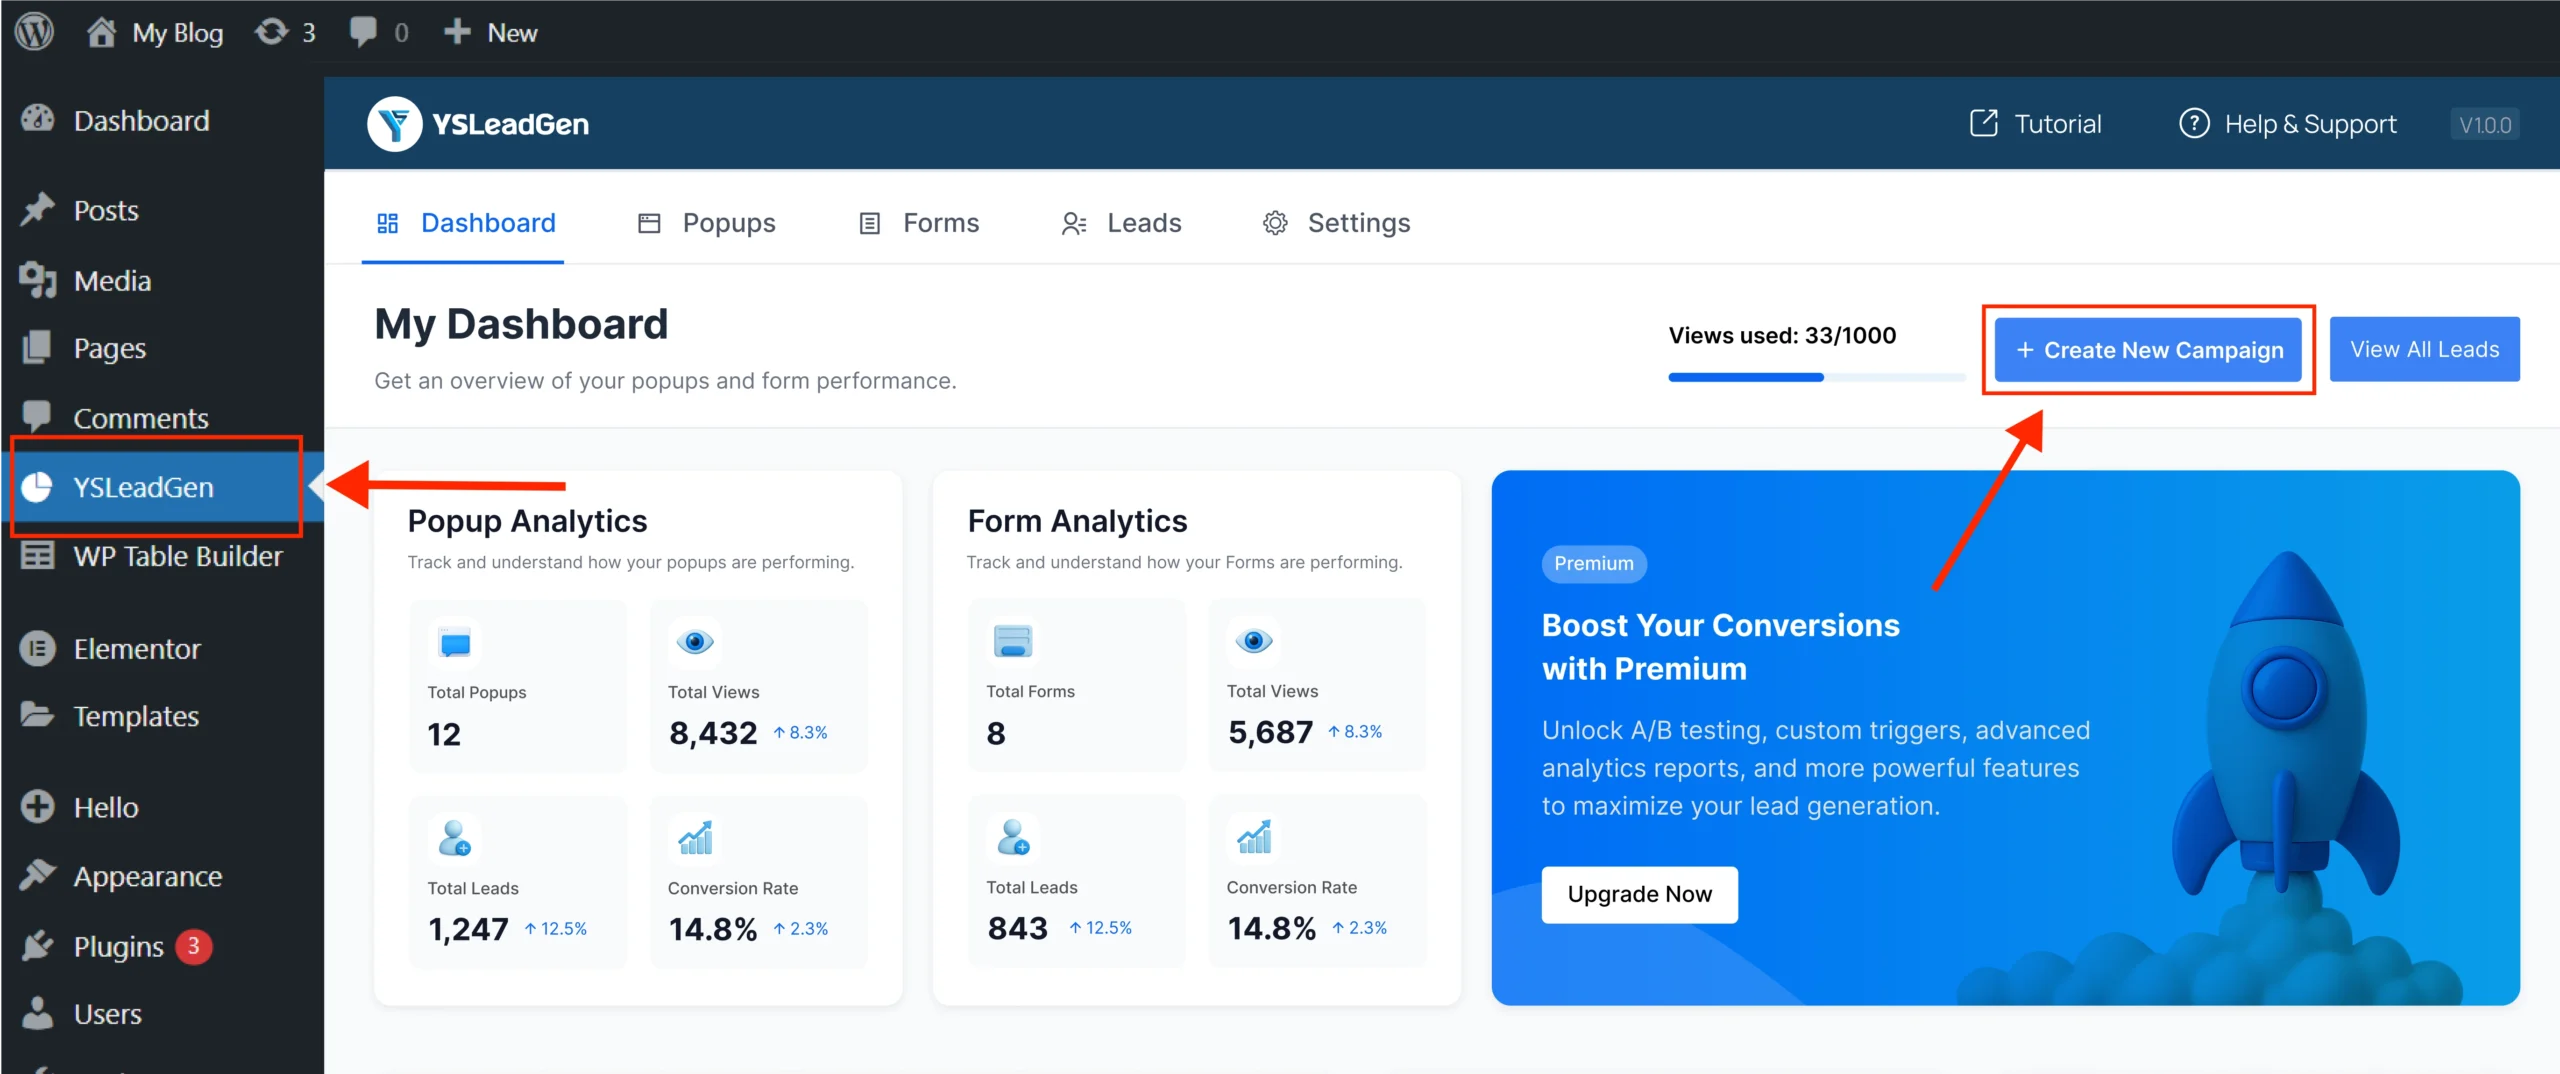
Step 1: Go to Your Campaign Dashboard
WordPress → YS Lead Gen → Create New Campaign
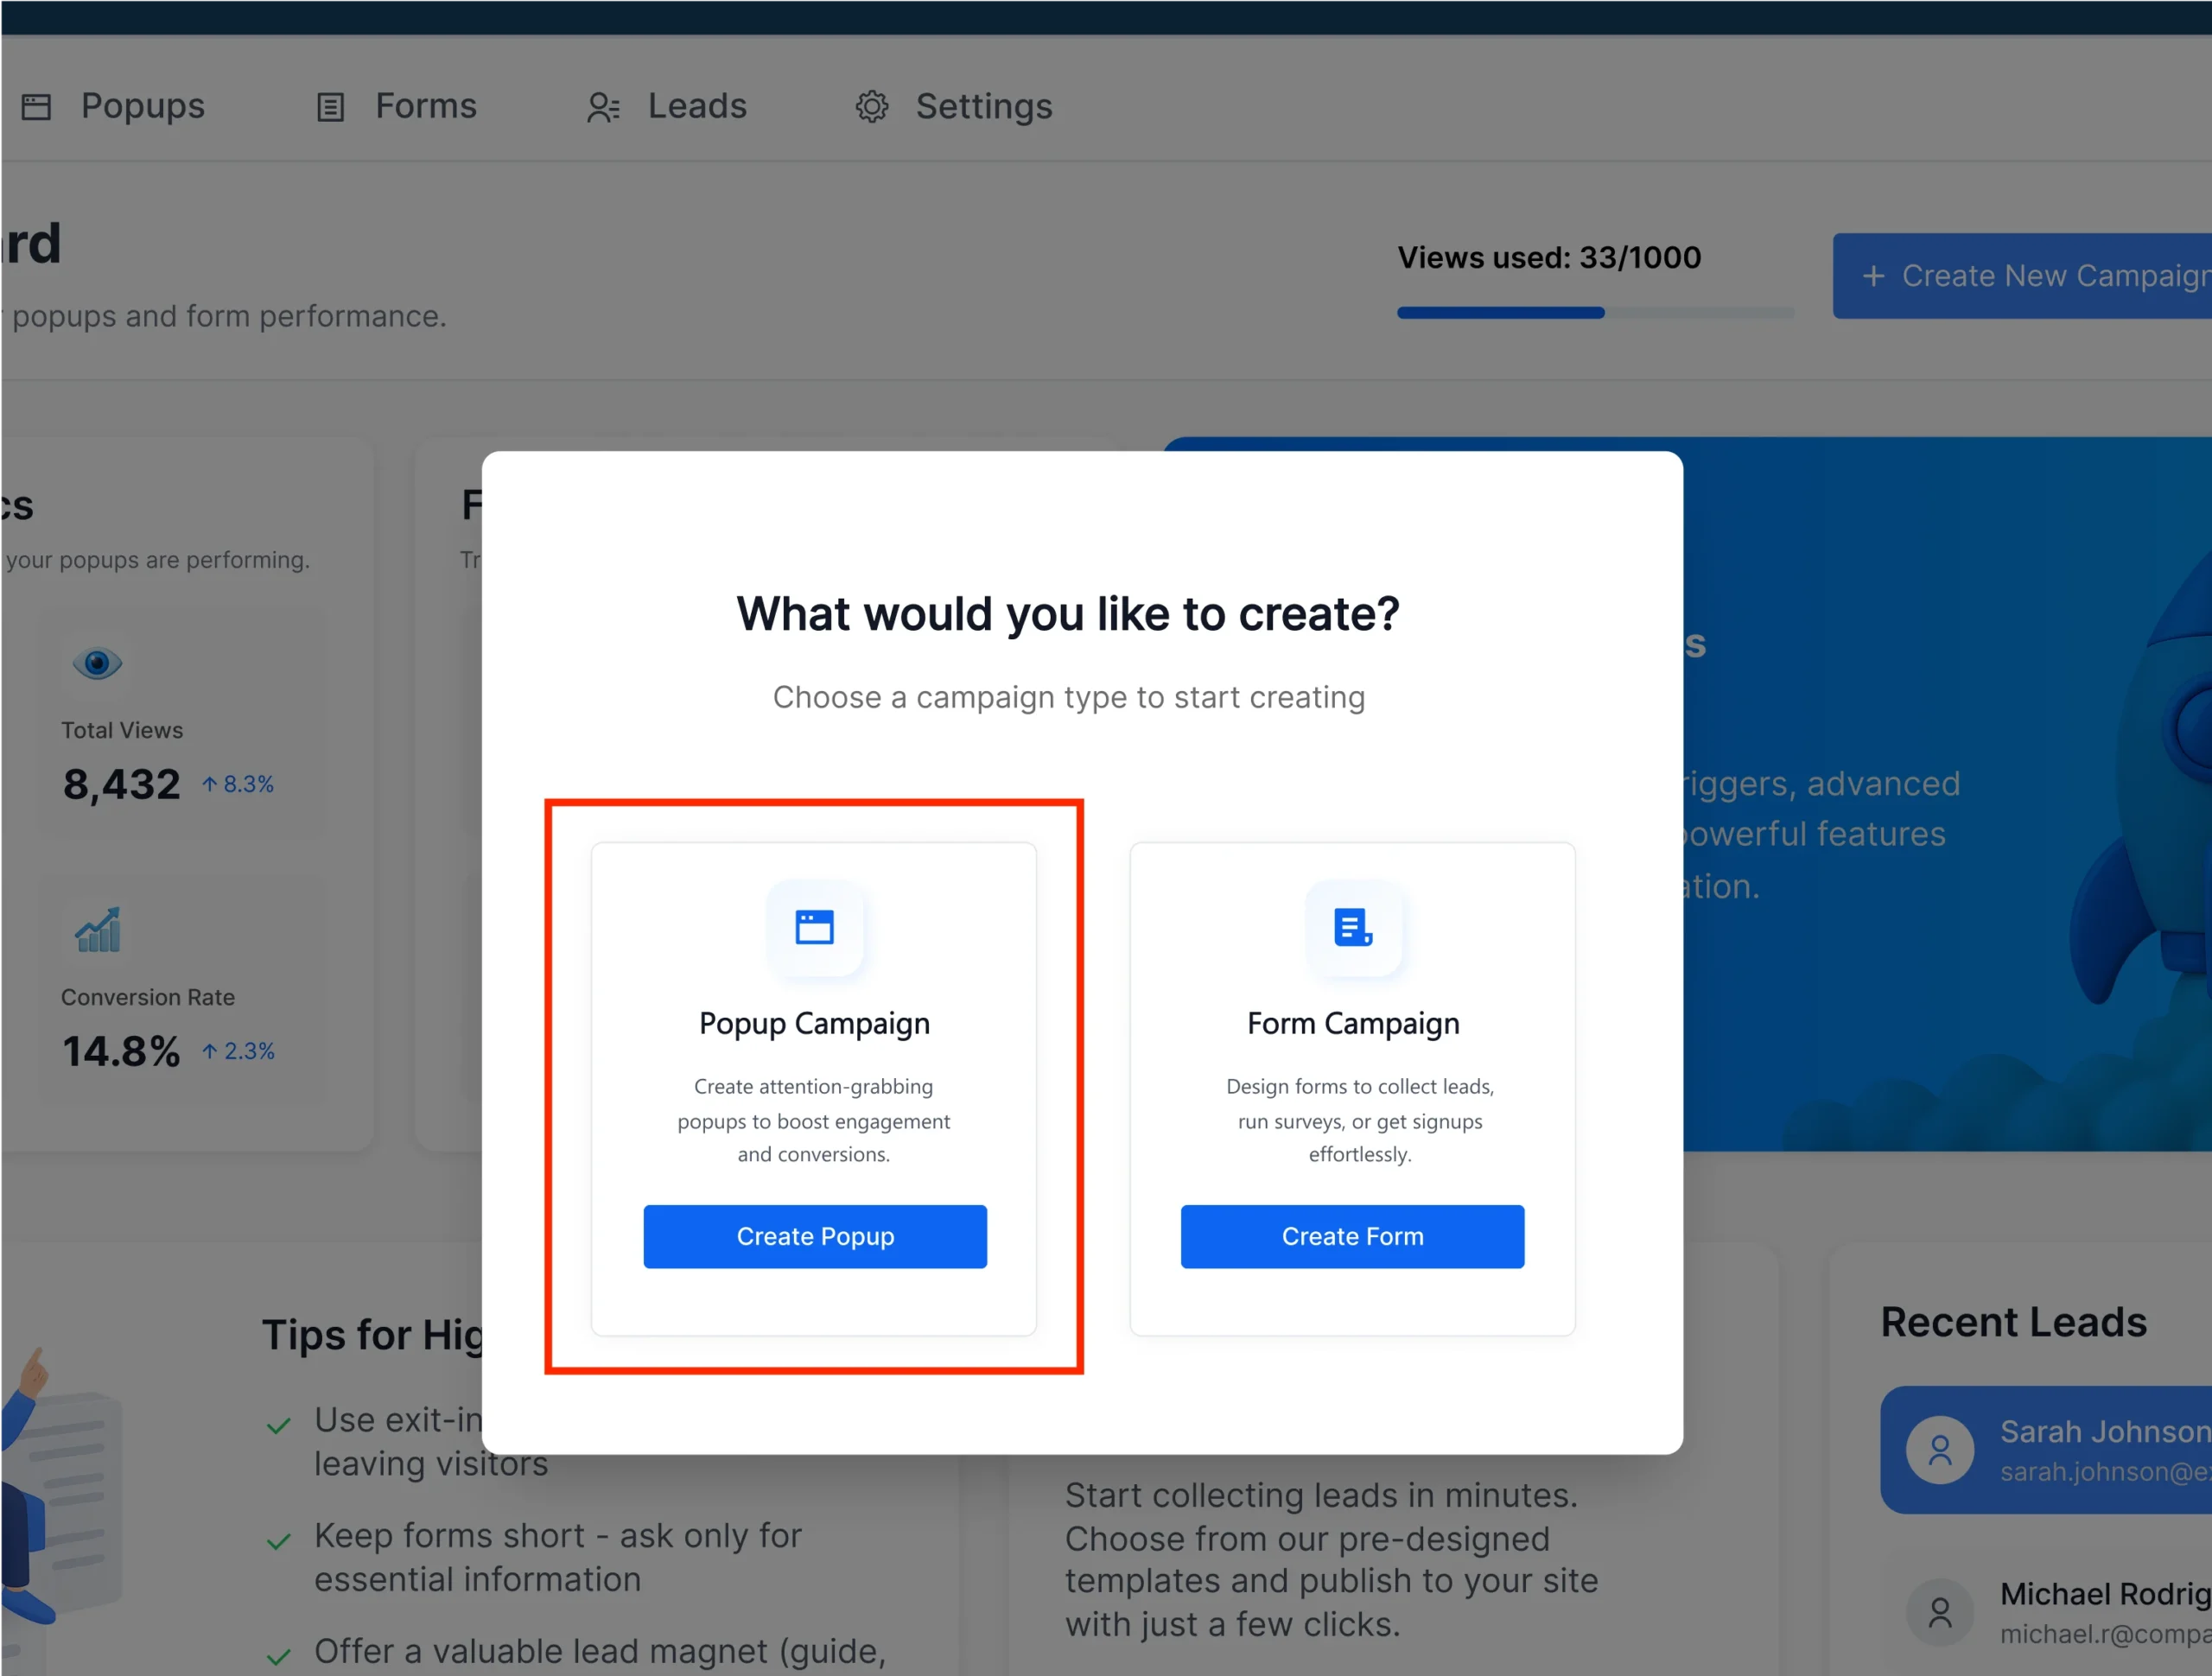
Step 2: Choose Campaign Type
Select Popup Campaign
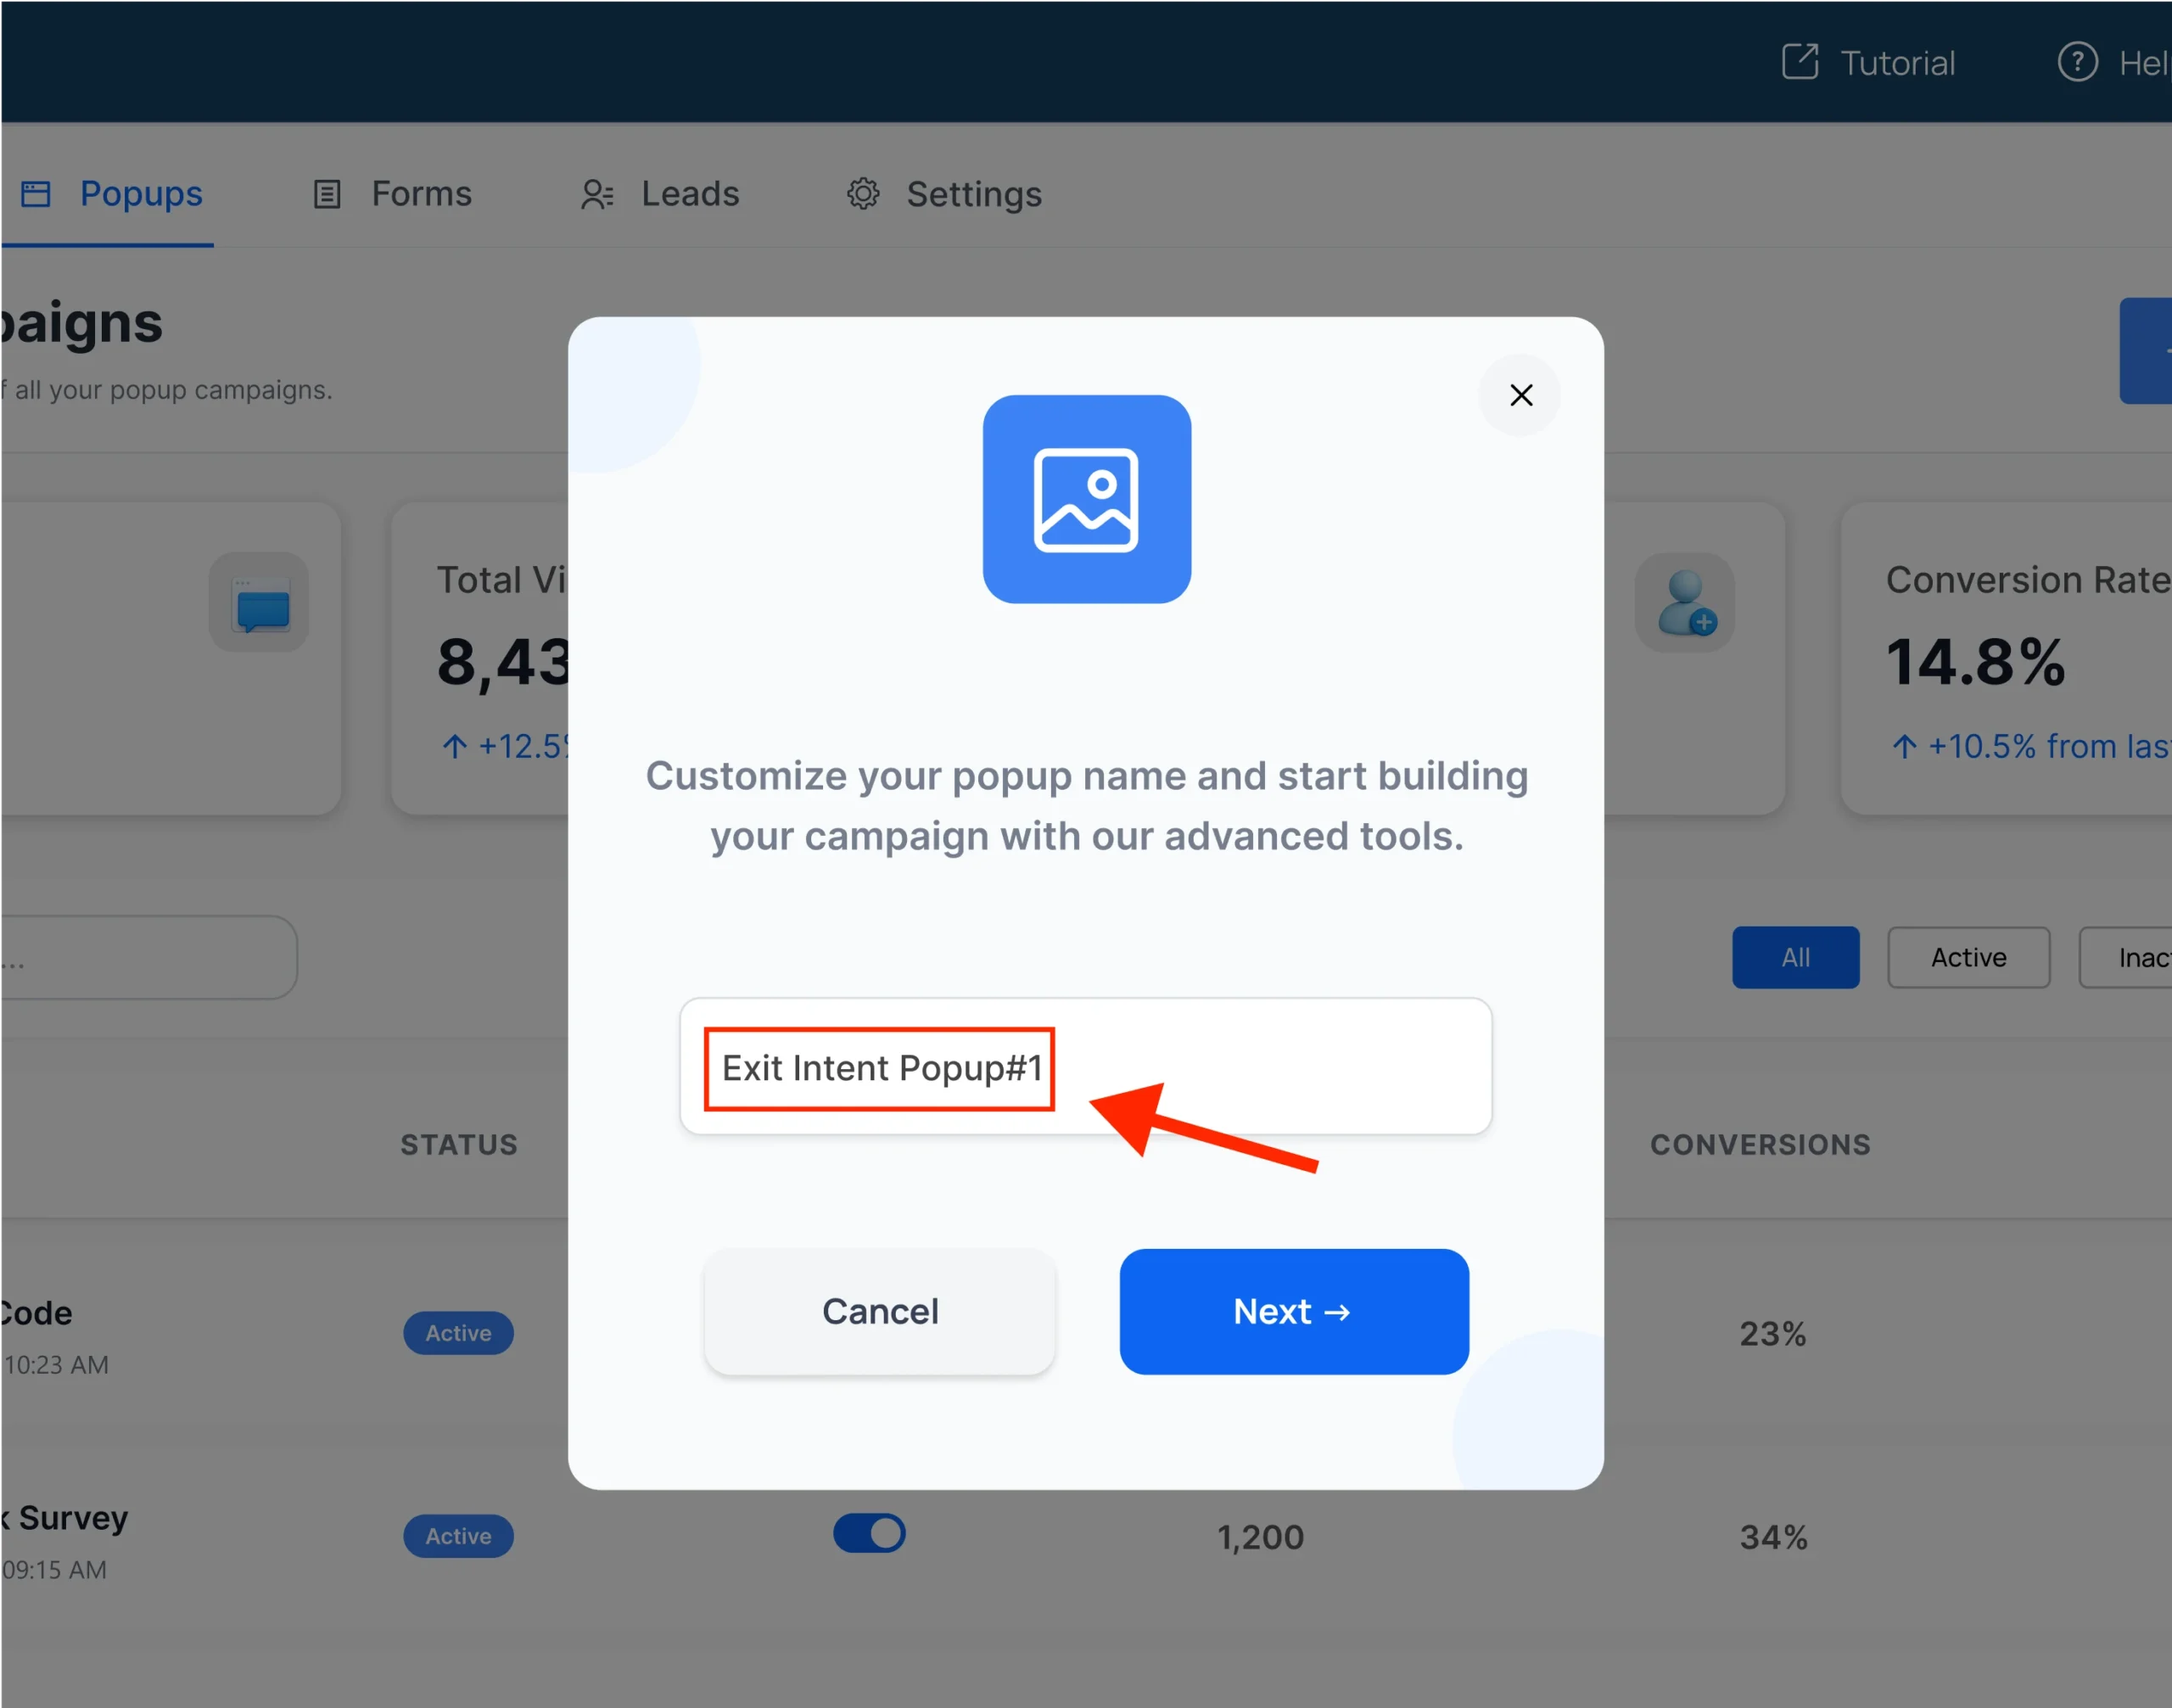
Step 3: Set Your Campaign Name
Give a name for your popup campaign (for your own reference).
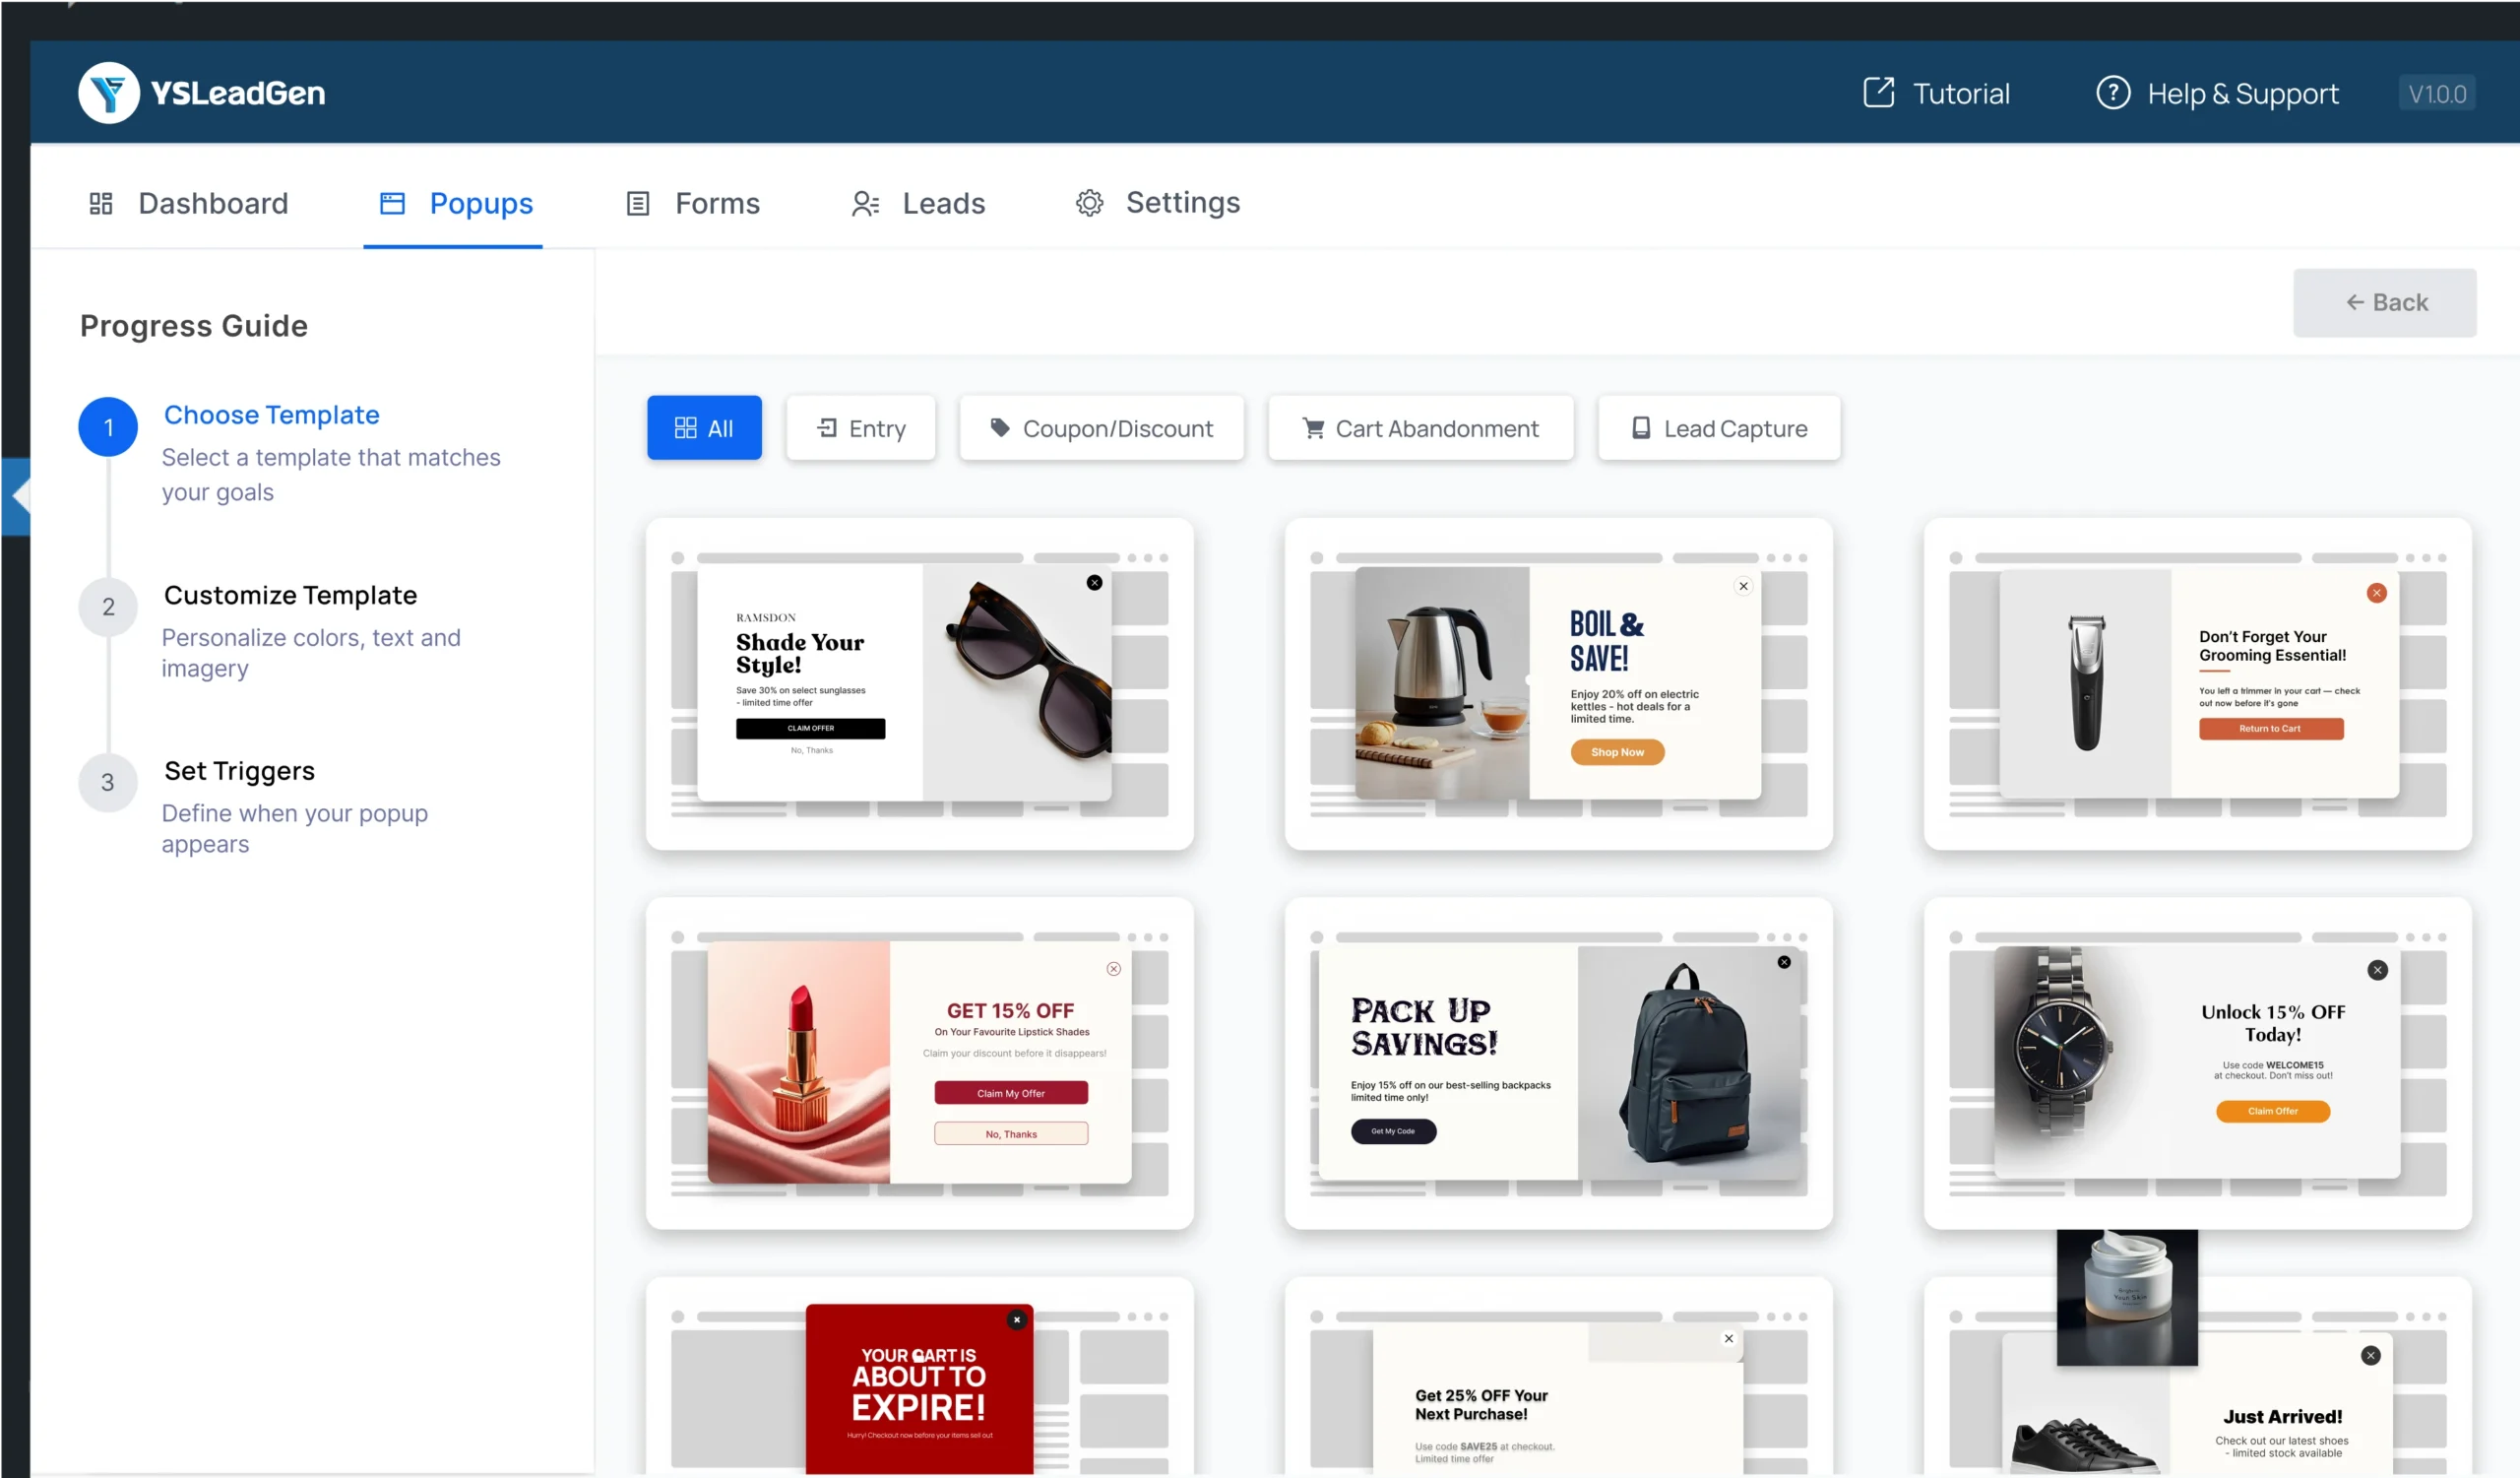
Step 4: Pick a Template
Browse and choose your favorite popup design from 100+ templates.
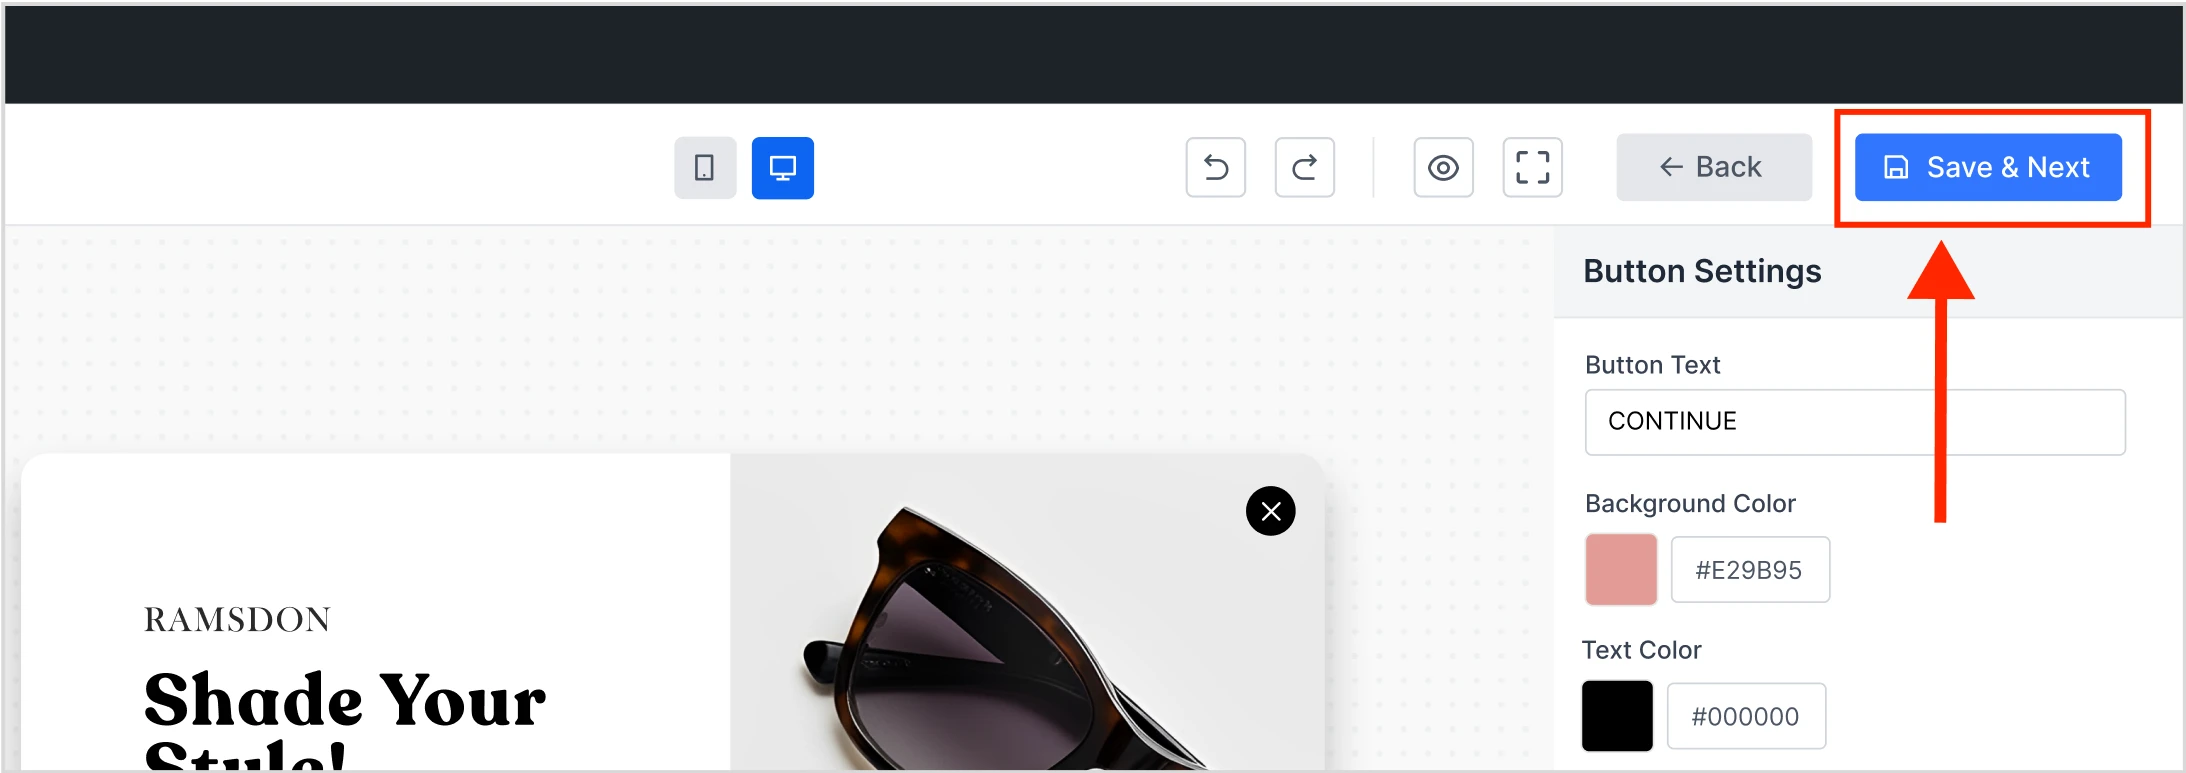
Step 5: Customize Your Popup
Use the editor to change:
- Text
- Image
- Button
- Colors
- Logo
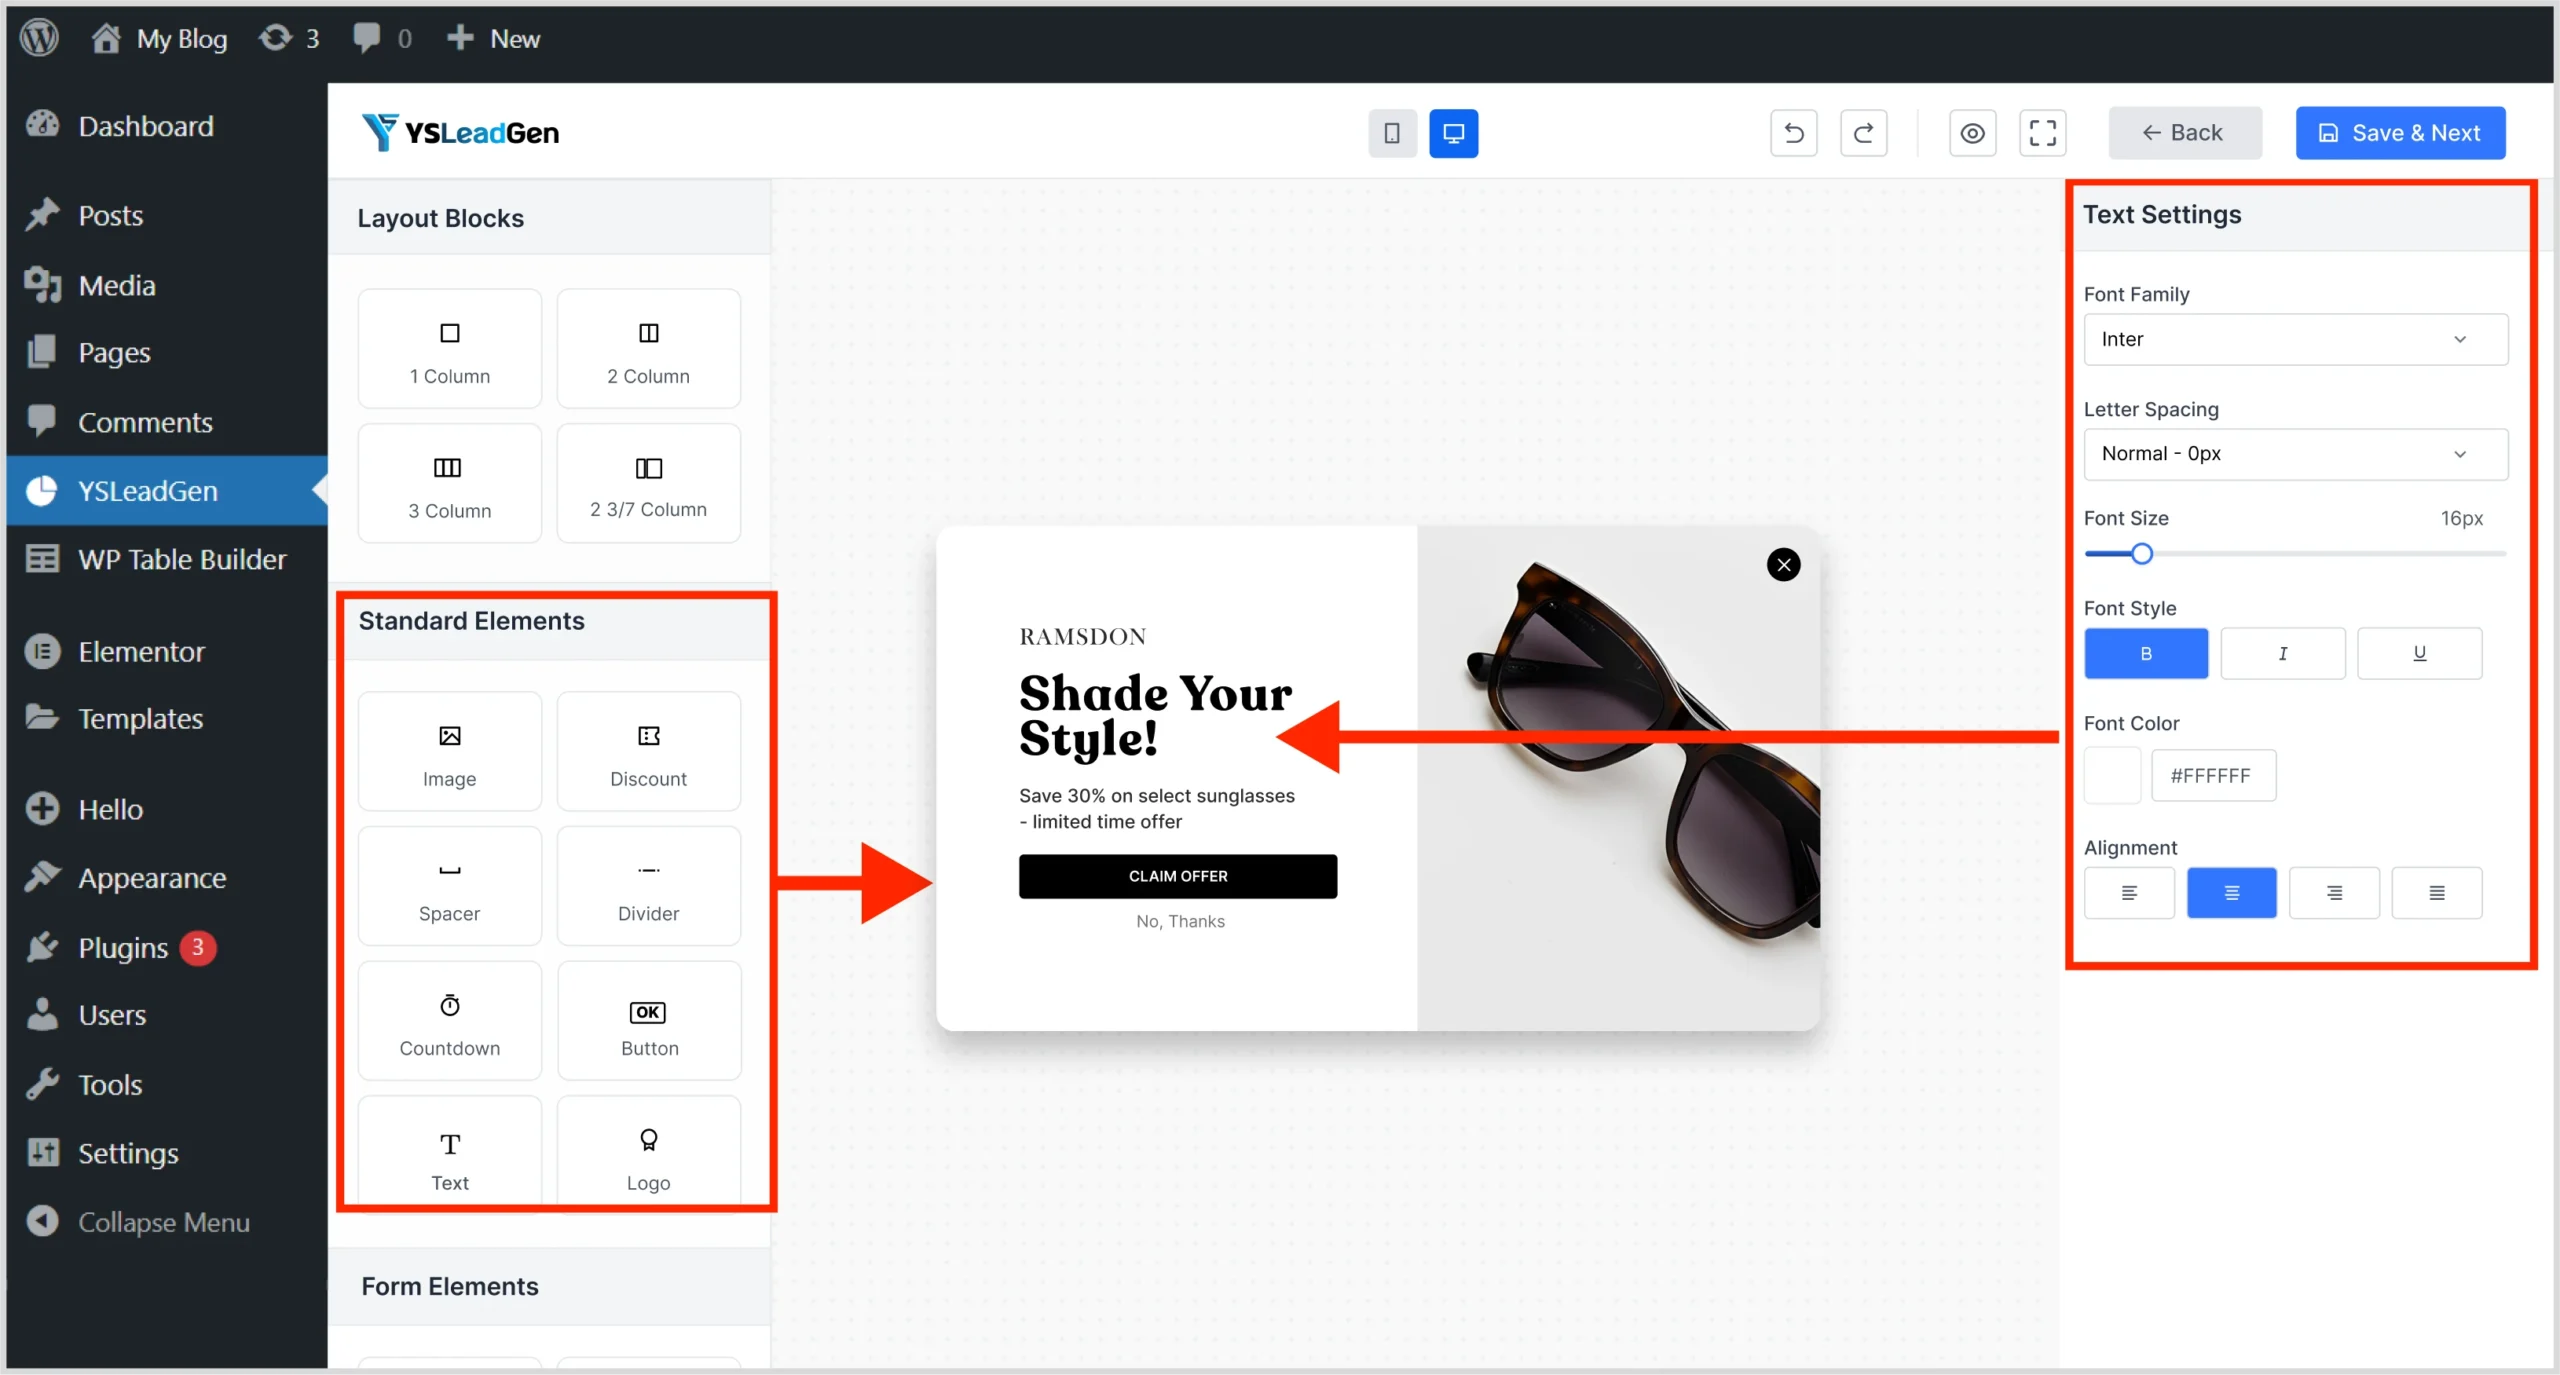
Click Save & Next
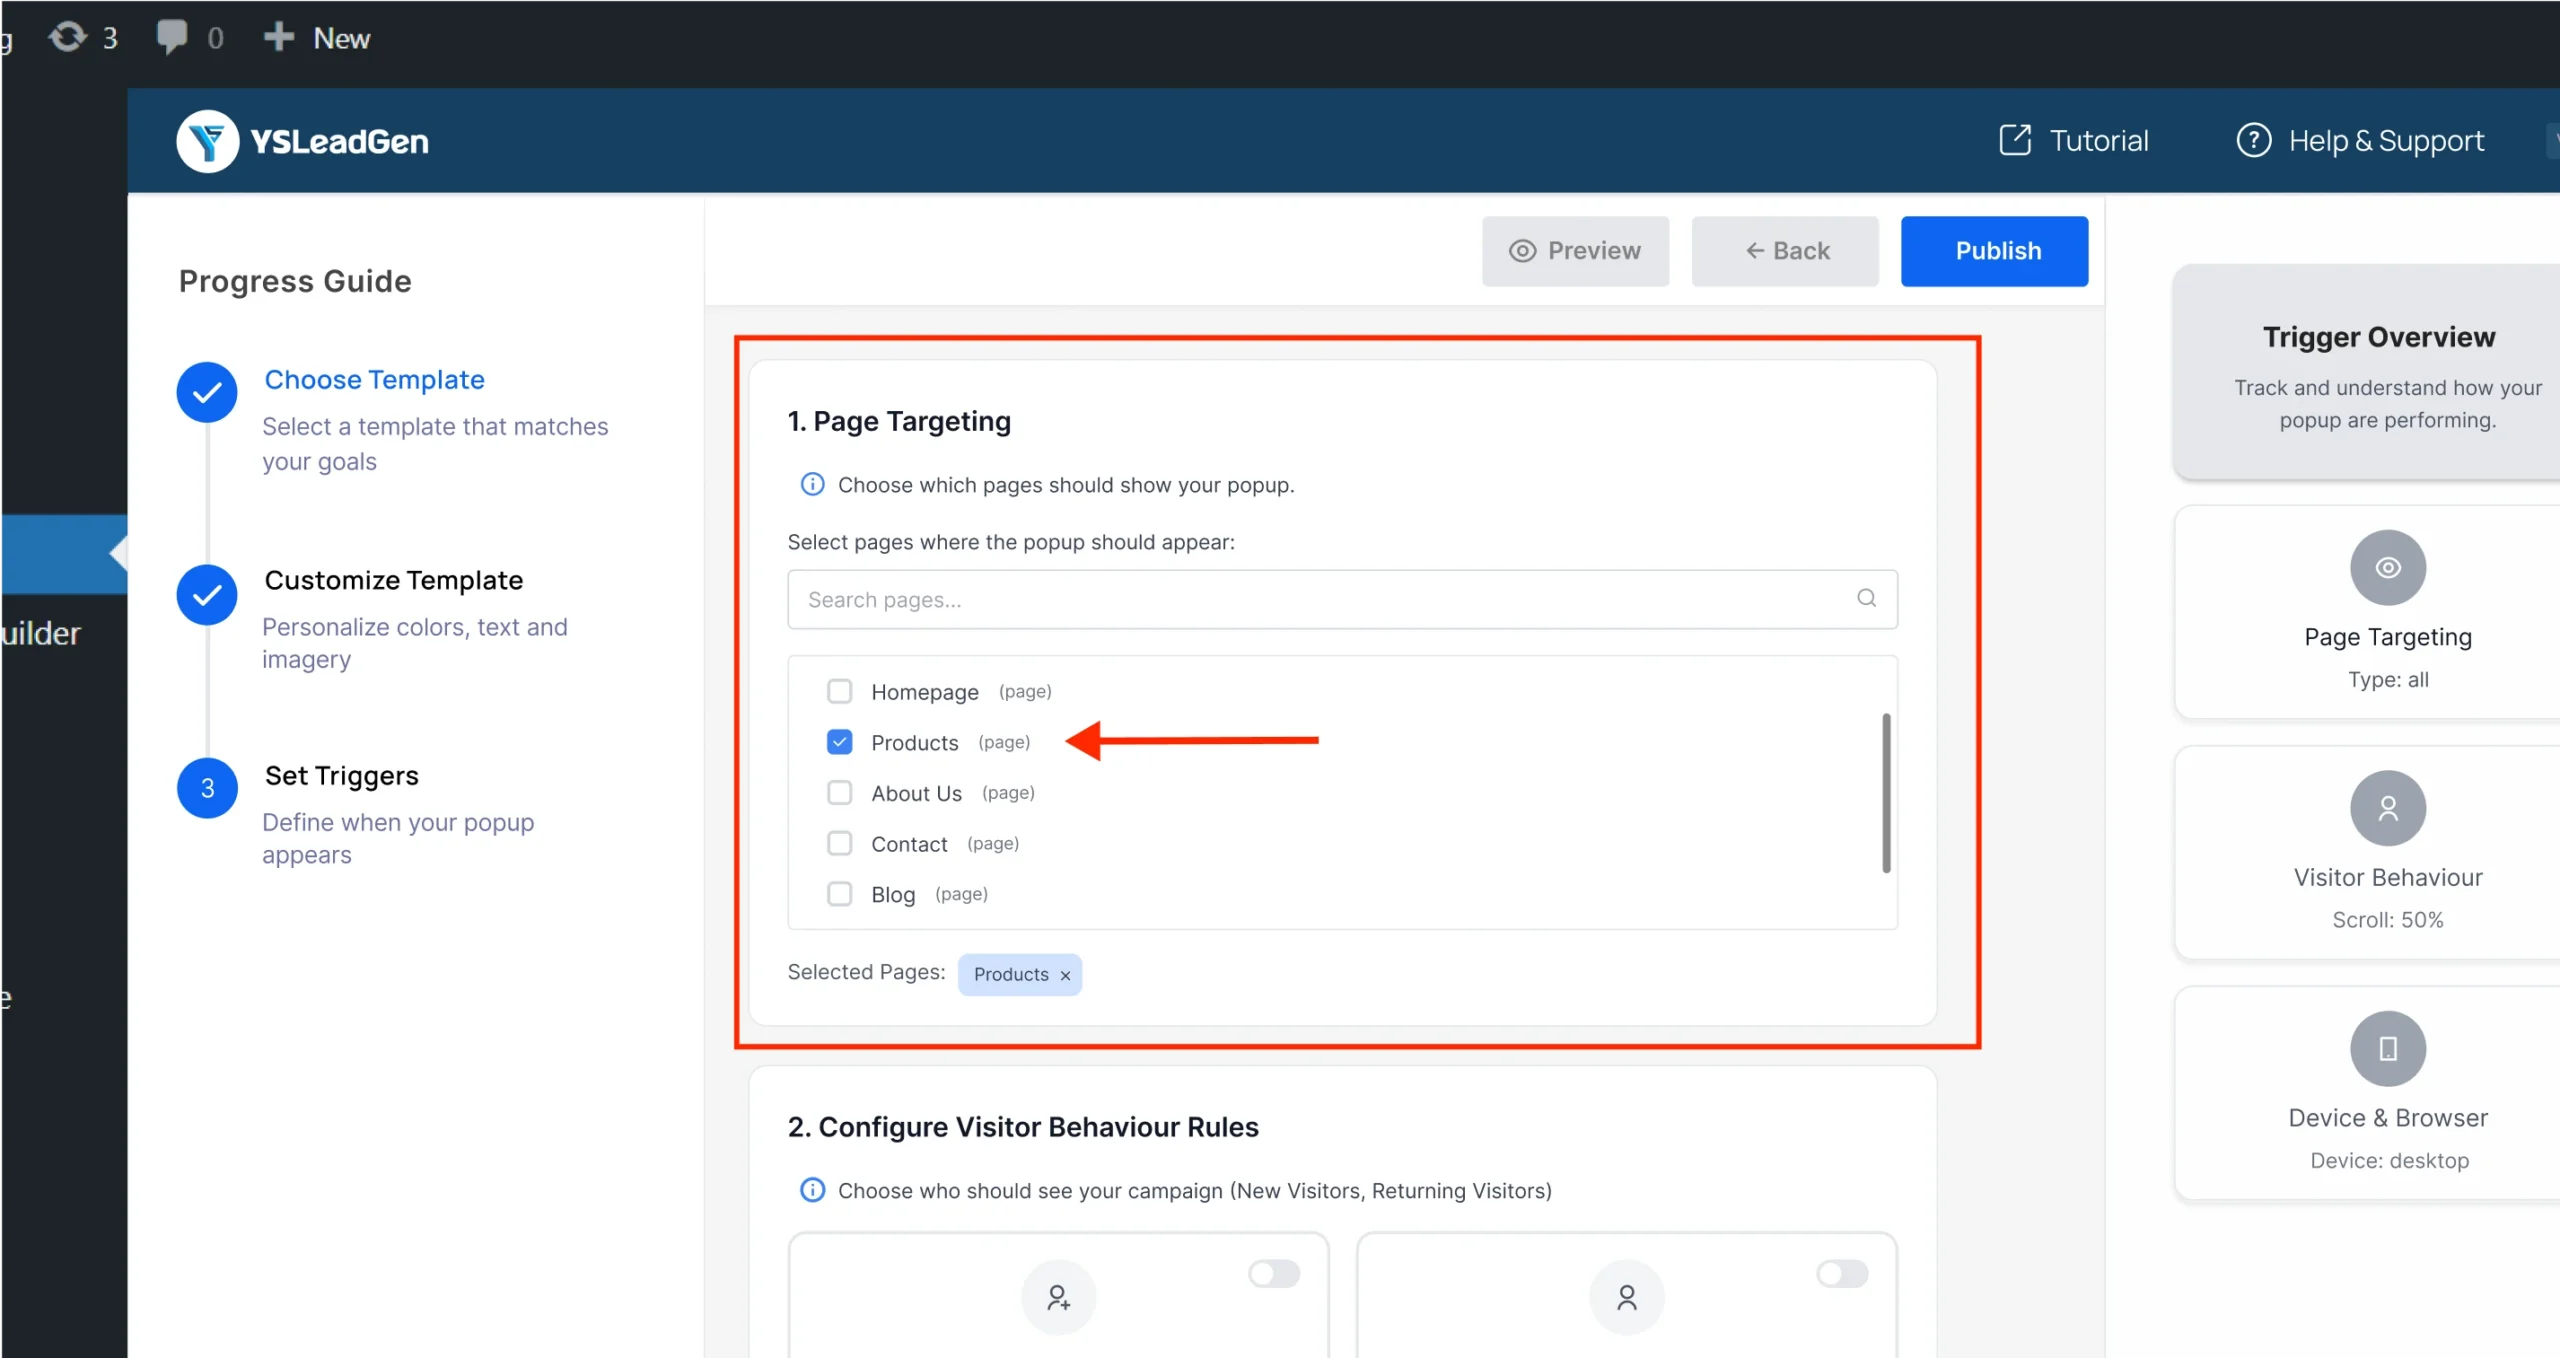
Step 6: Set Target Pages
Choose where your popup should appear:
- Entire website
- Specific pages
- Categories or product pages
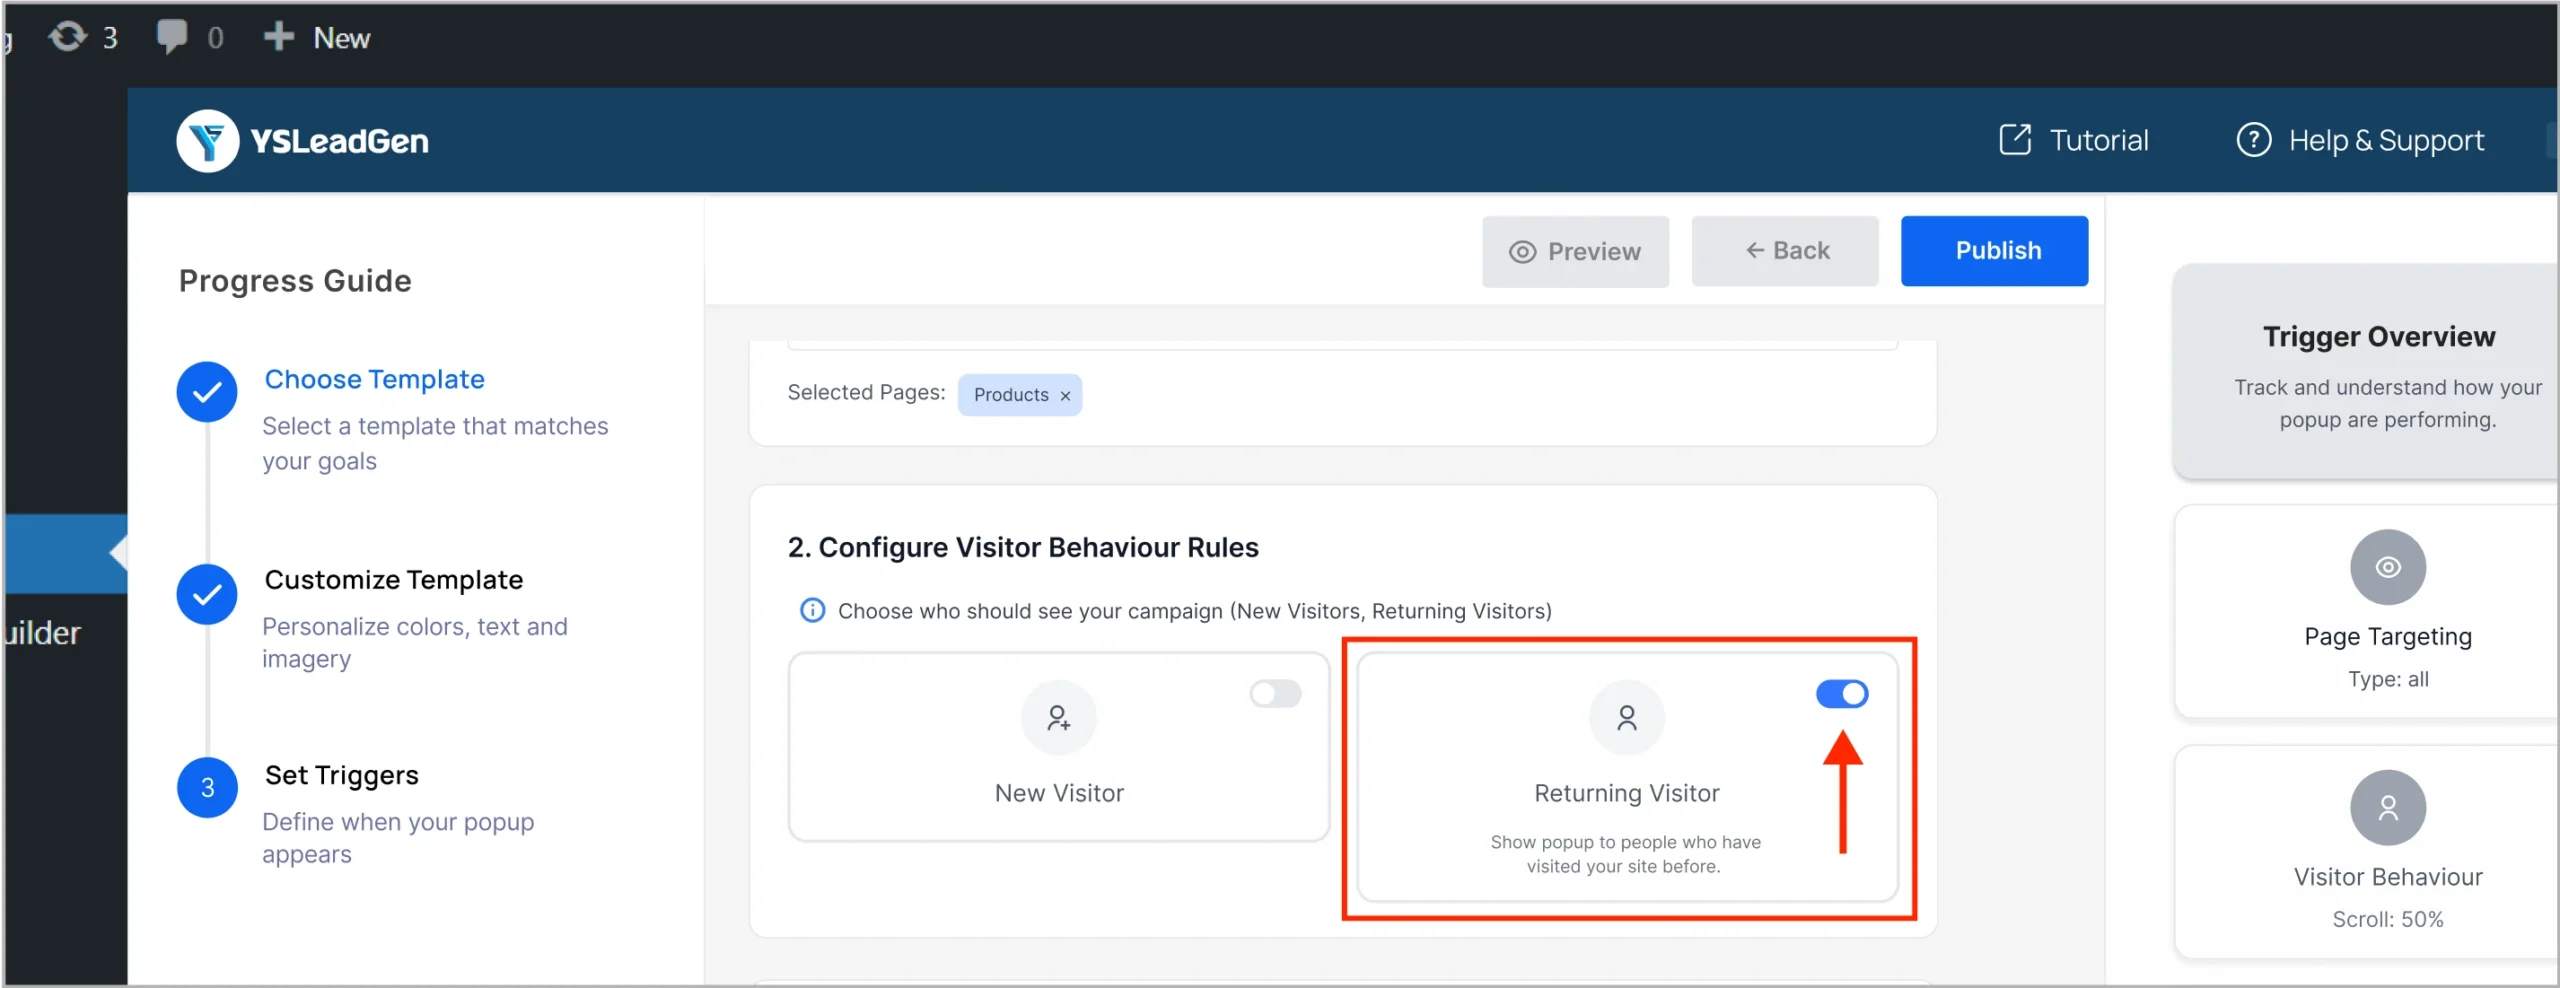
Step 7: Choose Visitor Type
Decide who should see the popup:
- All users
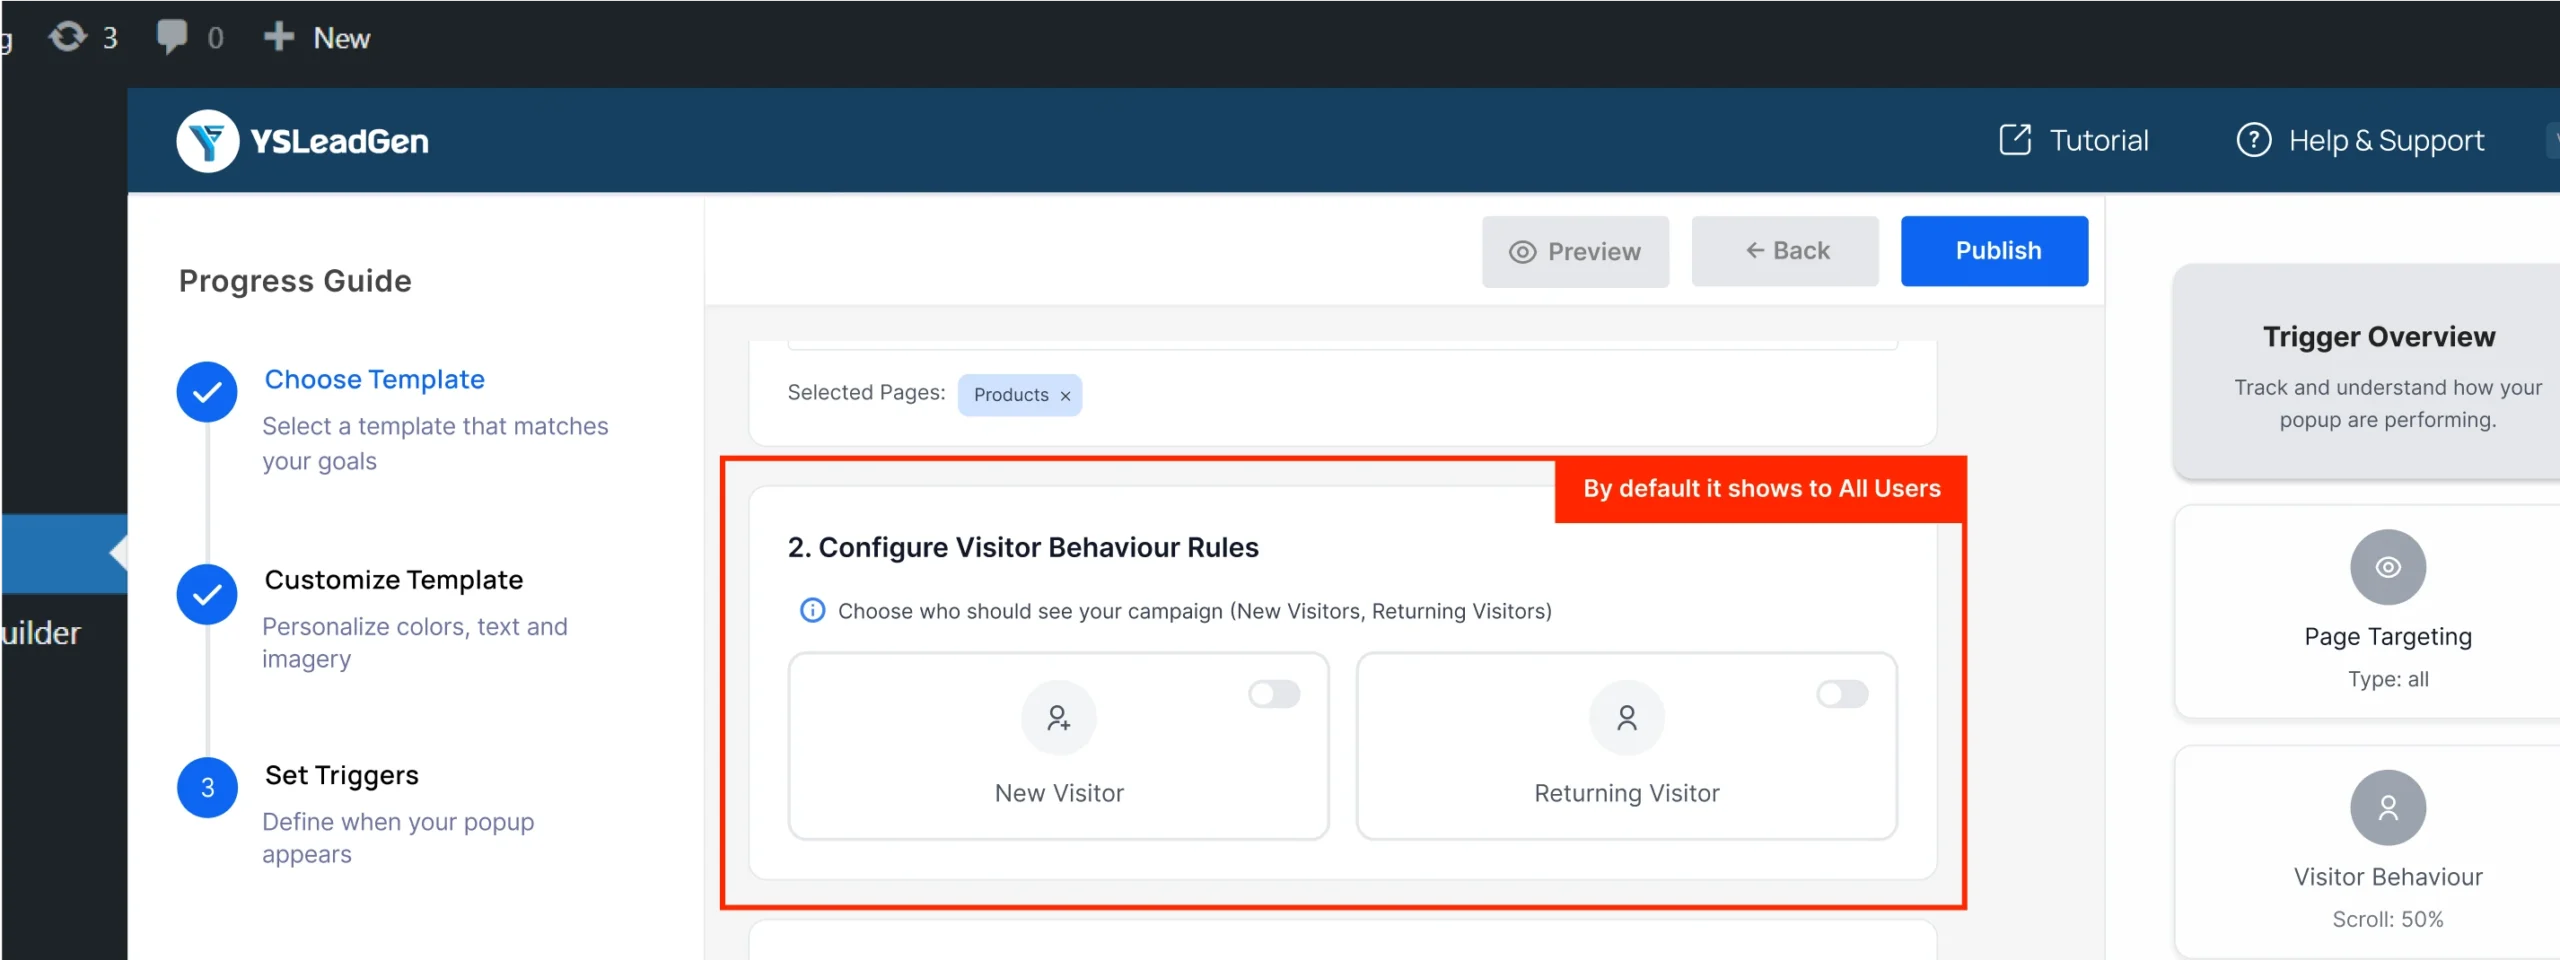
- New visitors
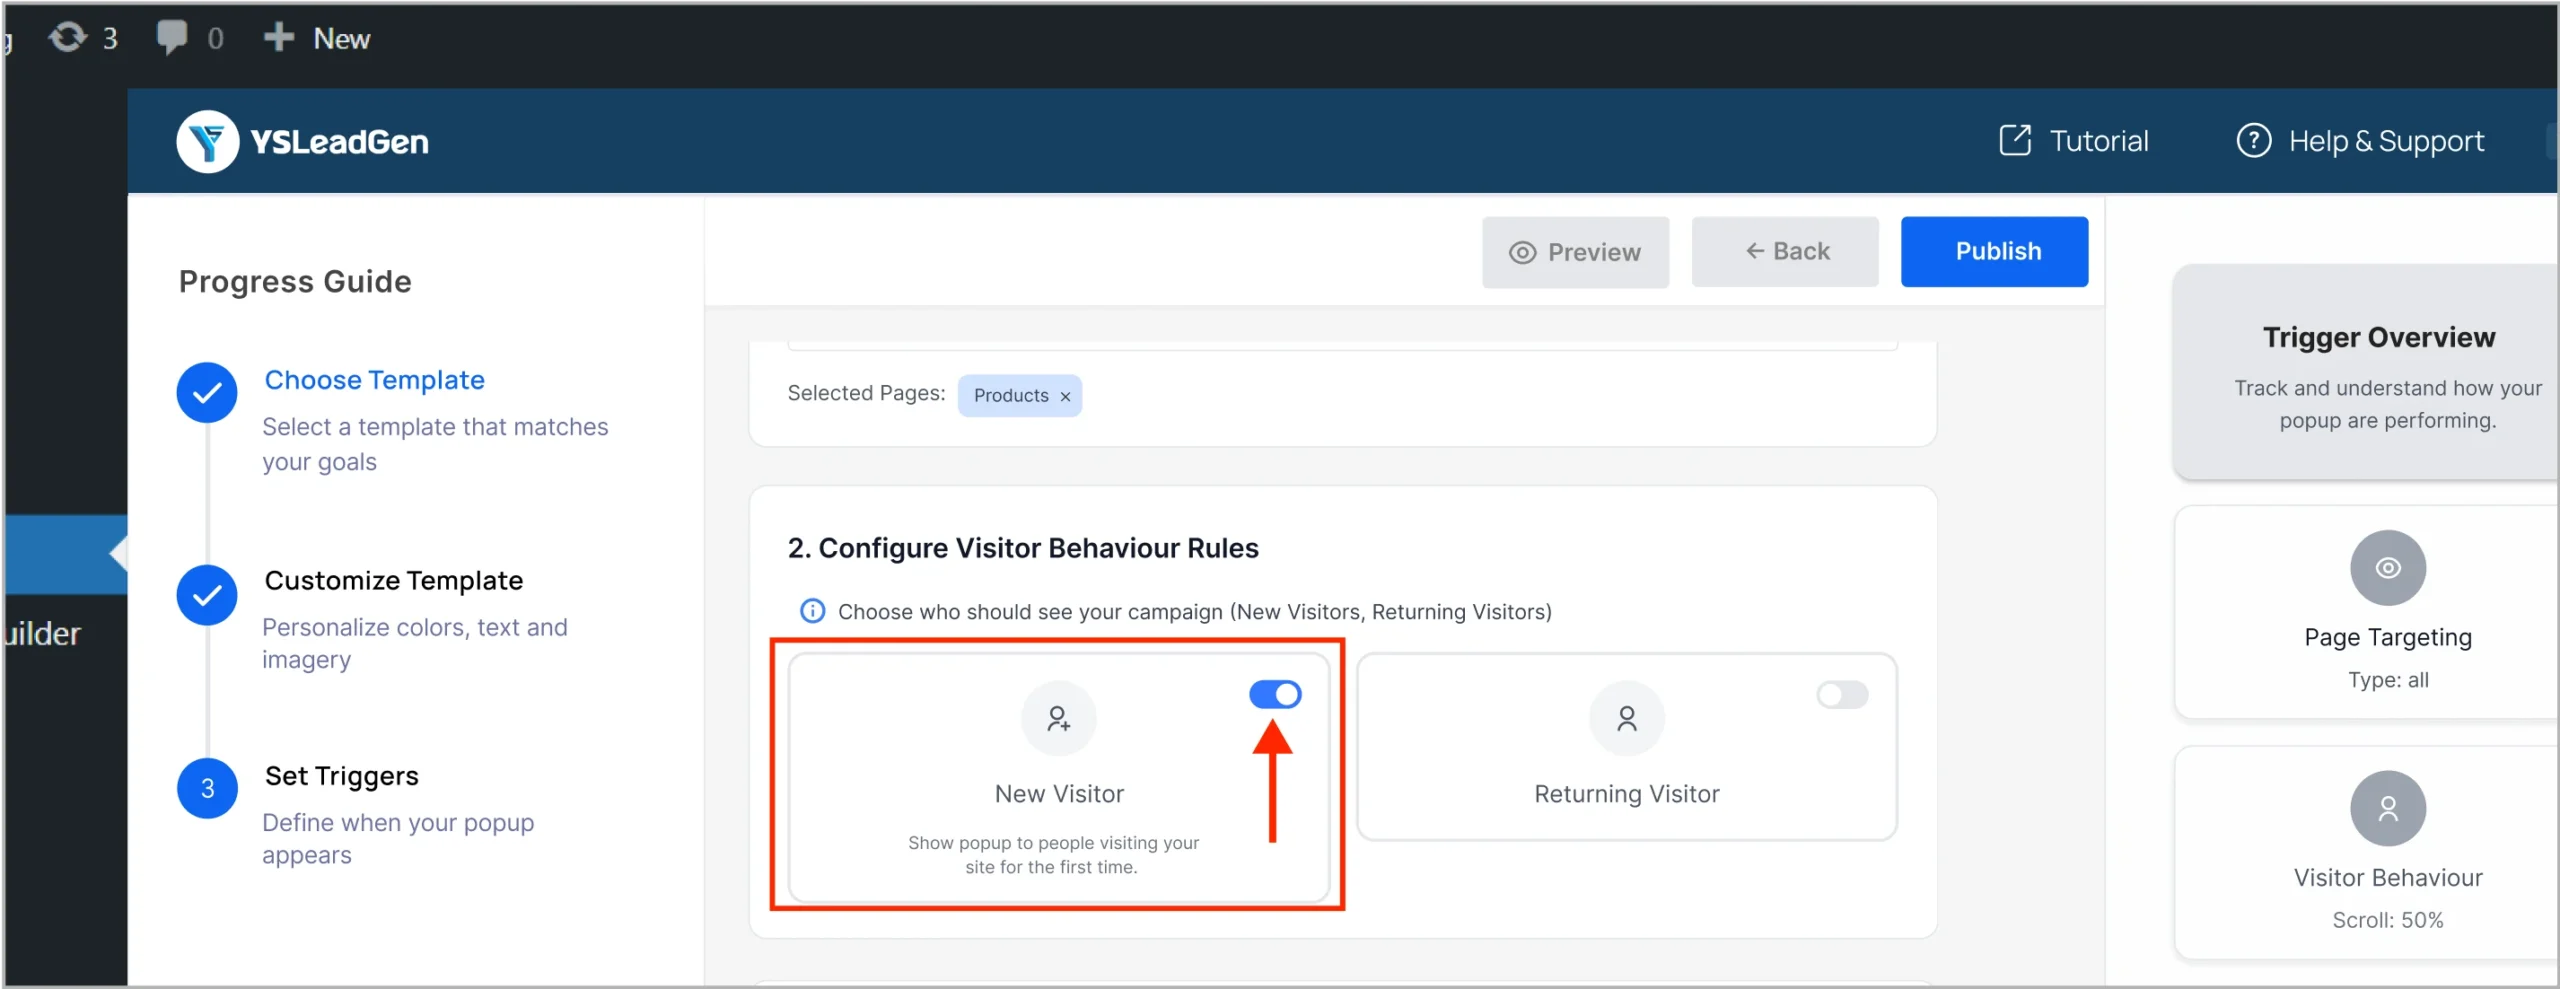
- Returning visitors
Step 8: Enable Exit Intent
Scroll to Visitor Behavior Settings
Find the “Exit Intent” toggle
Turn it ON to activate the feature
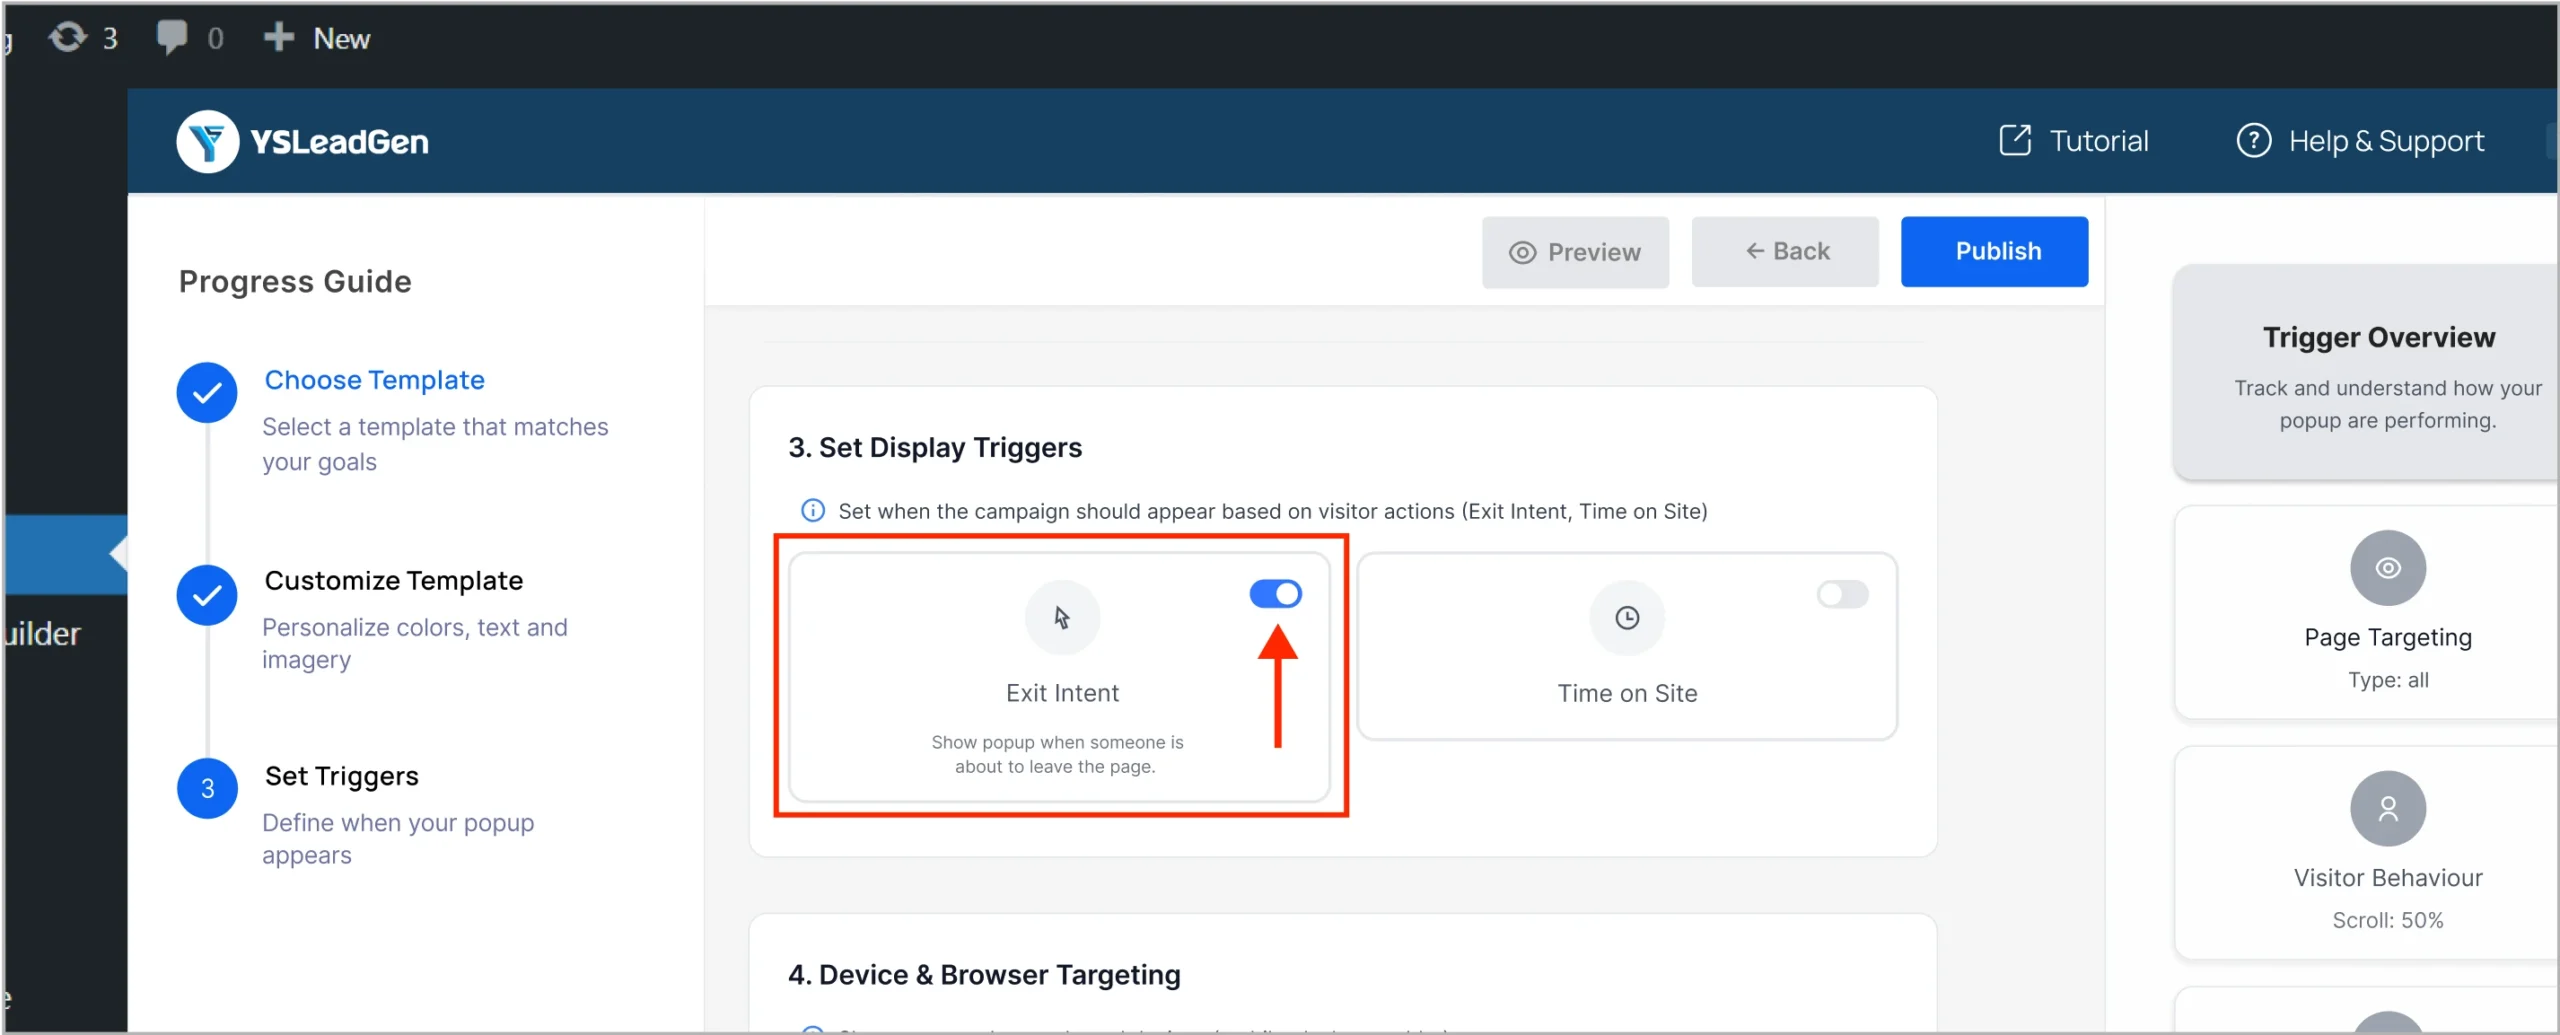
Once enabled, the popup will automatically trigger when users try to leave the page.
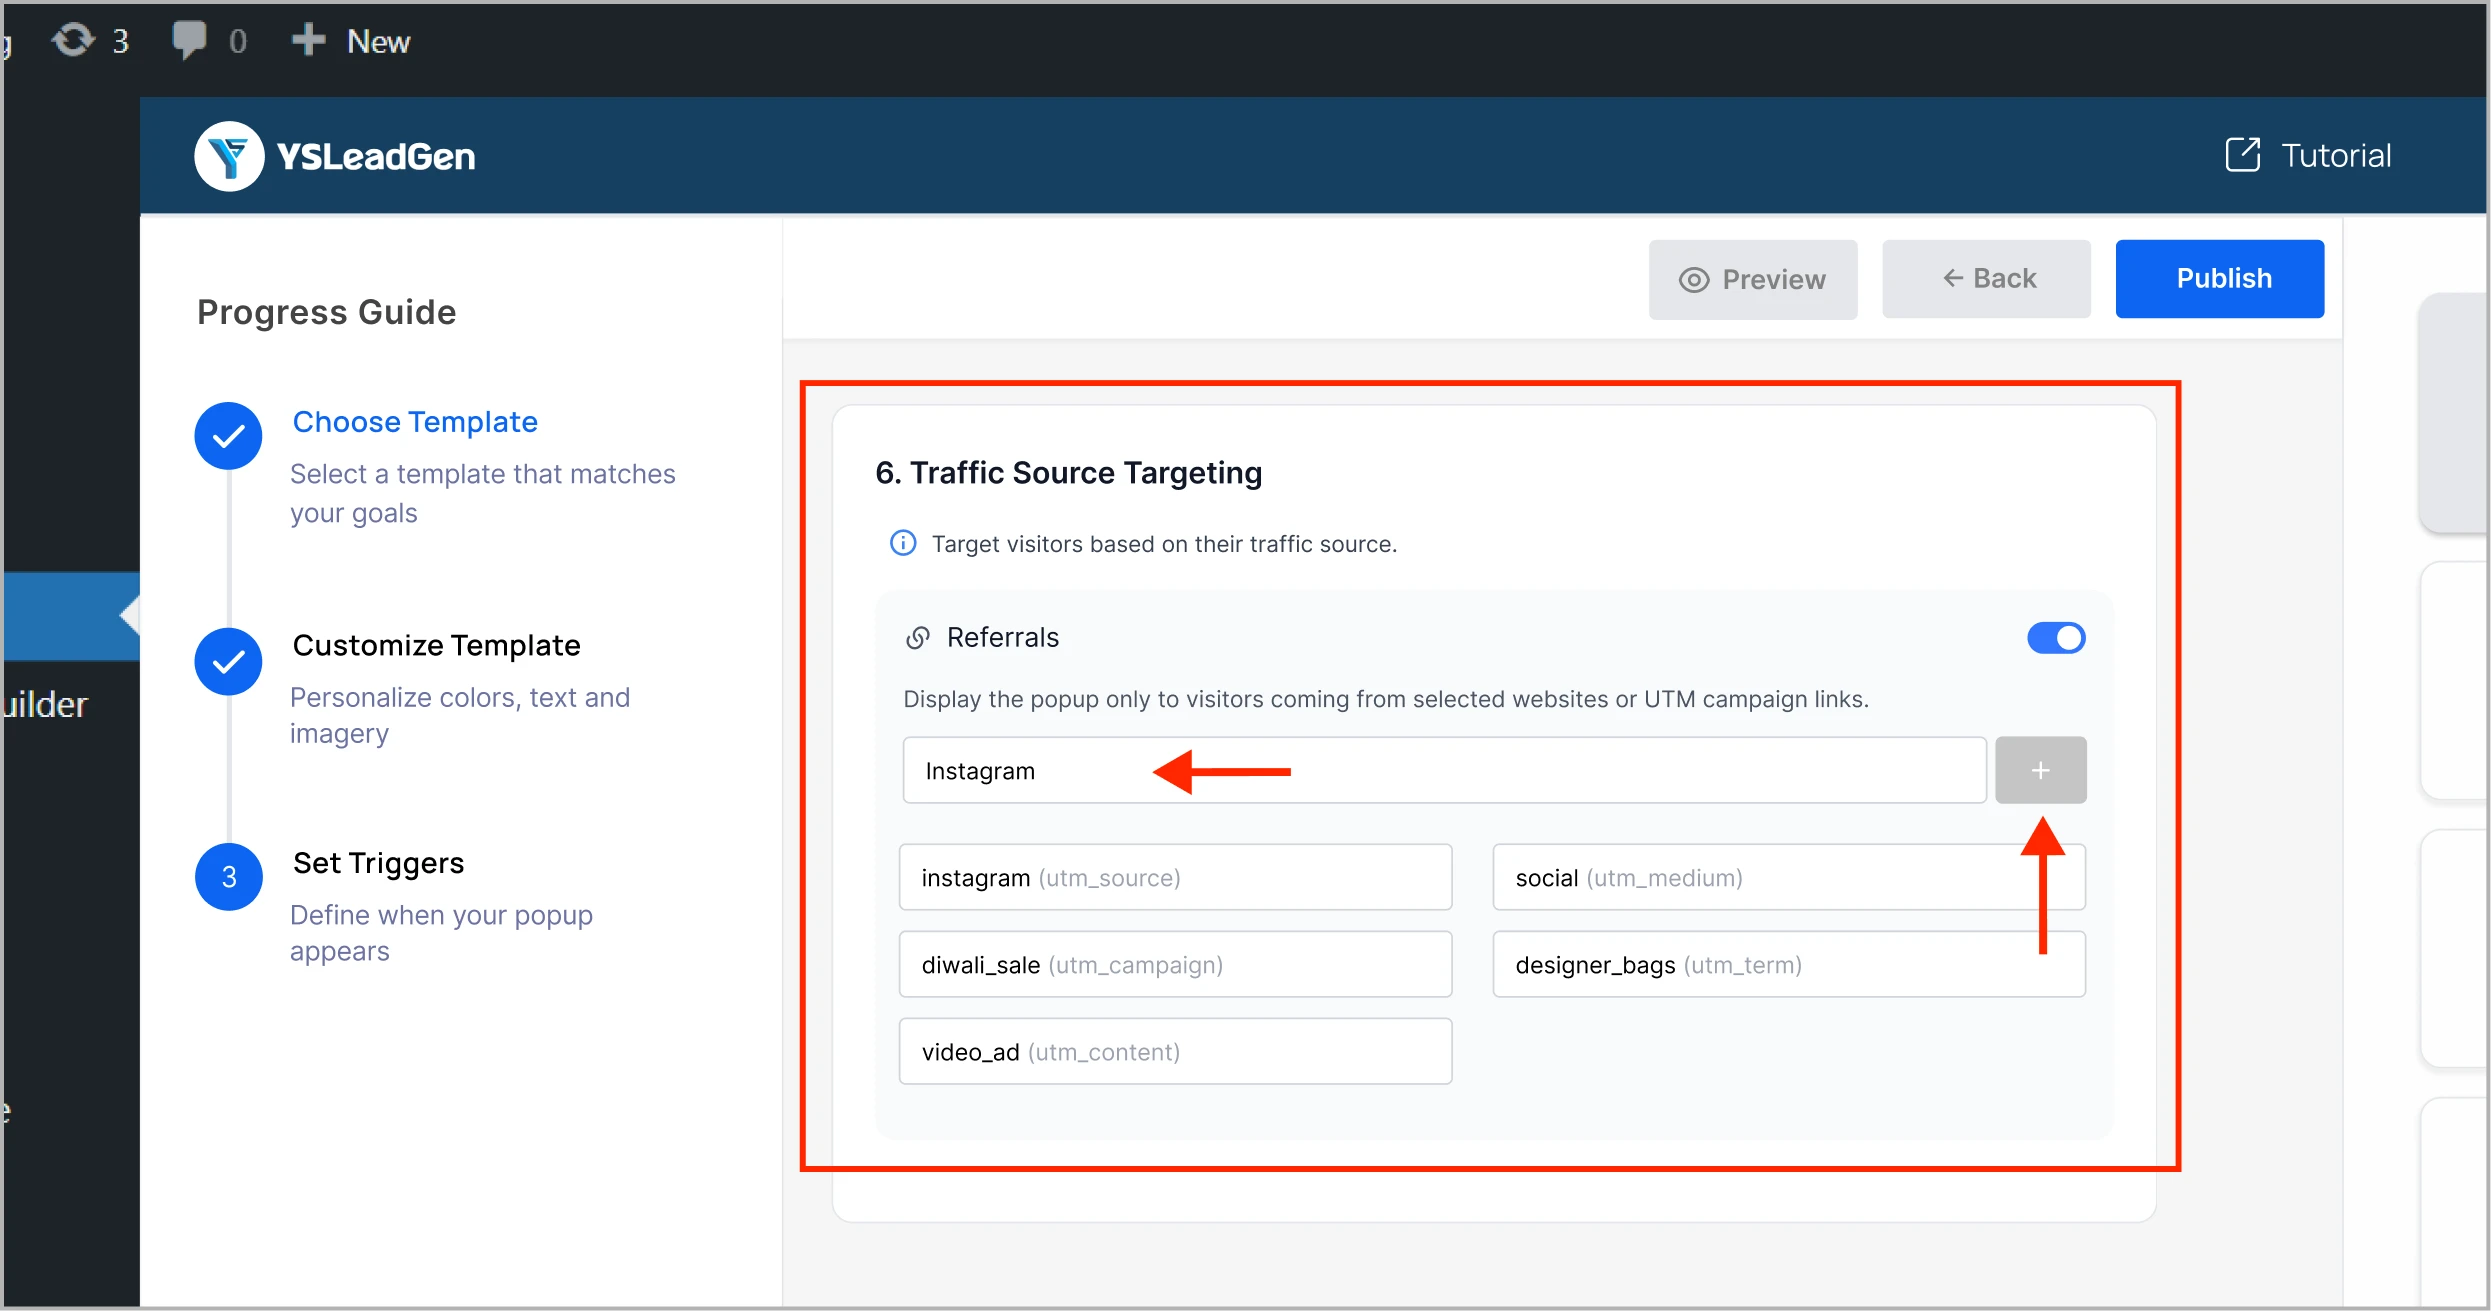
Step 9: Set Additional Rules (Optional)
- Device type (Desktop, Mobile)
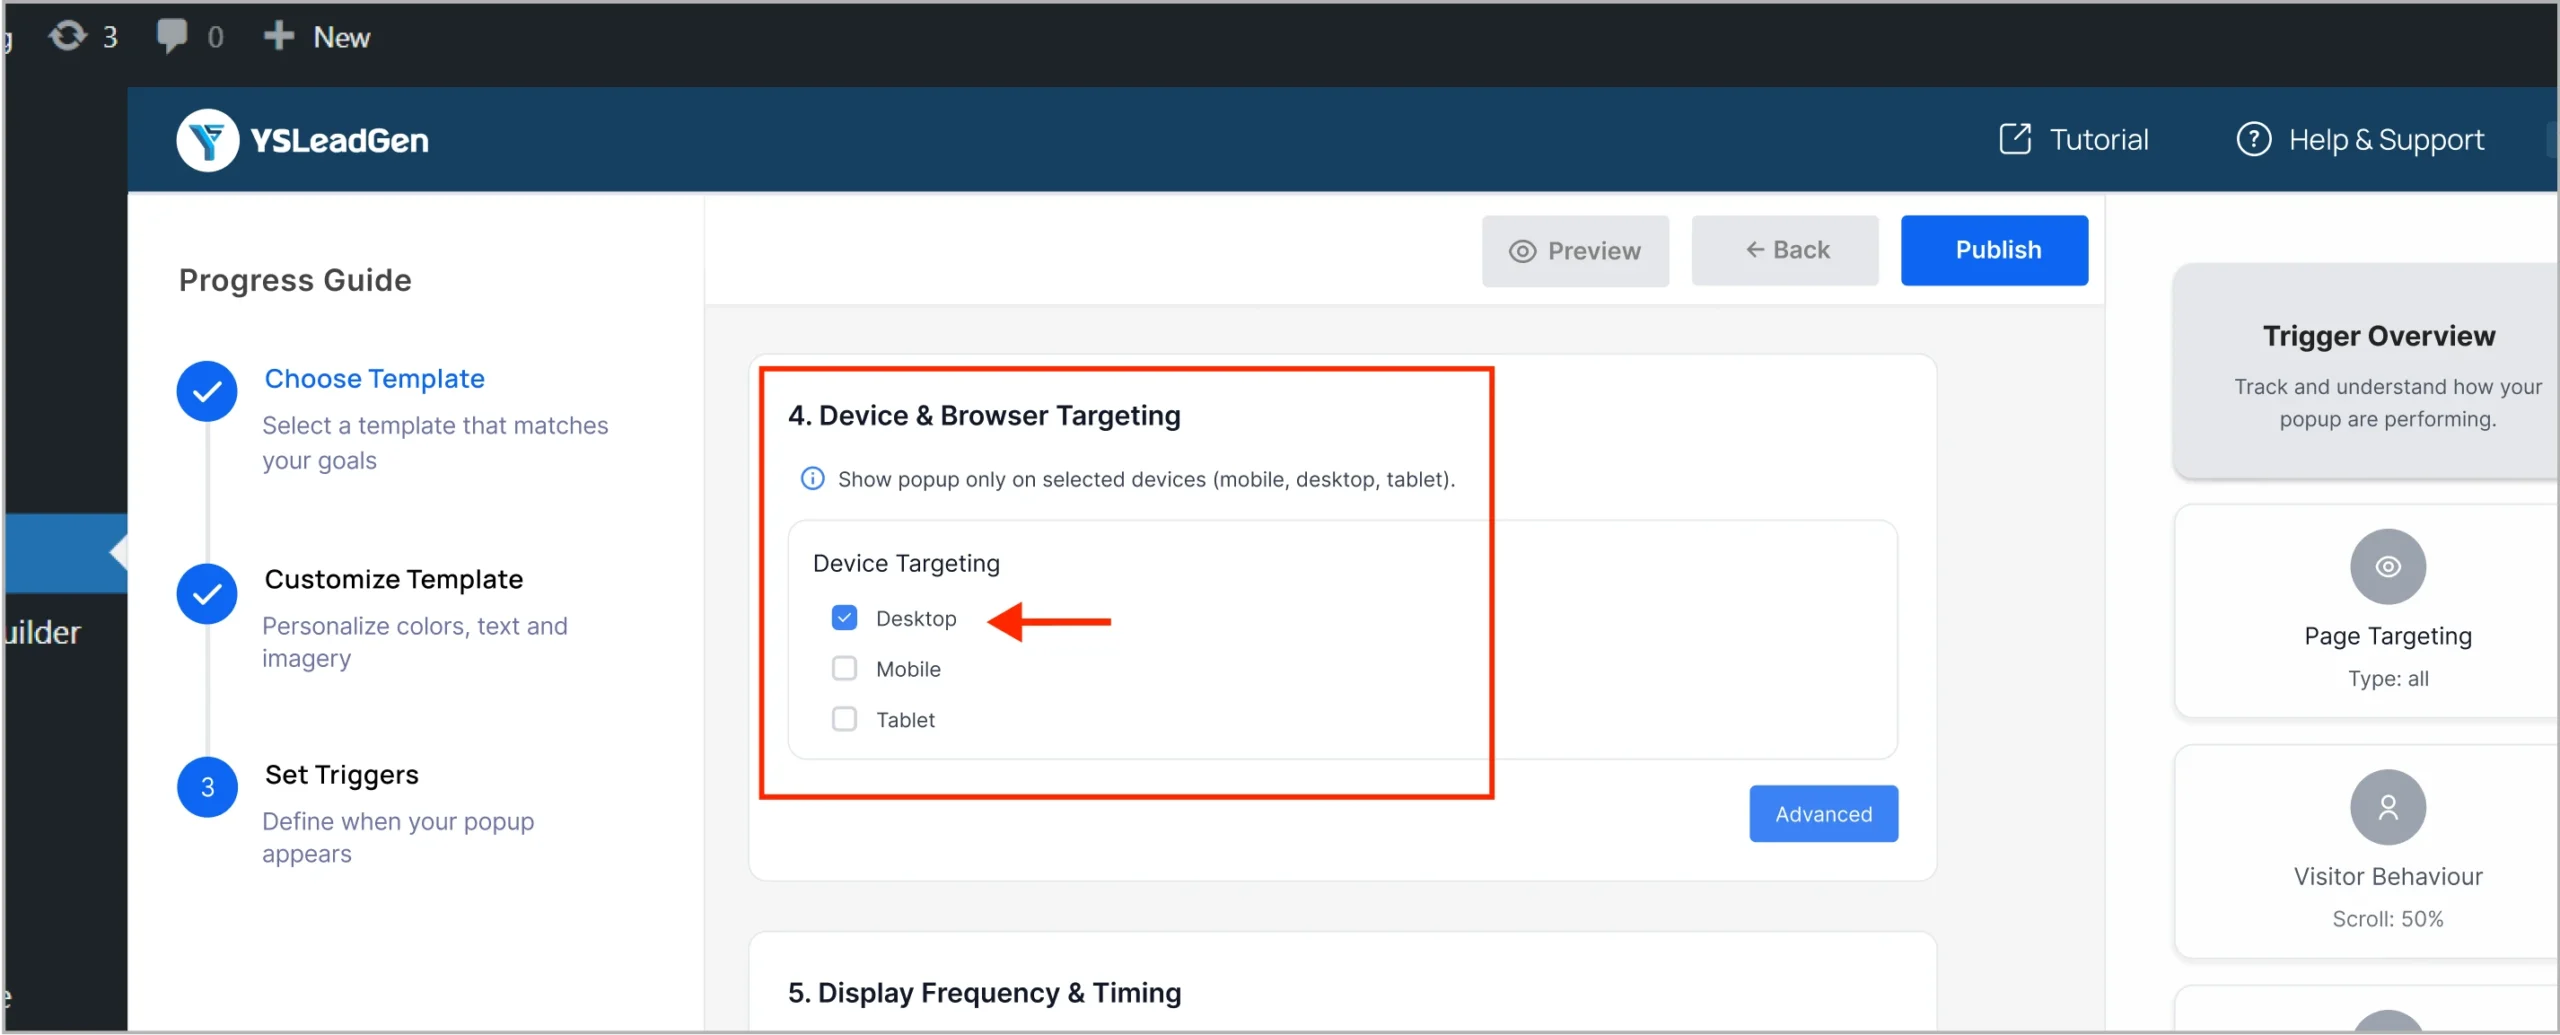
- Display frequency and Delay timing
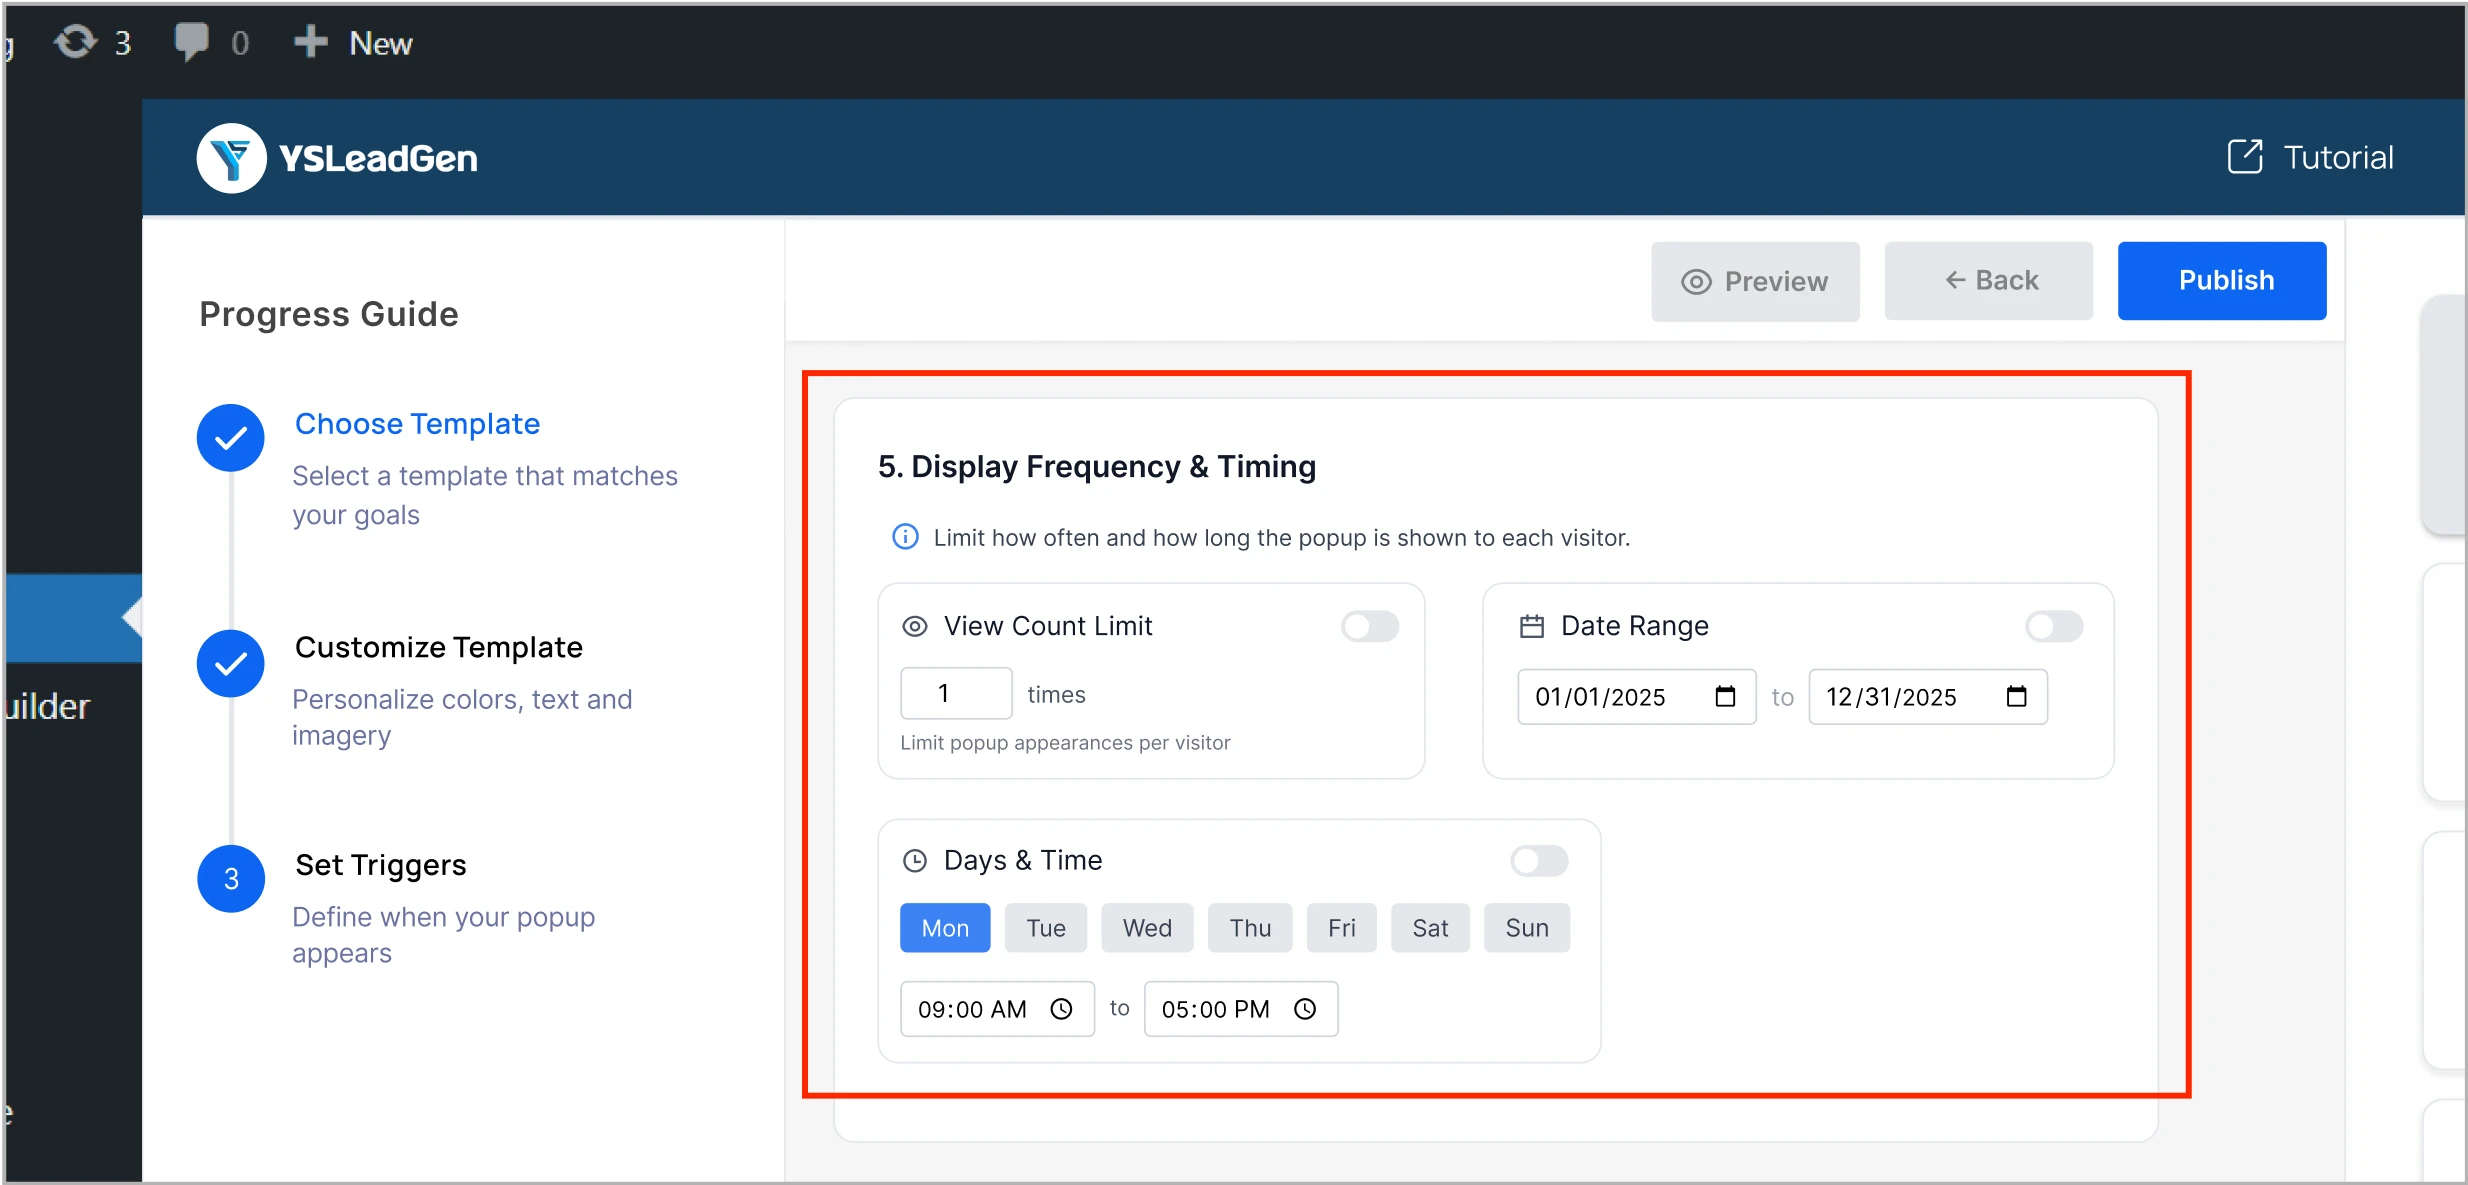
- Traffic source targeting
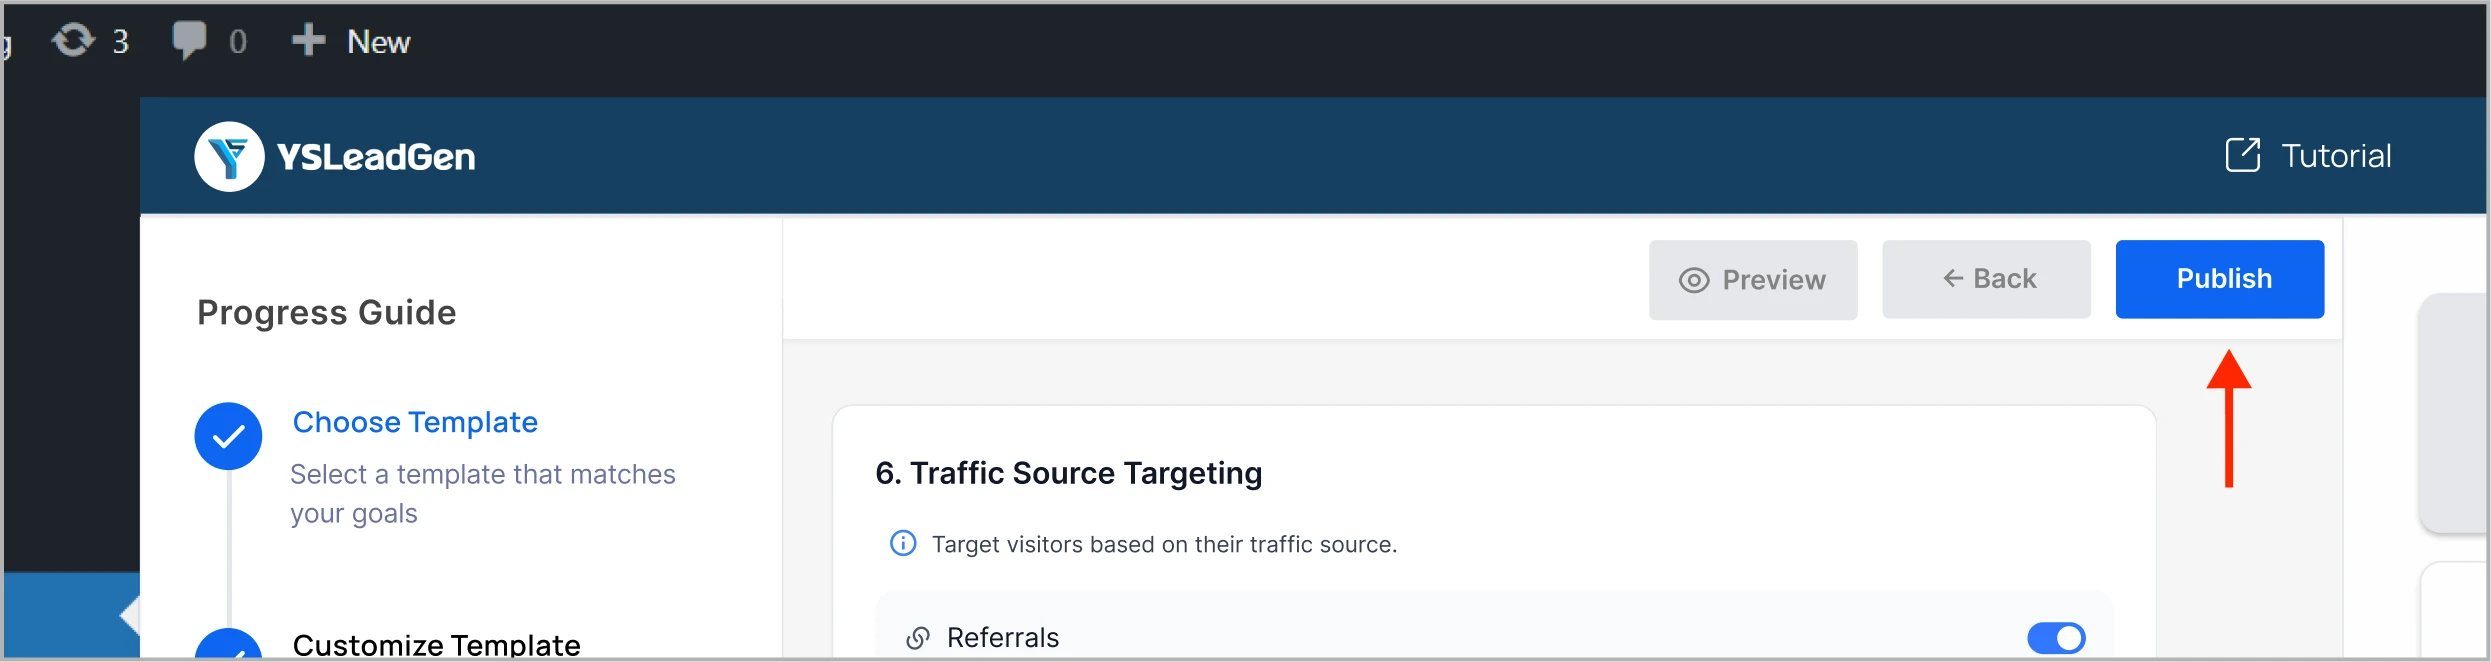
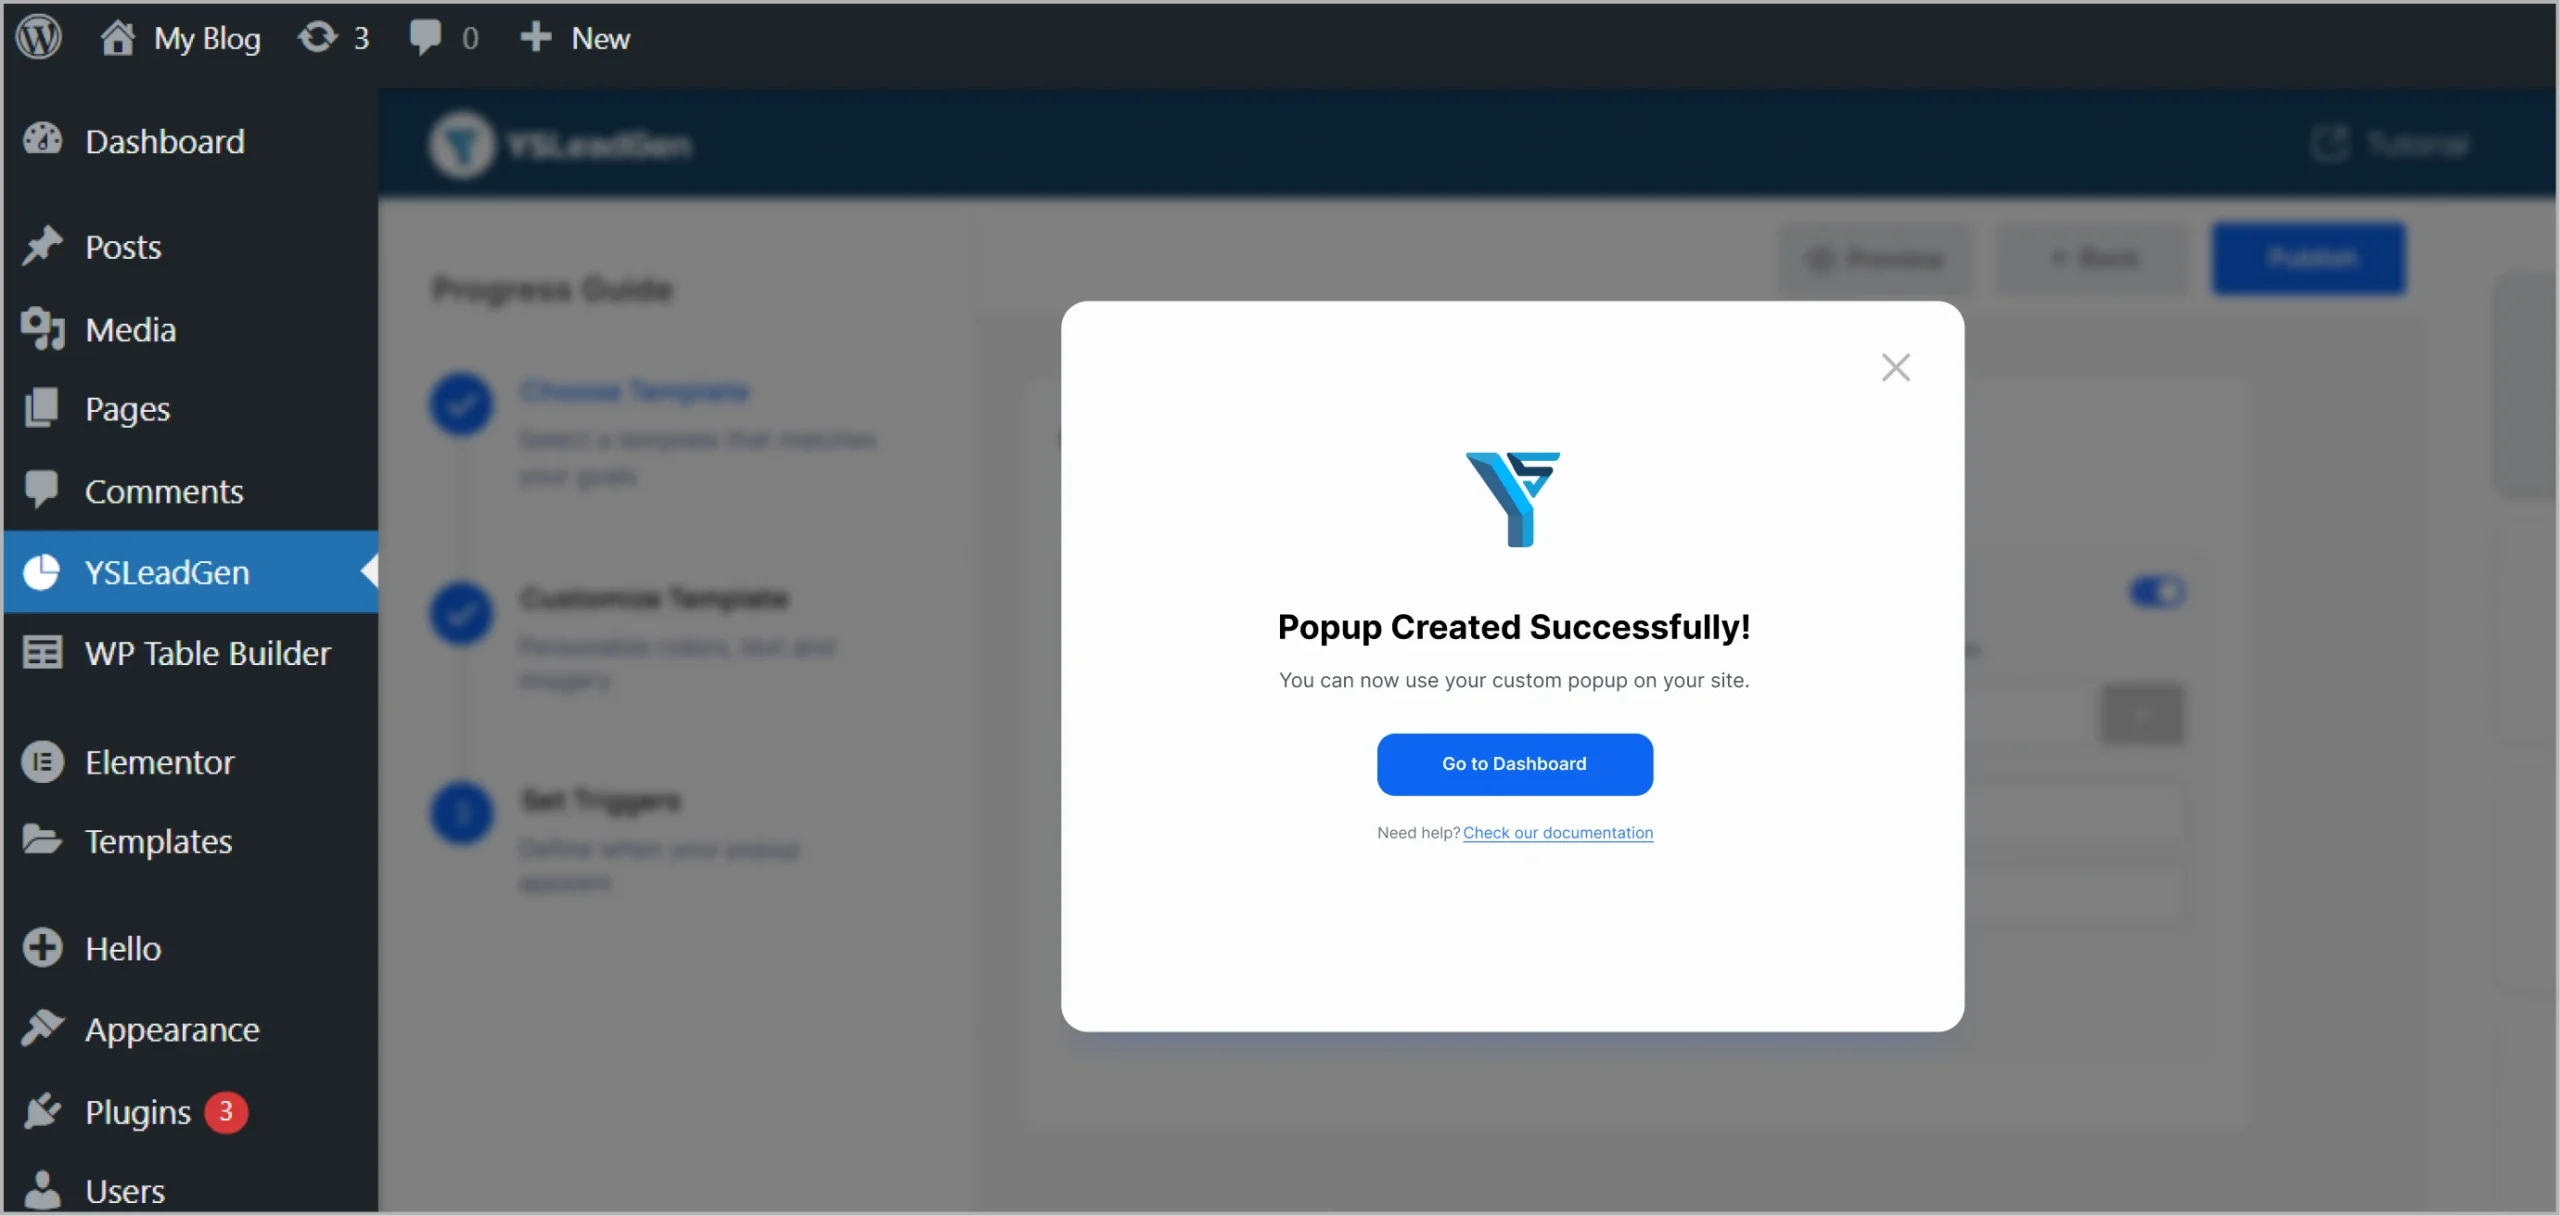
Step 10: Publish Your Campaign
Click Publish — and your Exit Intent popup is live!
Example: Best Ways to Use Exit Intent Popups
- Offer a Discount: “Wait! Get 10% OFF your order before you leave!”
- Collect Emails: “Leaving so soon? Sign up and get exclusive offers.”
- Remind About Abandoned Cart: “You have items waiting in your cart!”
Need Help?
Contact us at support@ysleadgen.com
Visit: YS Lead Gen Help Docs