
Here’s how to delay your popup and show it after X seconds:
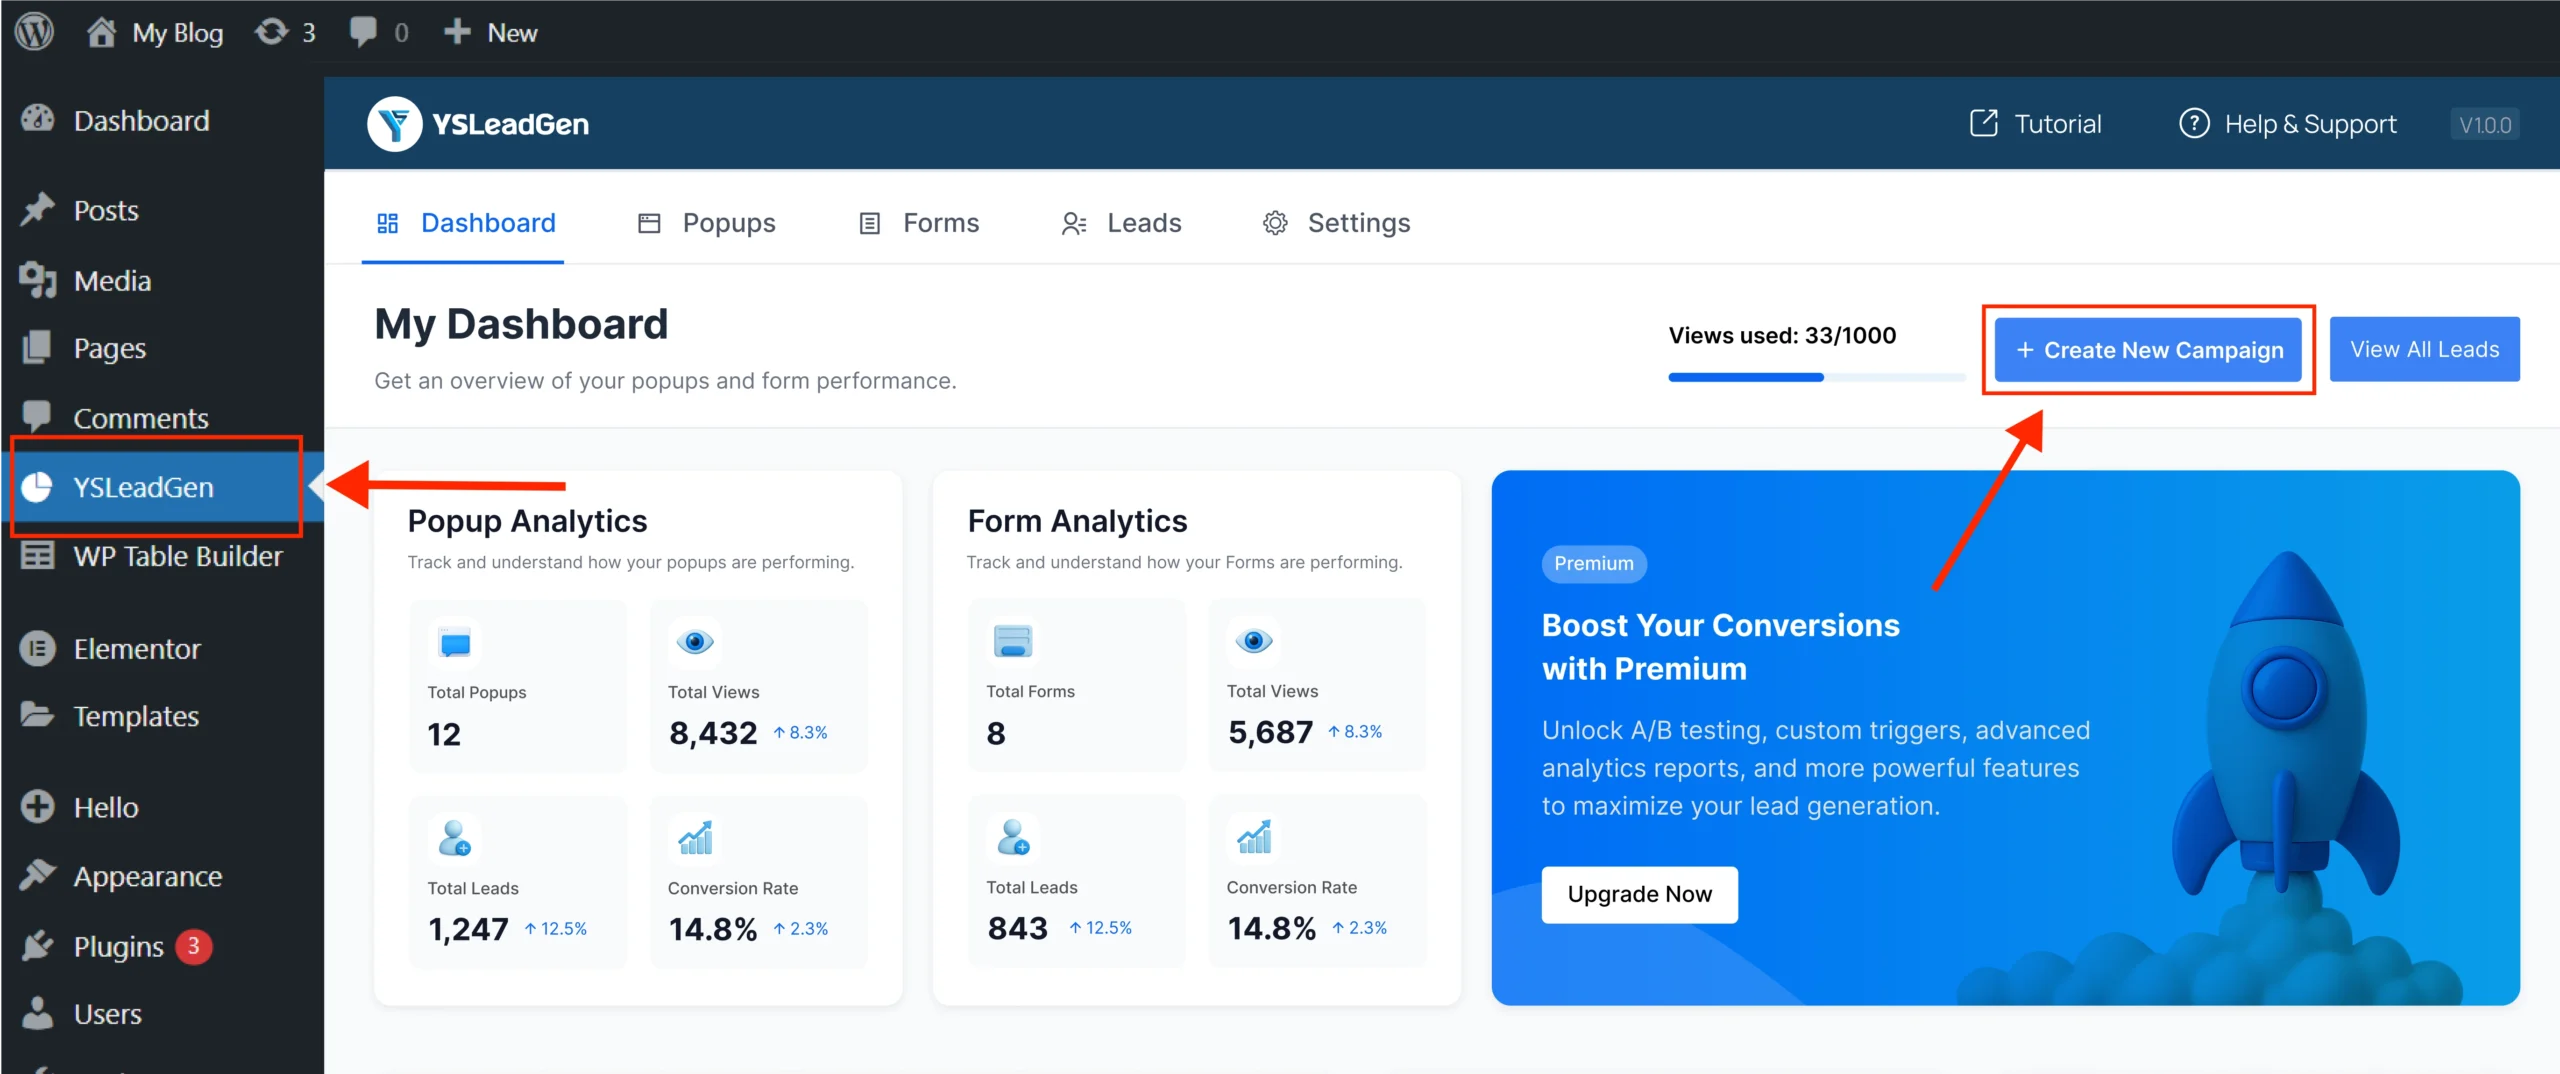
Step 1: Go to Campaign Setup
WordPress Dashboard → YS Lead Gen → Create New Campaign
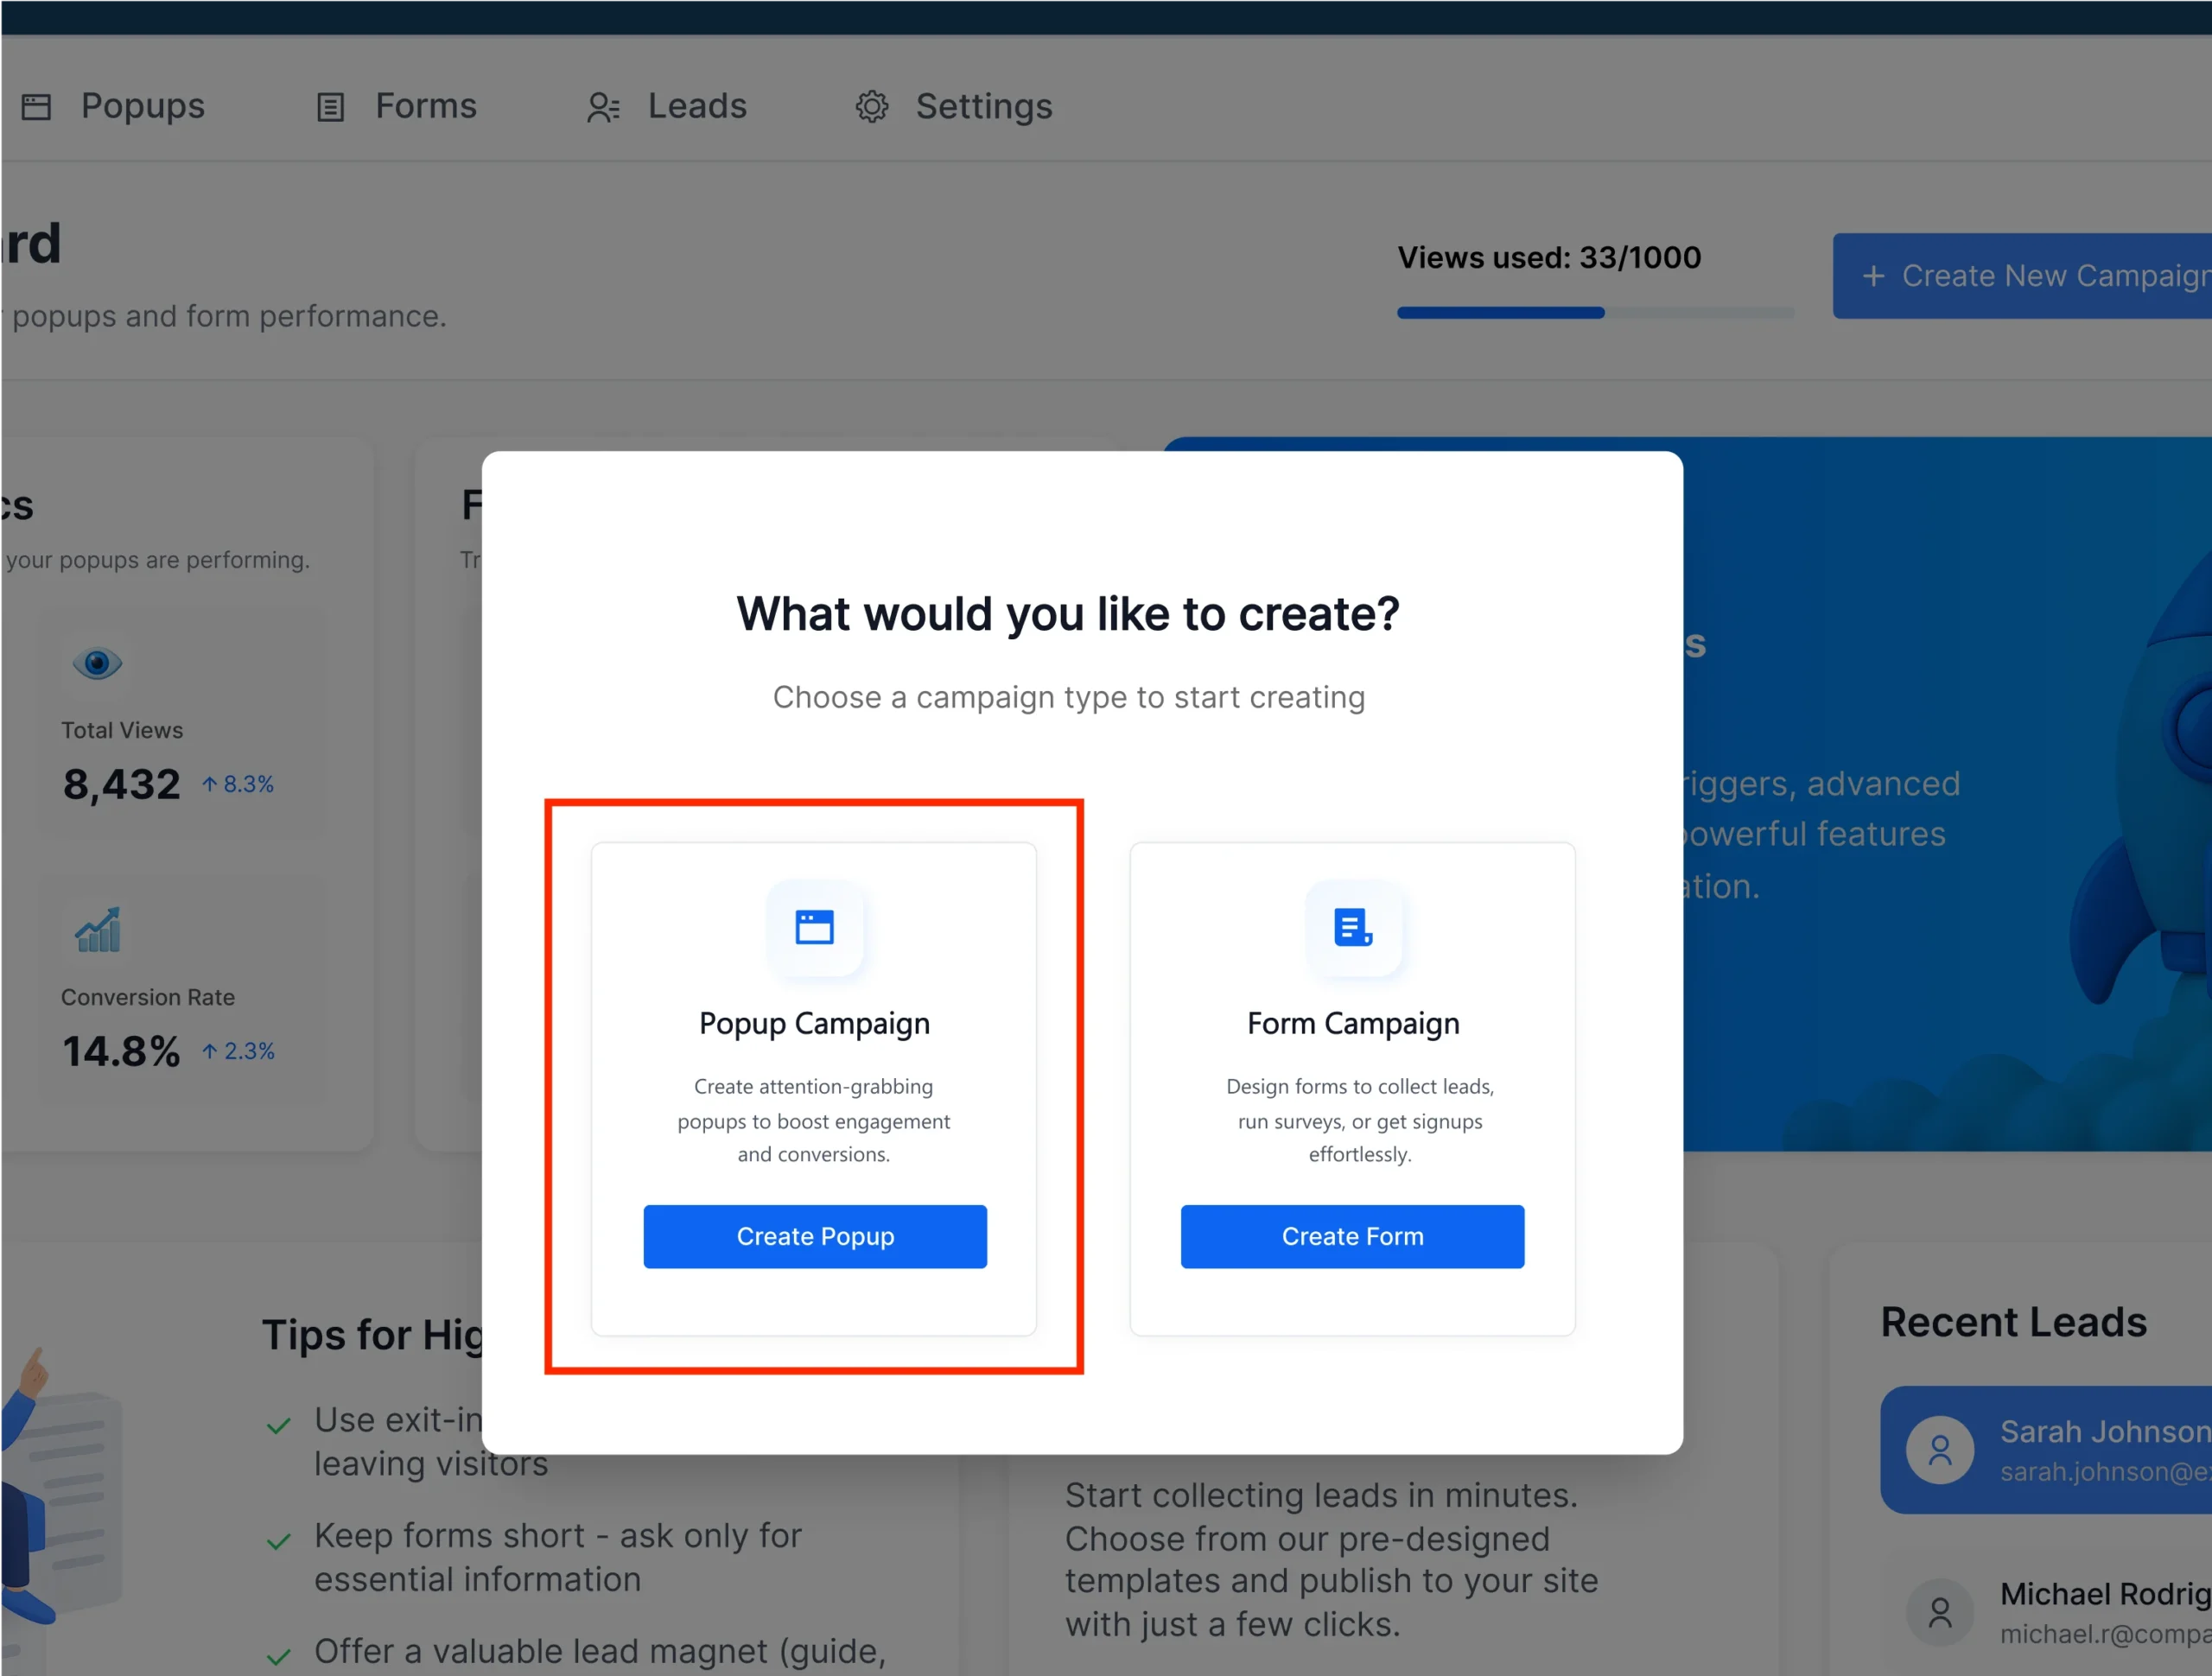
Step 2: Select Campaign Type
Click Popup Campaign → Create Popup
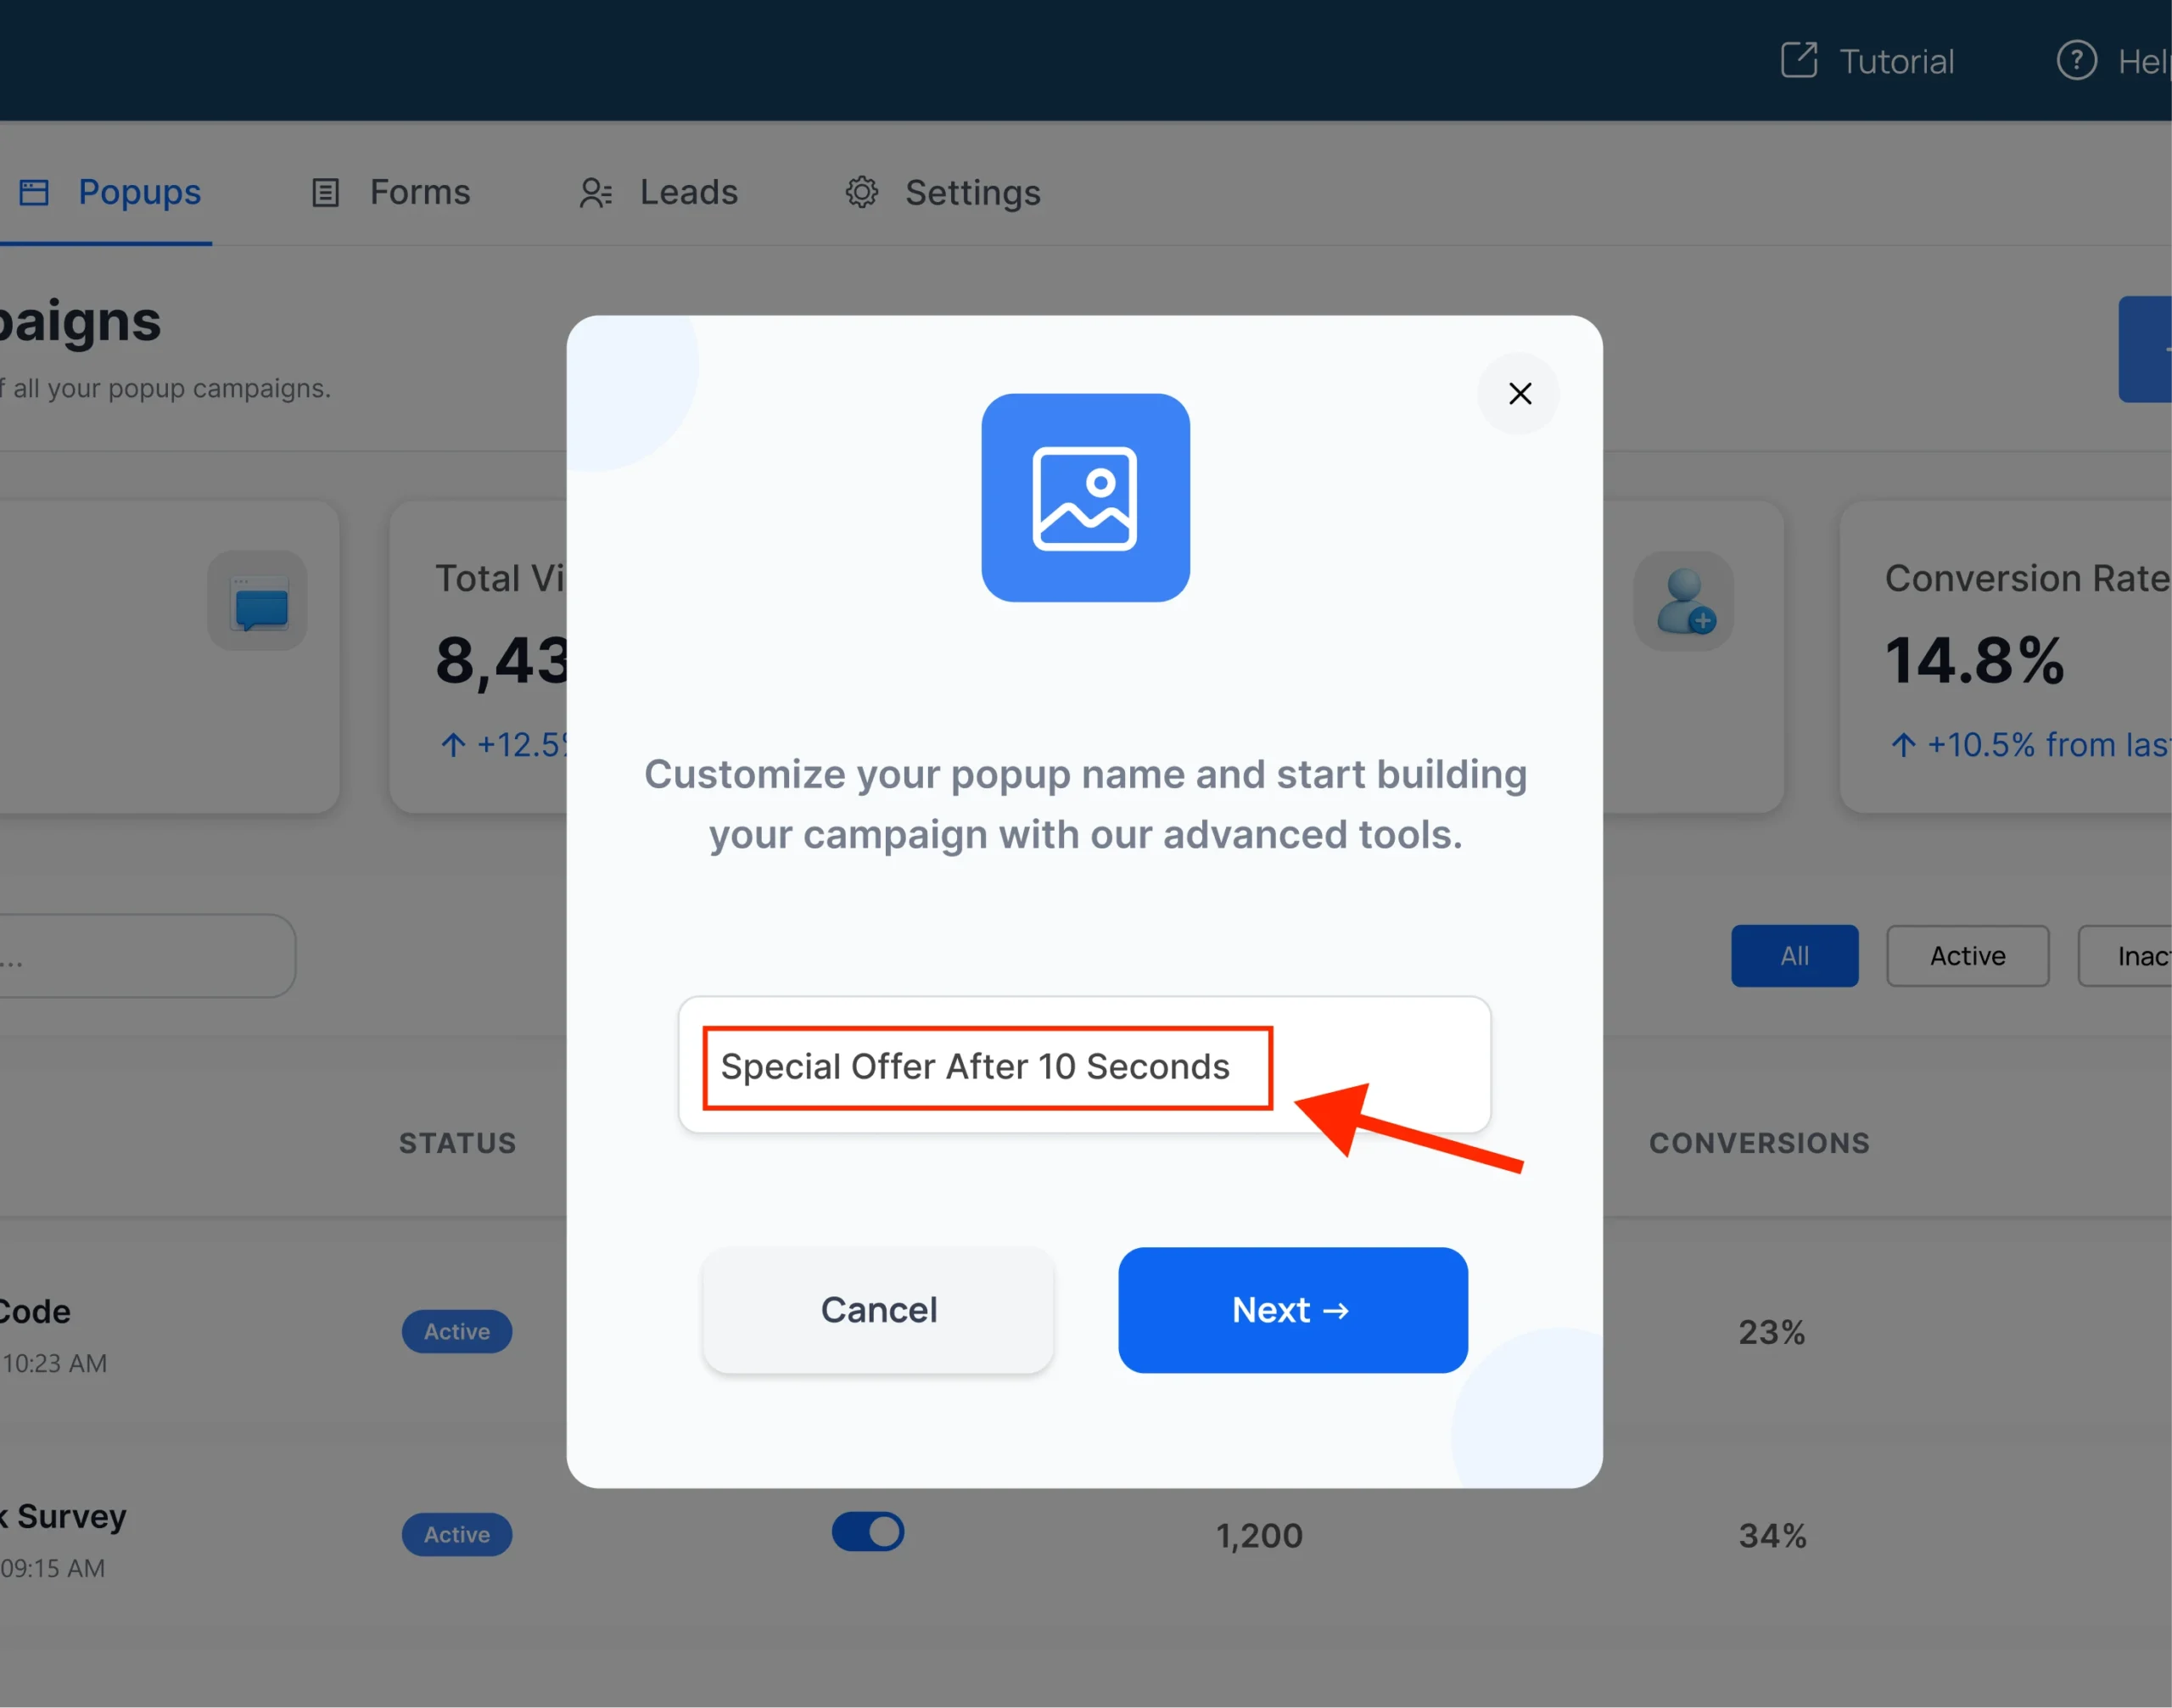
Step 3: Name Your Campaign
Example: “Special Offer After 10 Seconds” or “Wait for It…”
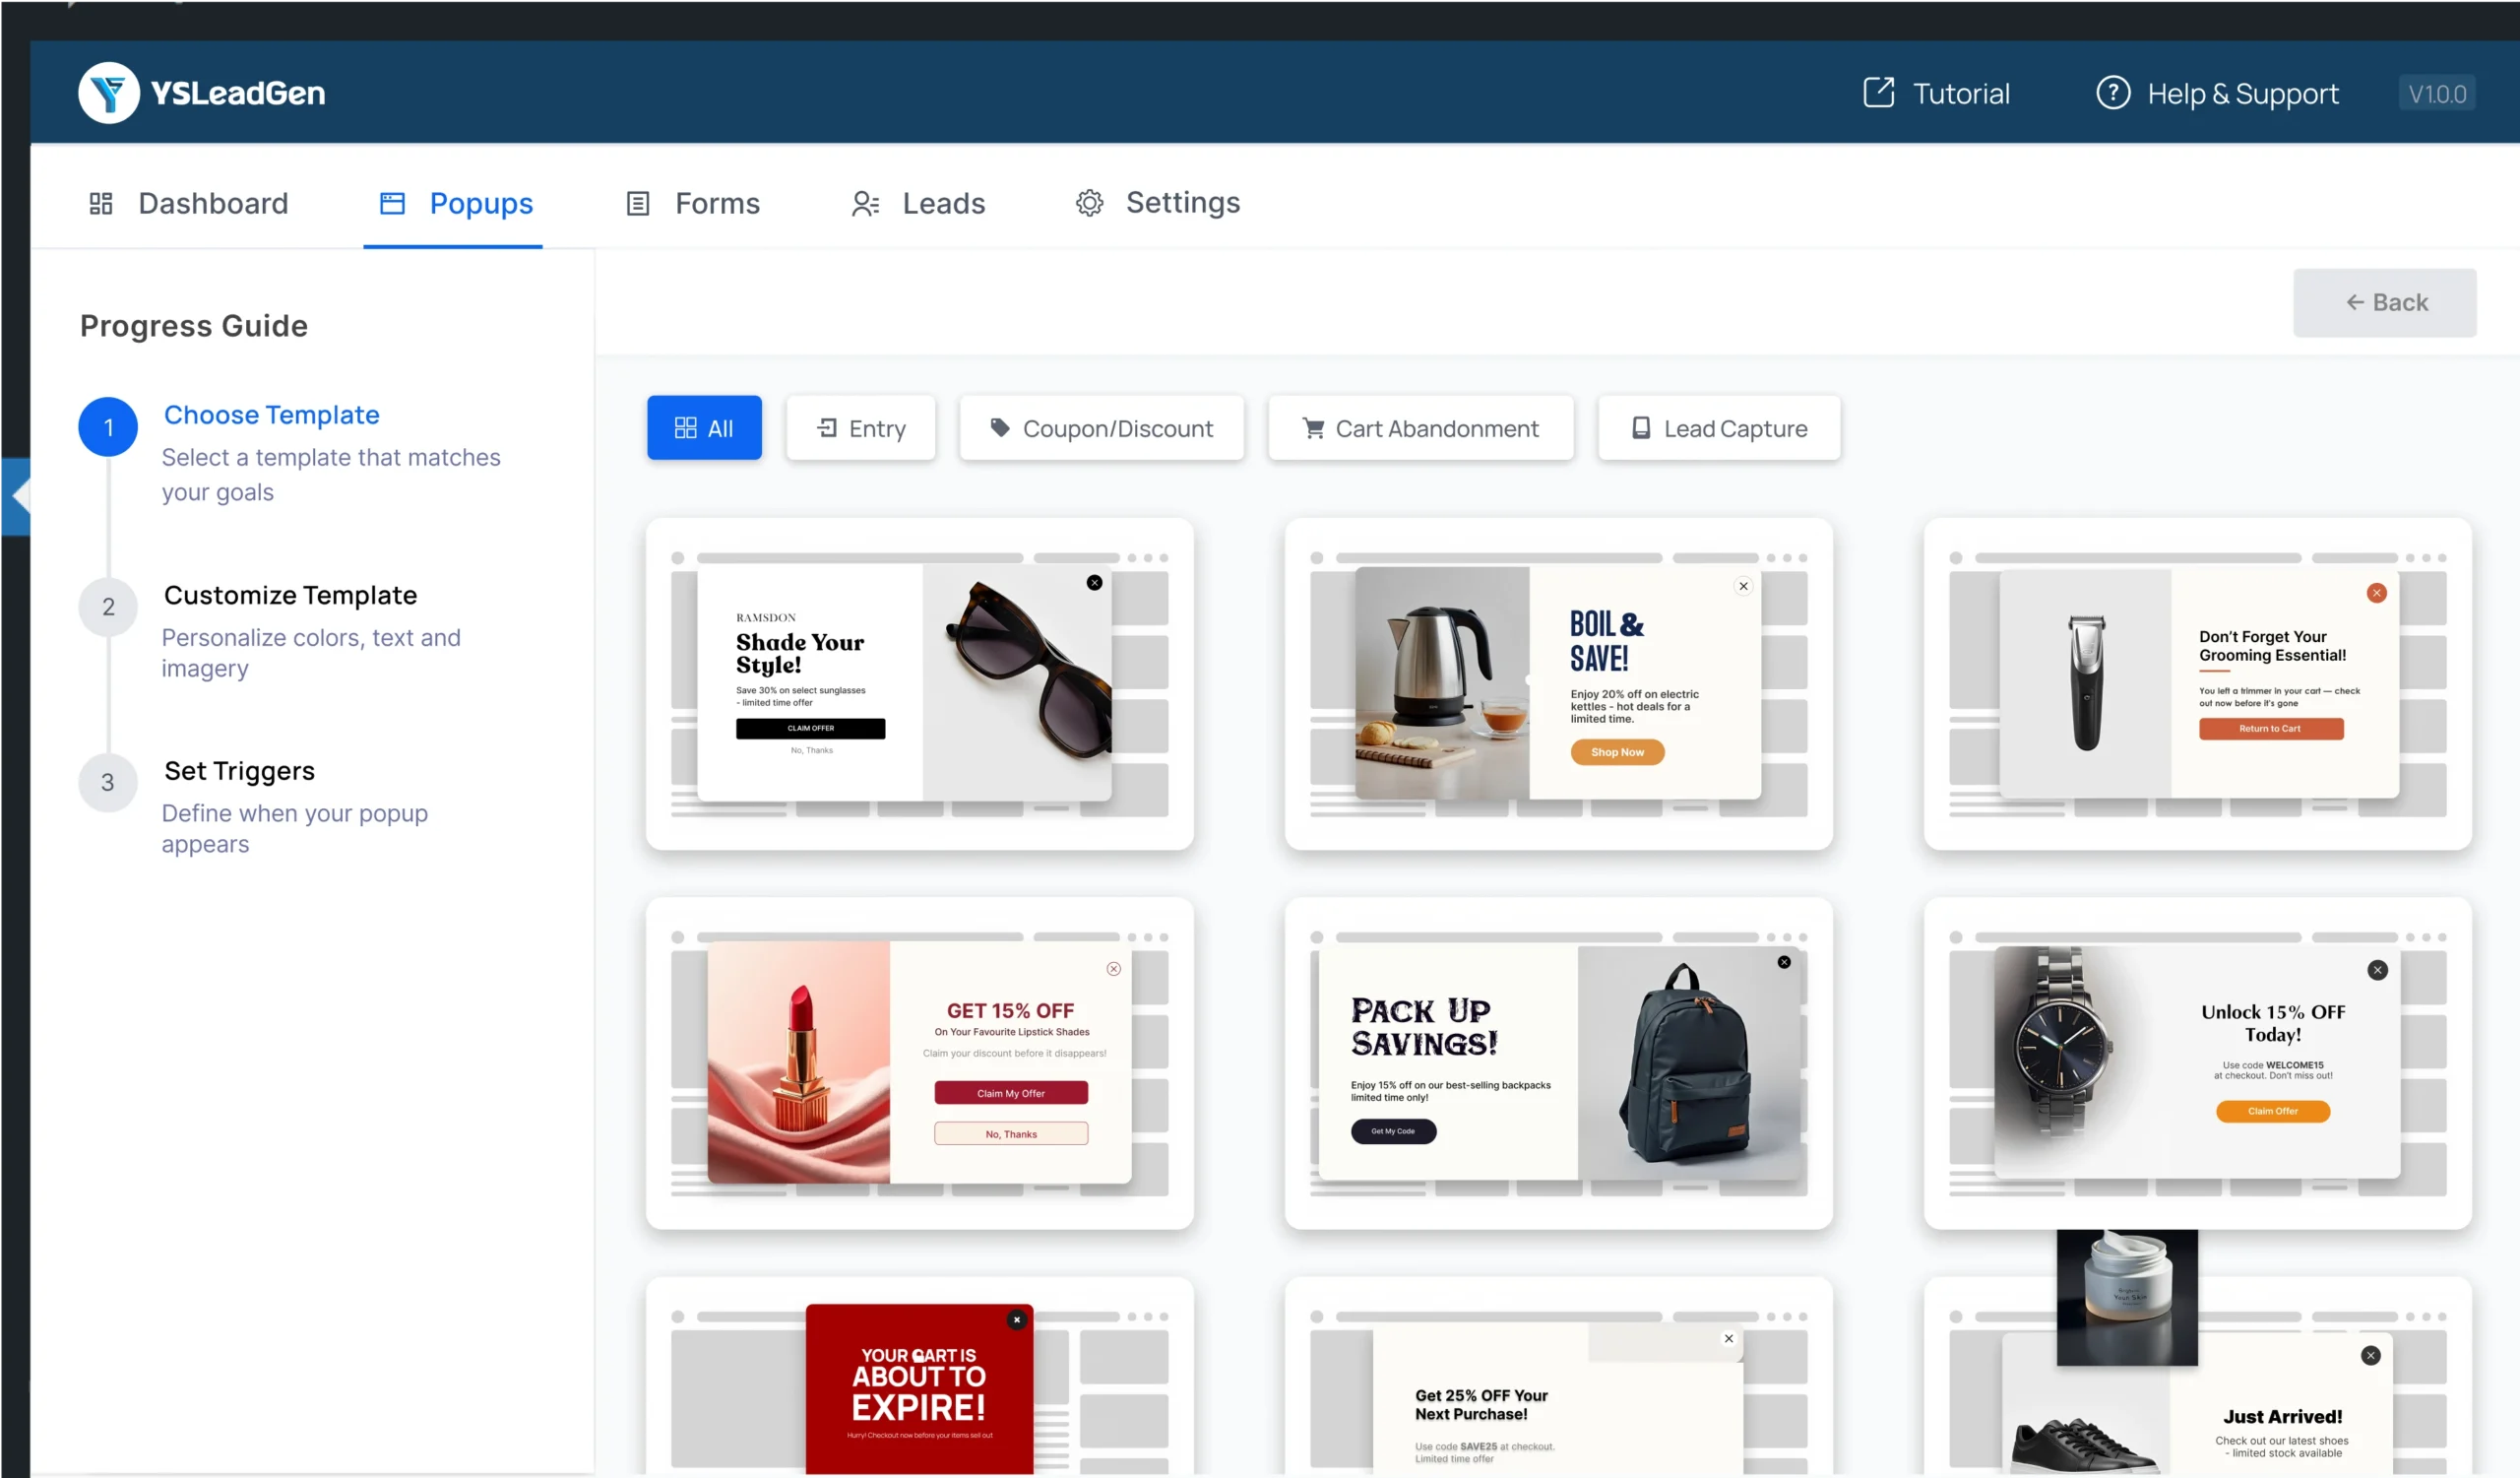
Step 4: Choose a Template
Pick a design that matches your goal — discount, lead capture, announcement, etc.
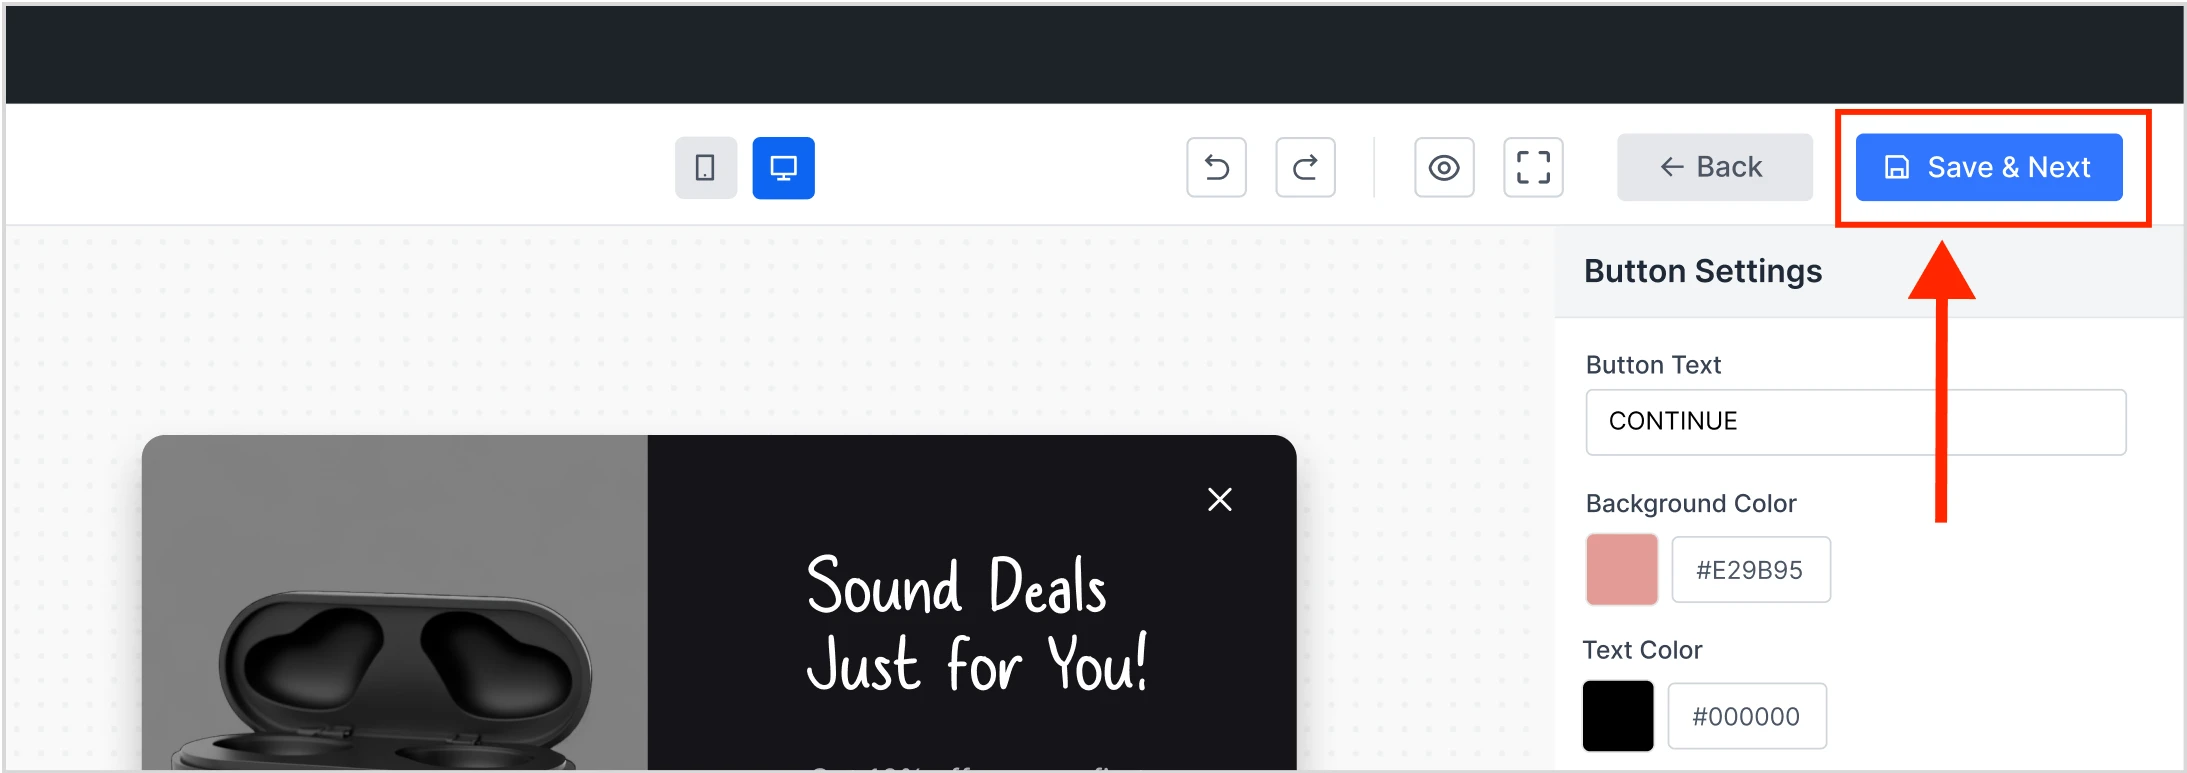
Step 5: Customize Your Popup
Edit the text, colors, image, and buttons using the drag-and-drop builder.
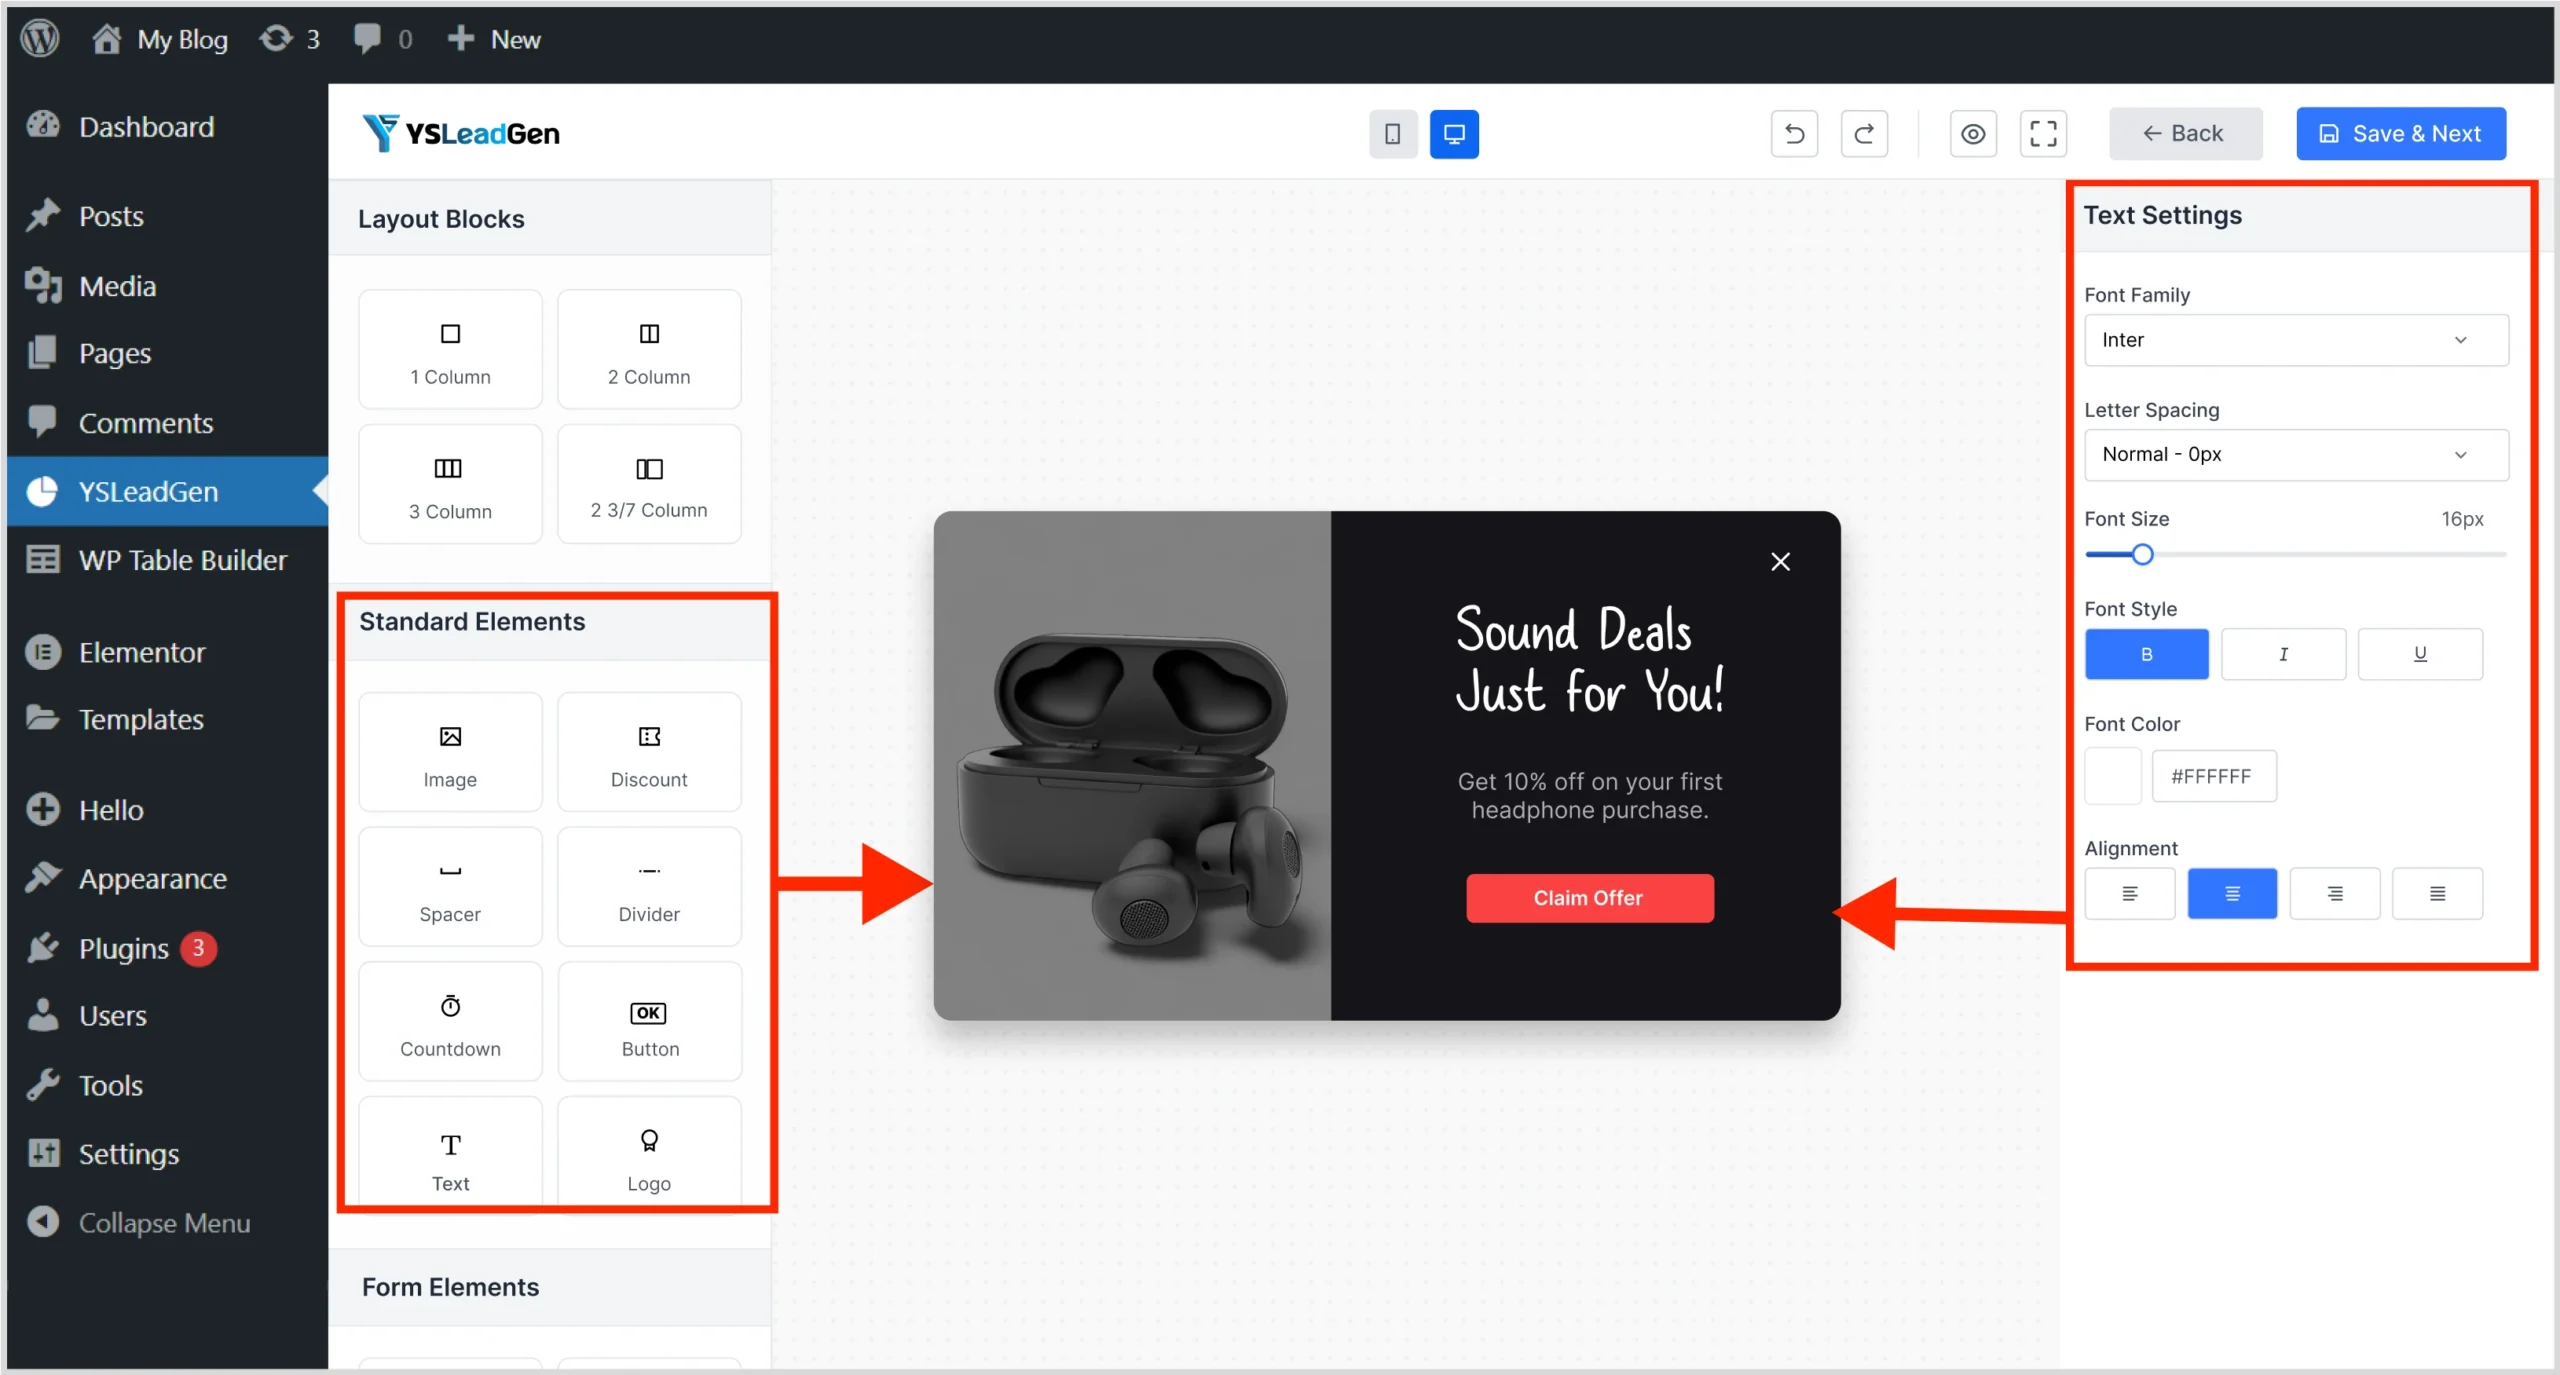
Click Save and Next once done.
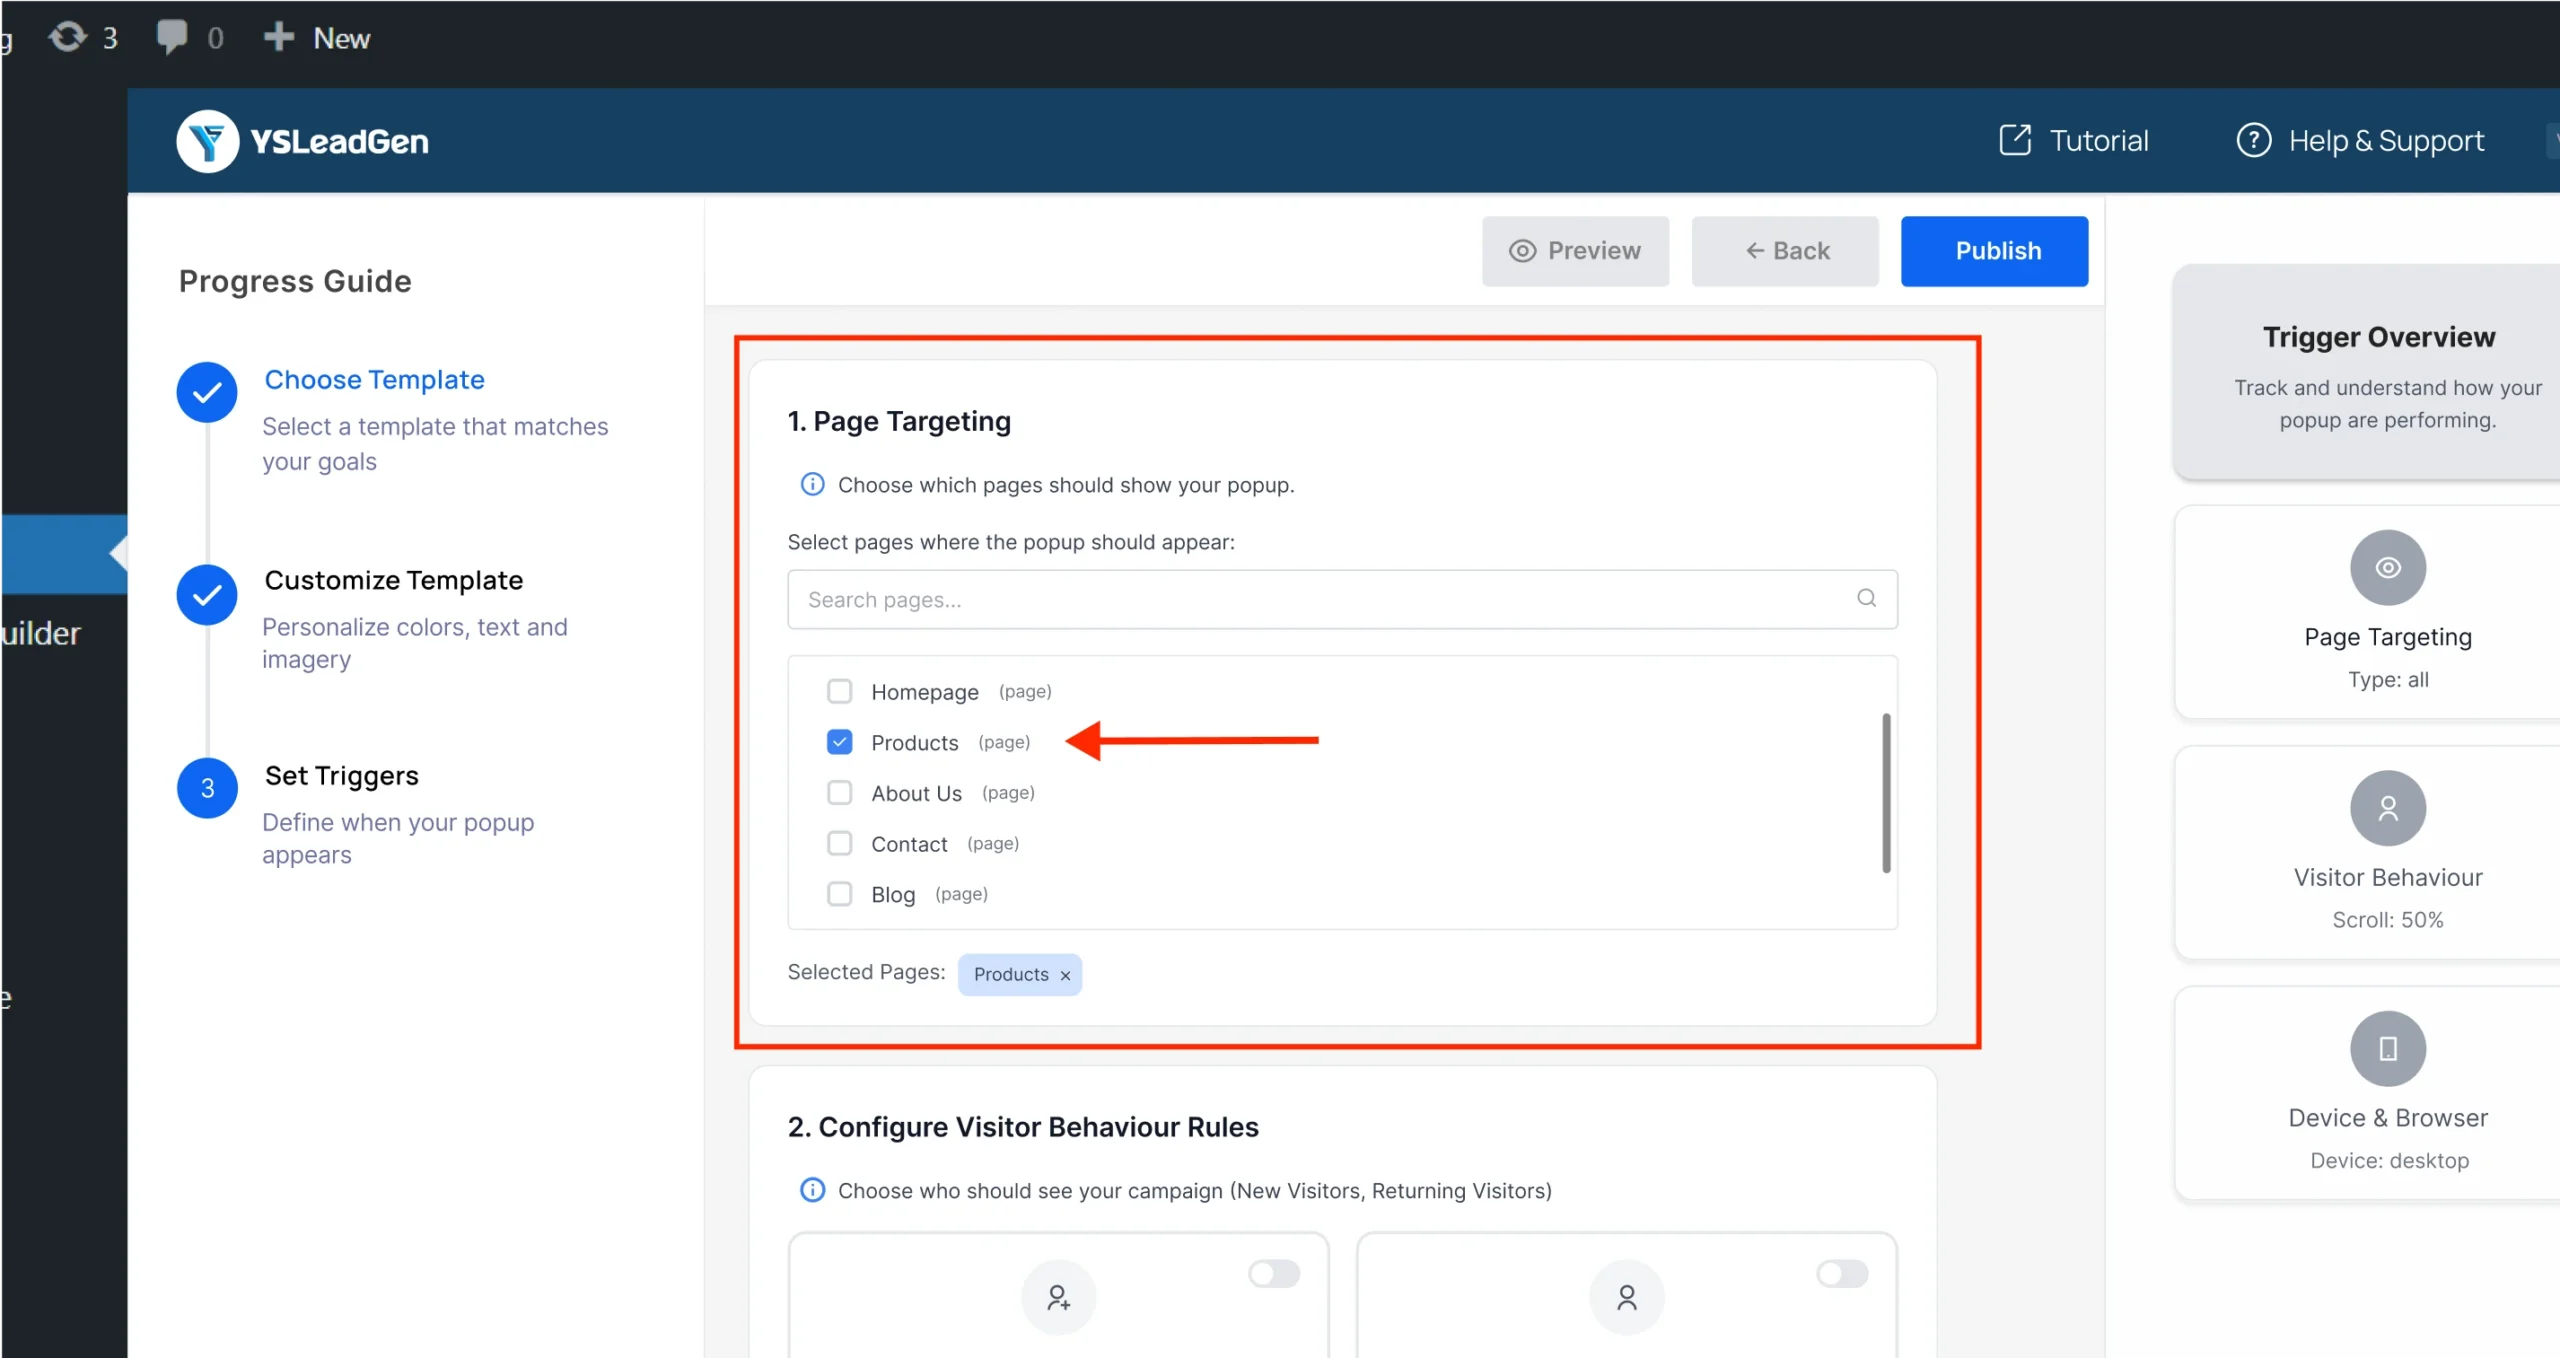
Step 6: Set Page Targeting
Choose where the popup should appear:
- Entire website
- Product/category pages
- Cart or checkout pages
Step 7: Go to Display Trigger Section
Scroll down to the Display Trigger section.
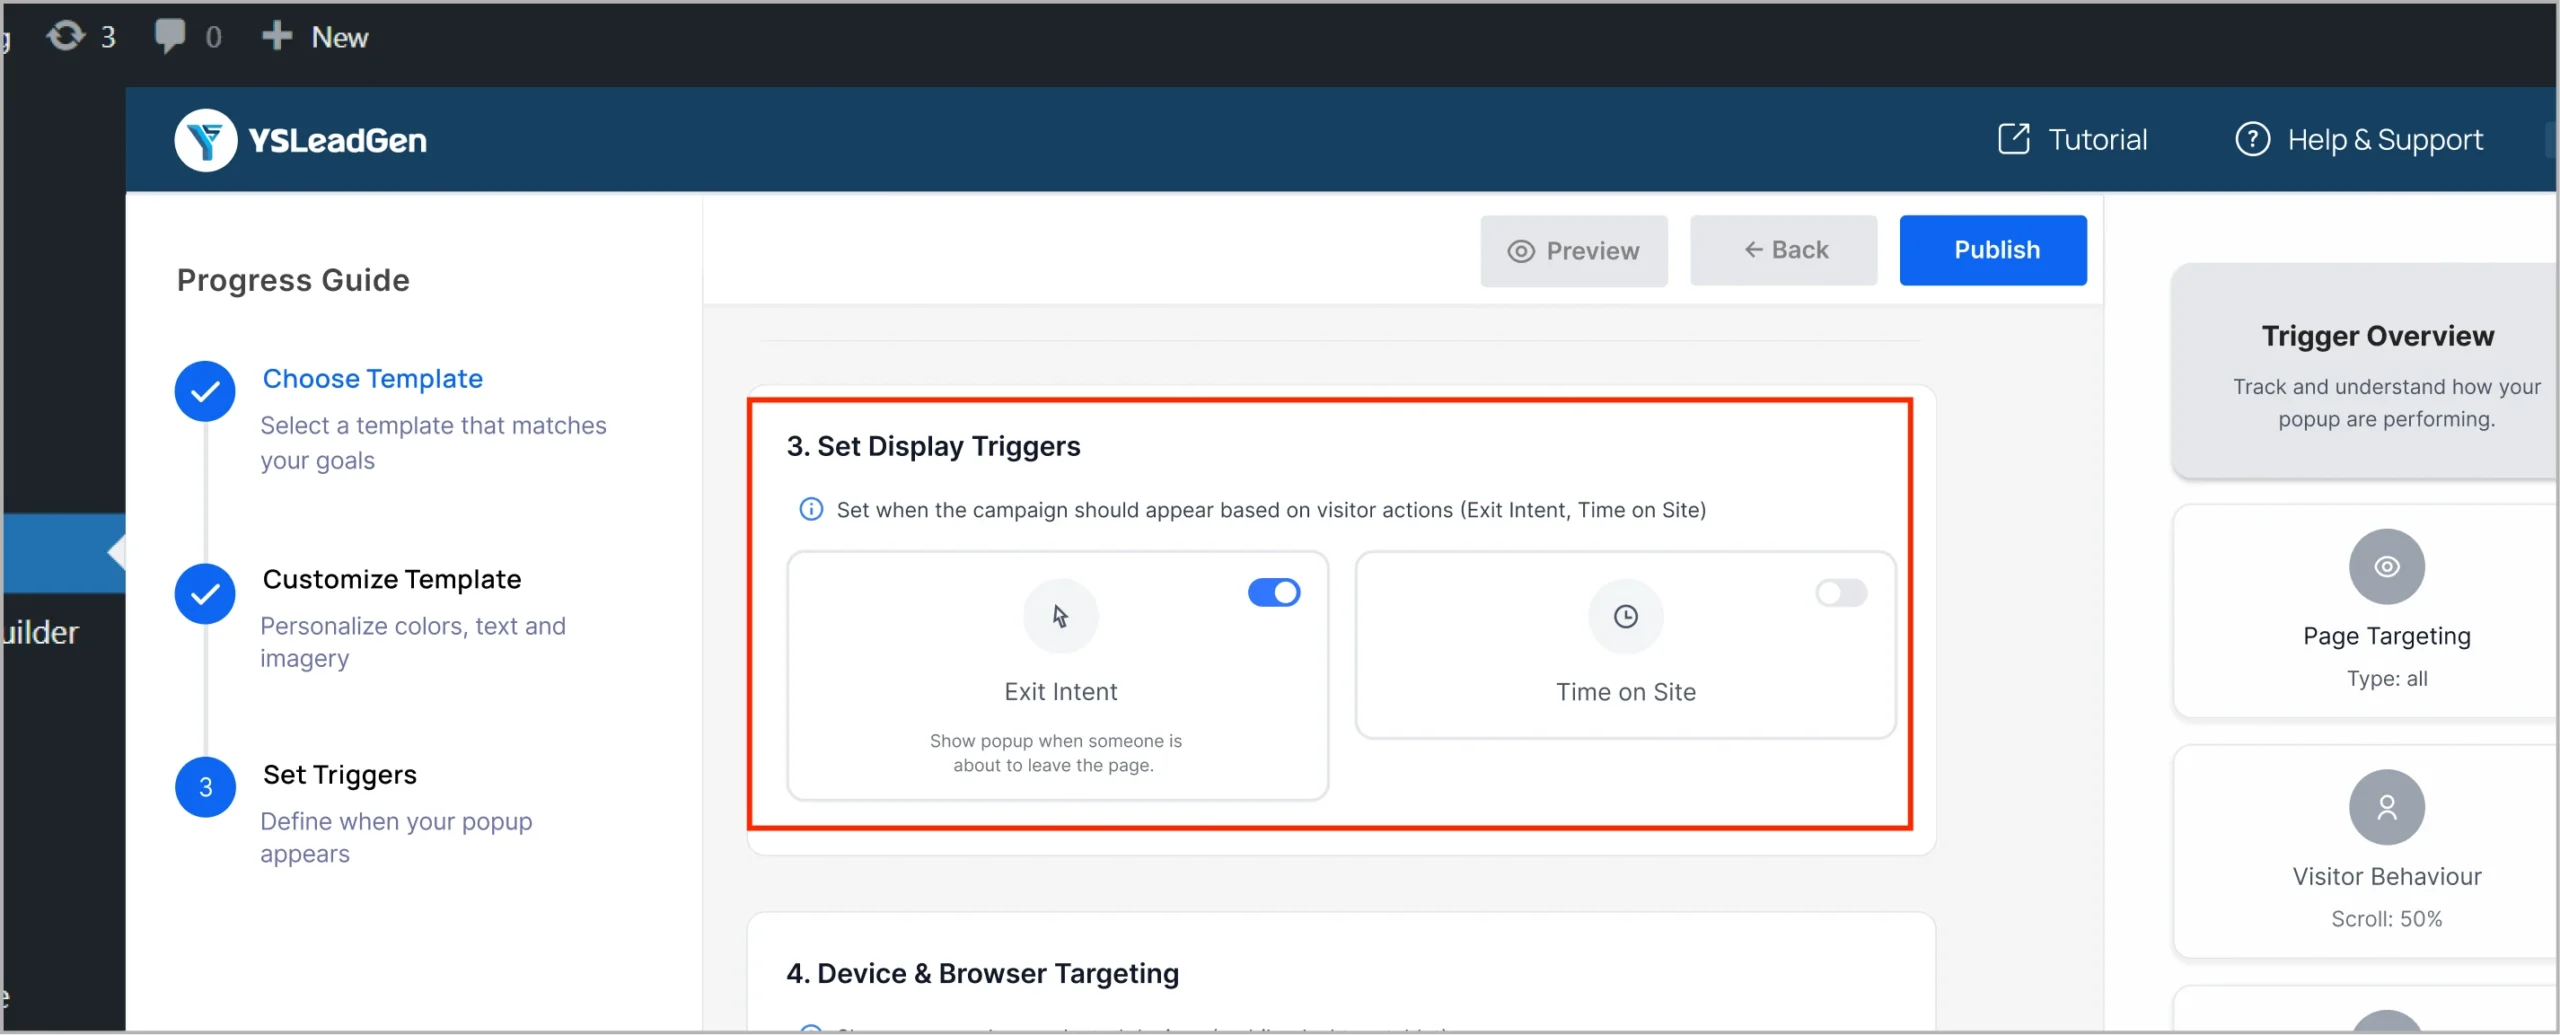
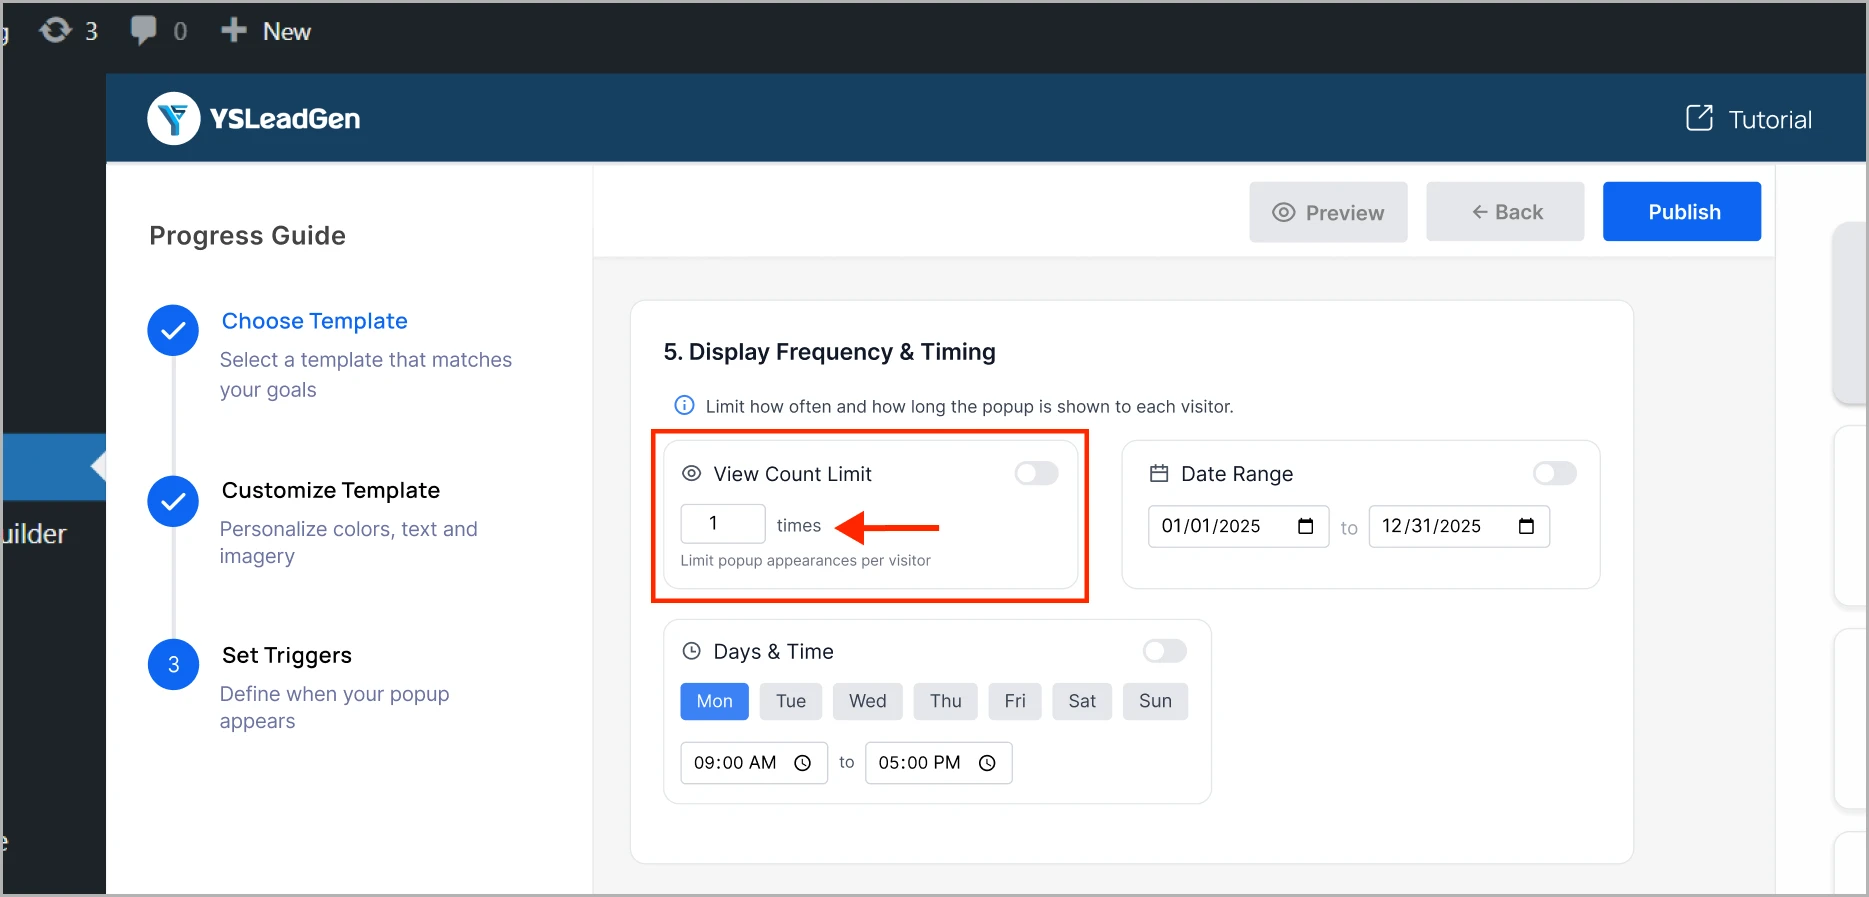
Step 8: Set Time on Site Trigger
Look for this option:
Time on Site
Show after visitor spends X seconds on site
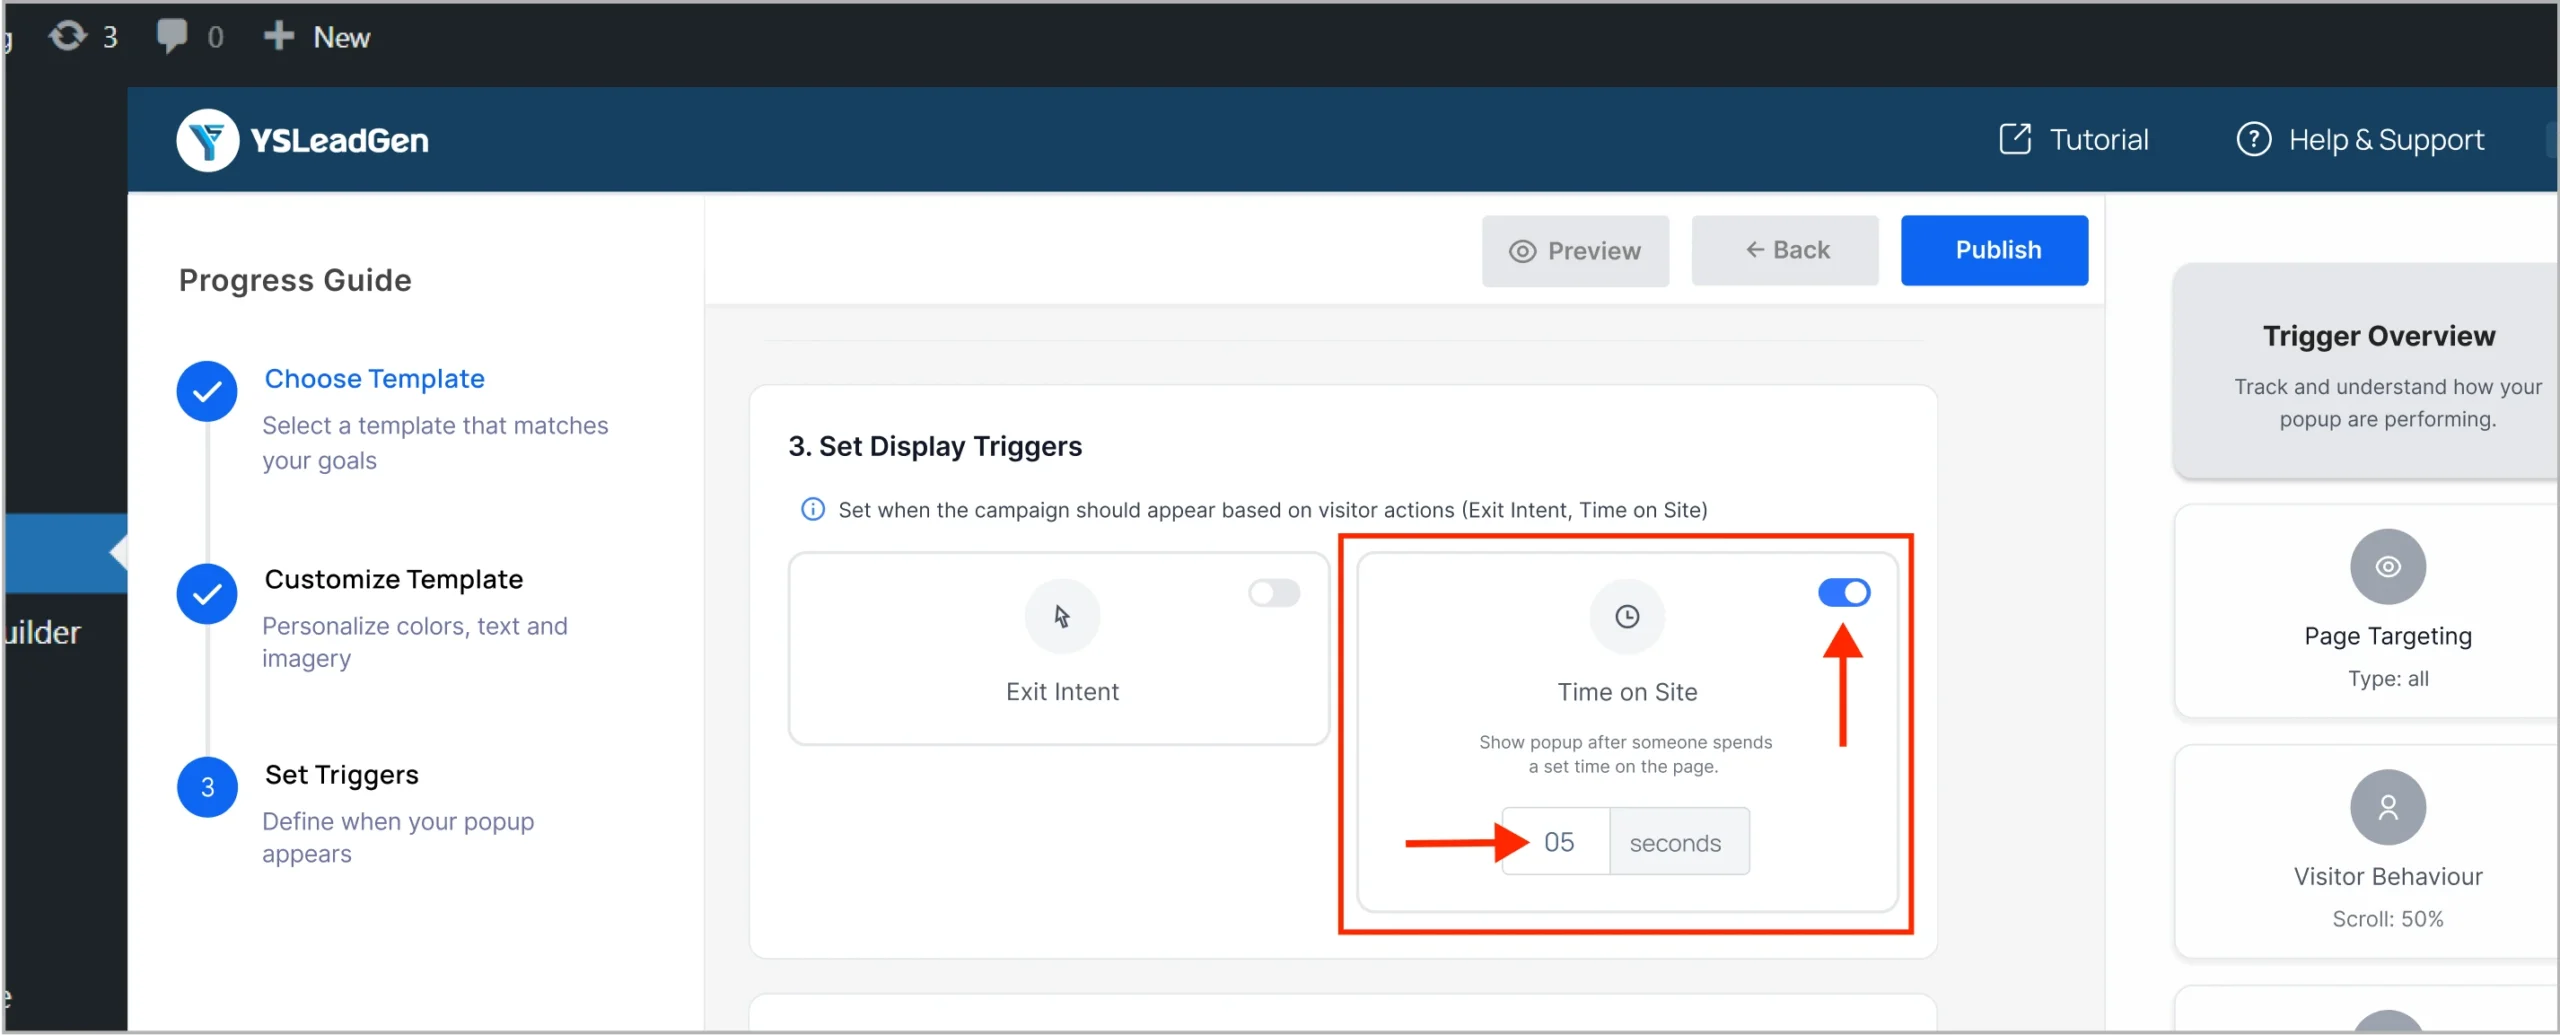
Enter the number of seconds (e.g., 10, 20, 30…).
This means the popup will appear only after the visitor has been on your site for that amount of time.
Example:
If you enter 15, the popup will be shown after the user stays on your site for 15 seconds.
Best Practice: Set this to 10–30 seconds for most campaigns.
This gives users time to explore before being prompted.
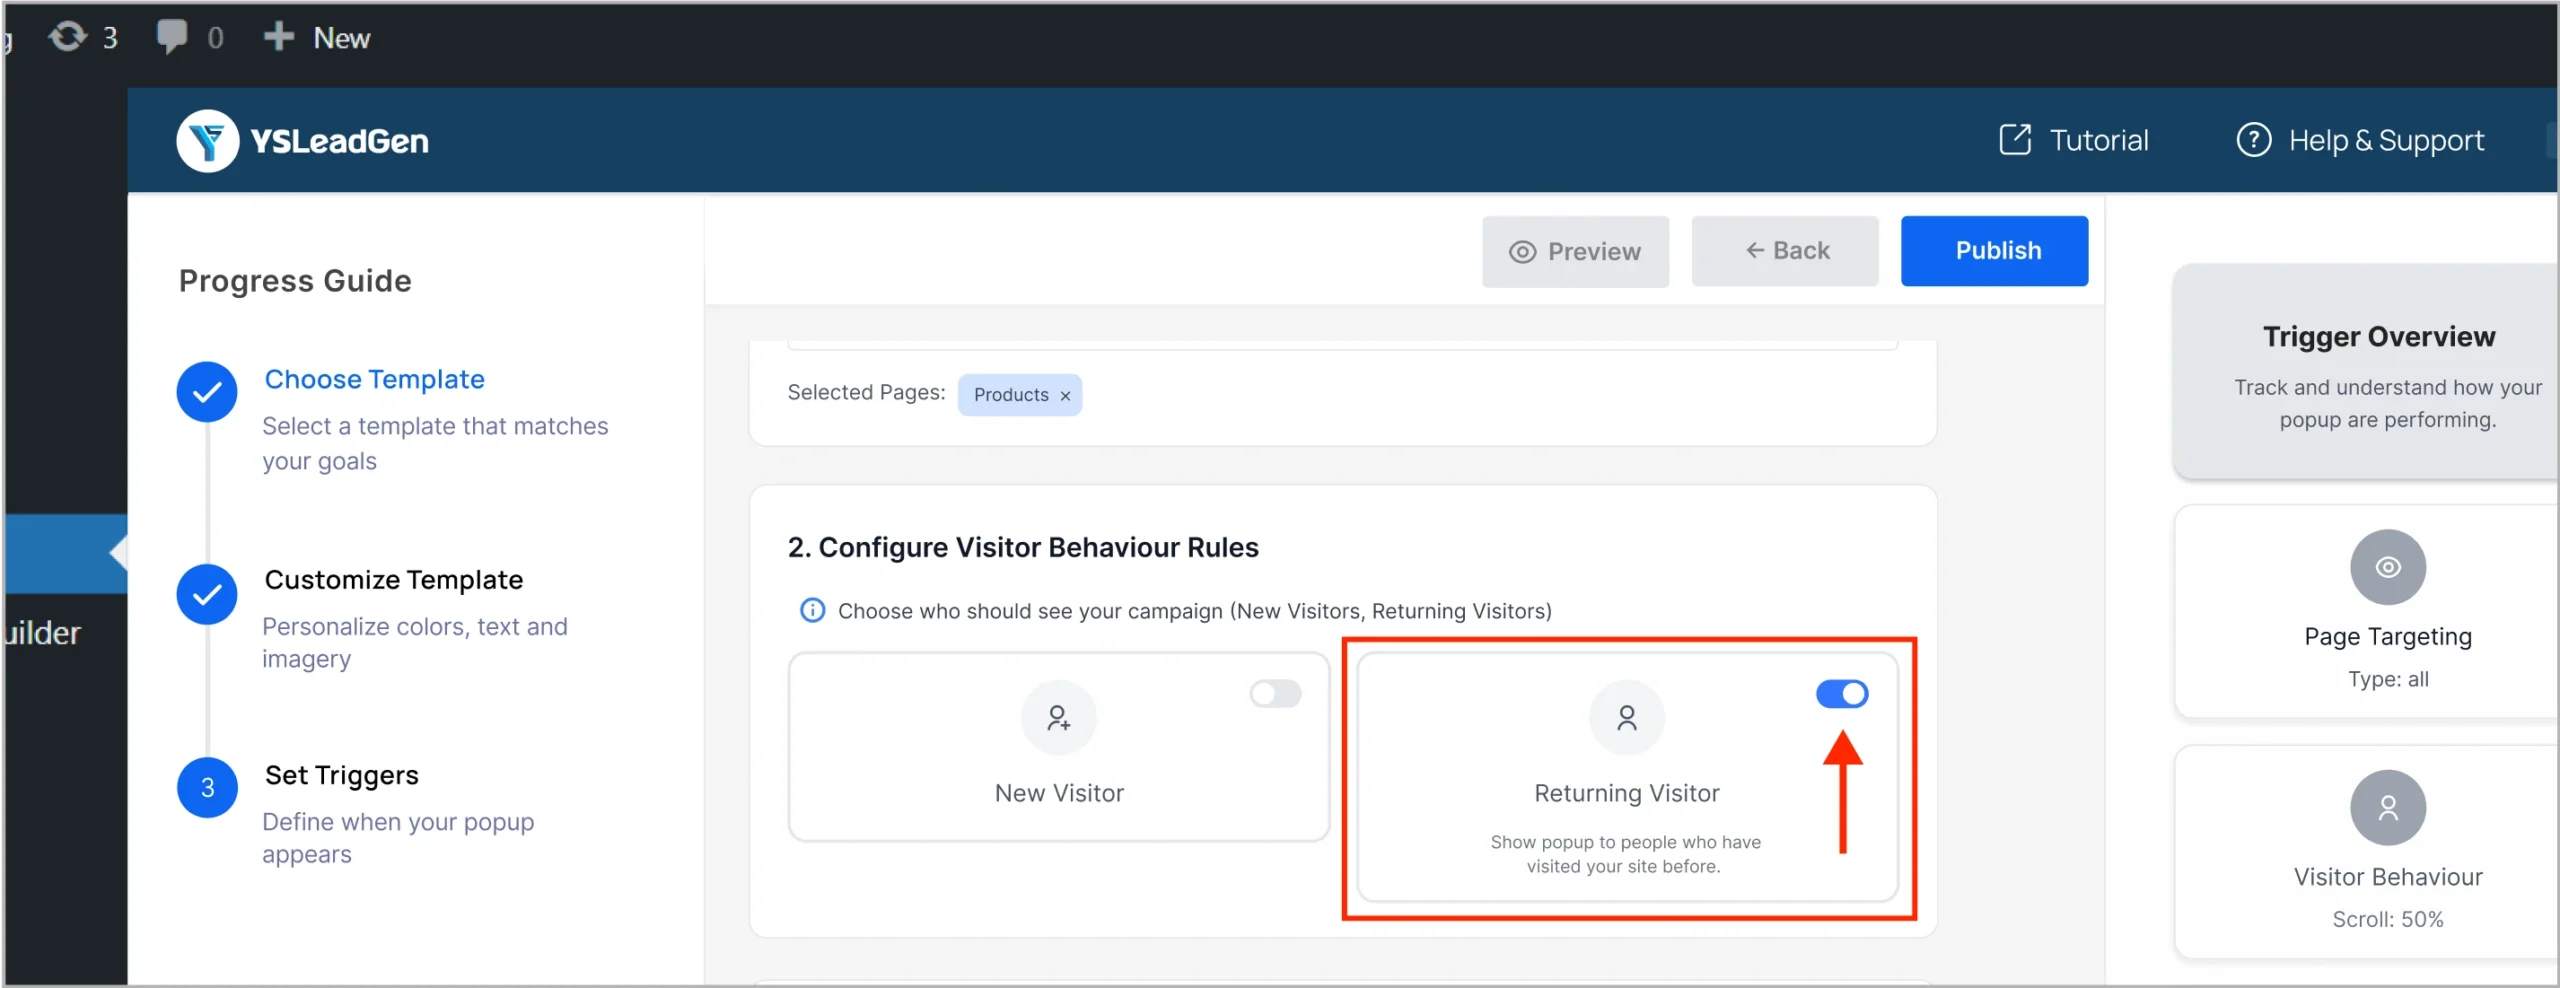
Step 9: Configure Other Triggers (Optional)
You can combine with other triggers like:
- Exit intent
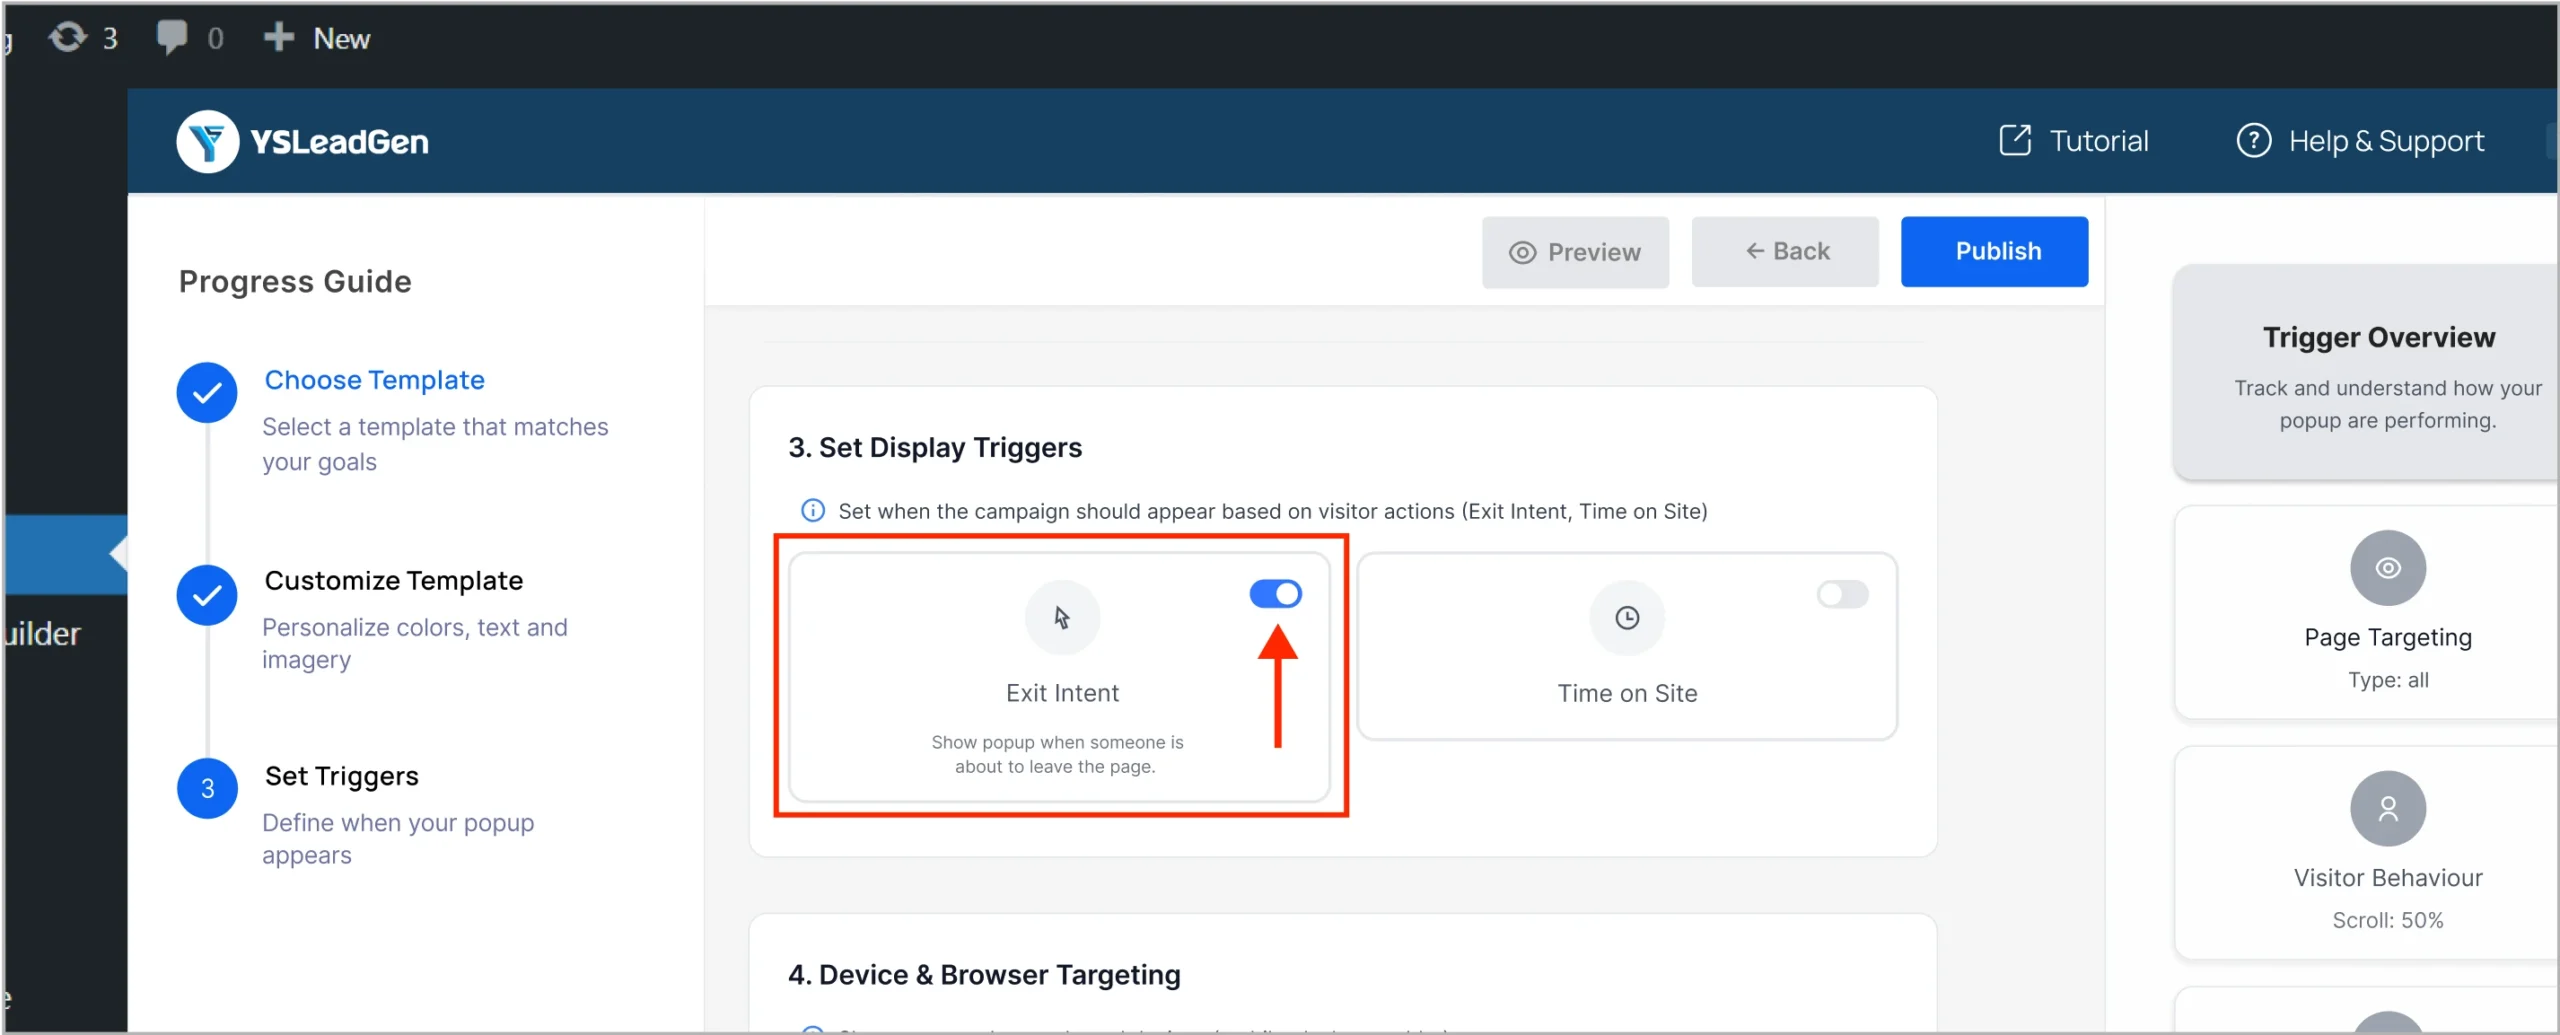
- Scroll percentage
- Returning visitors
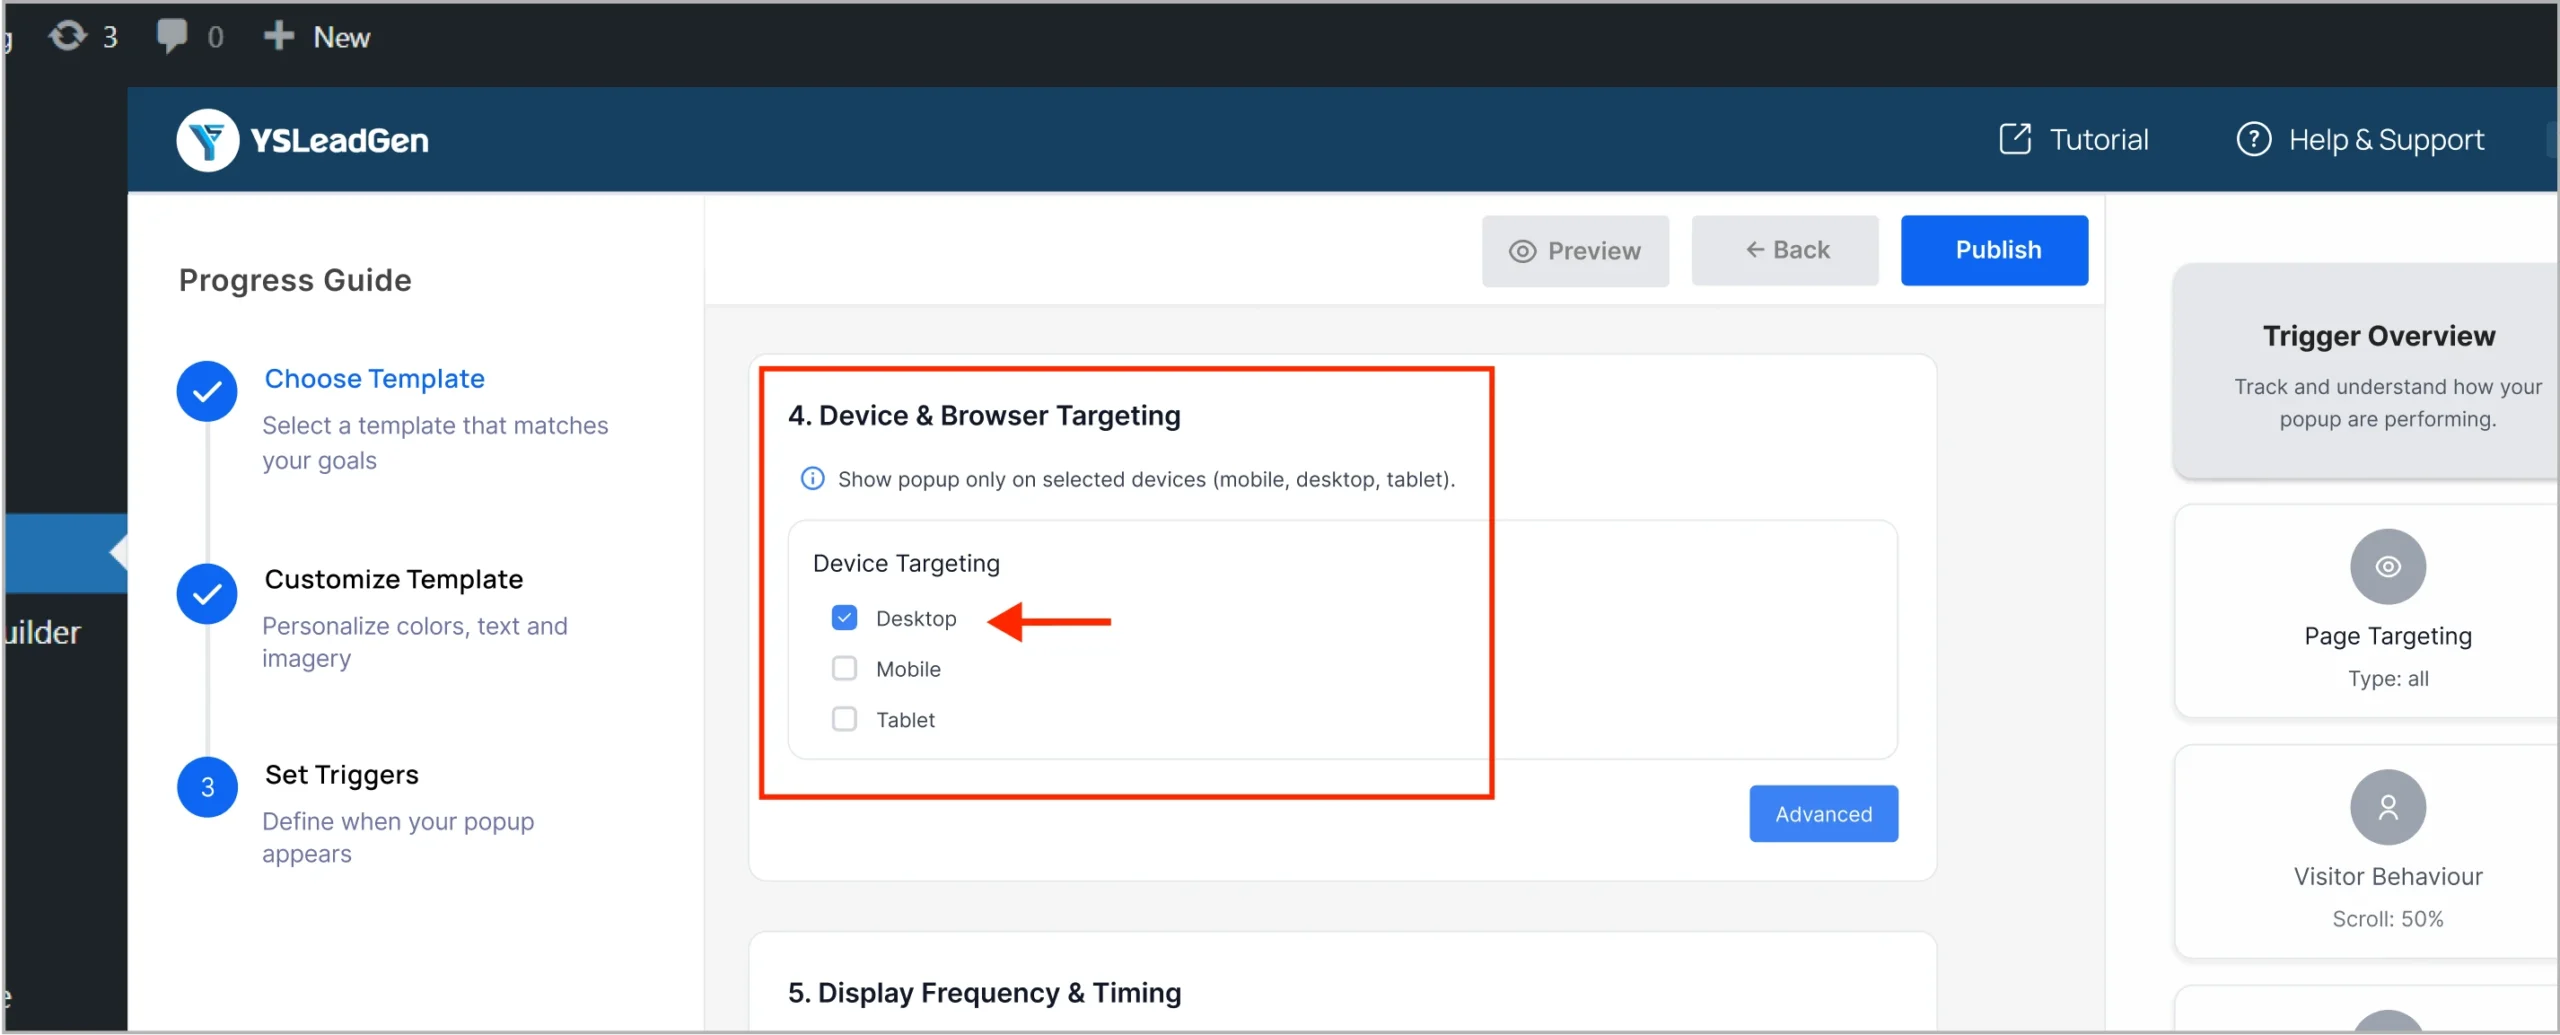
Step 10: Target Devices (Optional)
Choose where to display:
- Mobile
- Desktop
- Tablet
- All devices
Step 11: Set Frequency & Schedule (Optional)
You can also set:
- Show once per session
- Show only on certain days or times
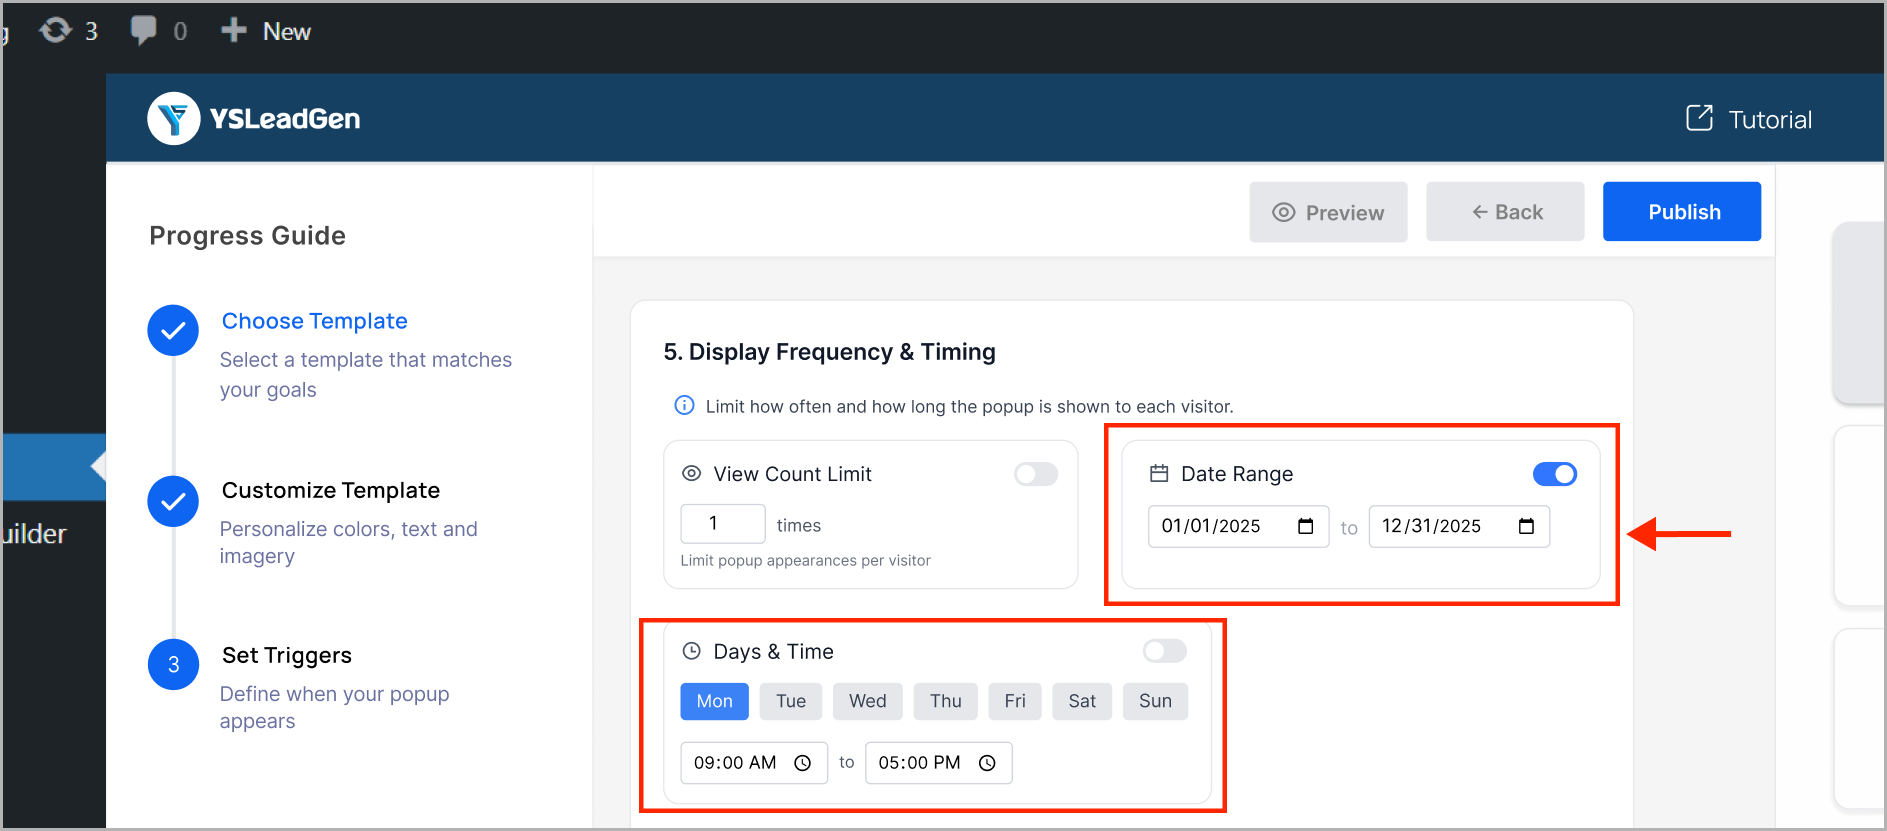
- Show for logged-in users only (if needed)
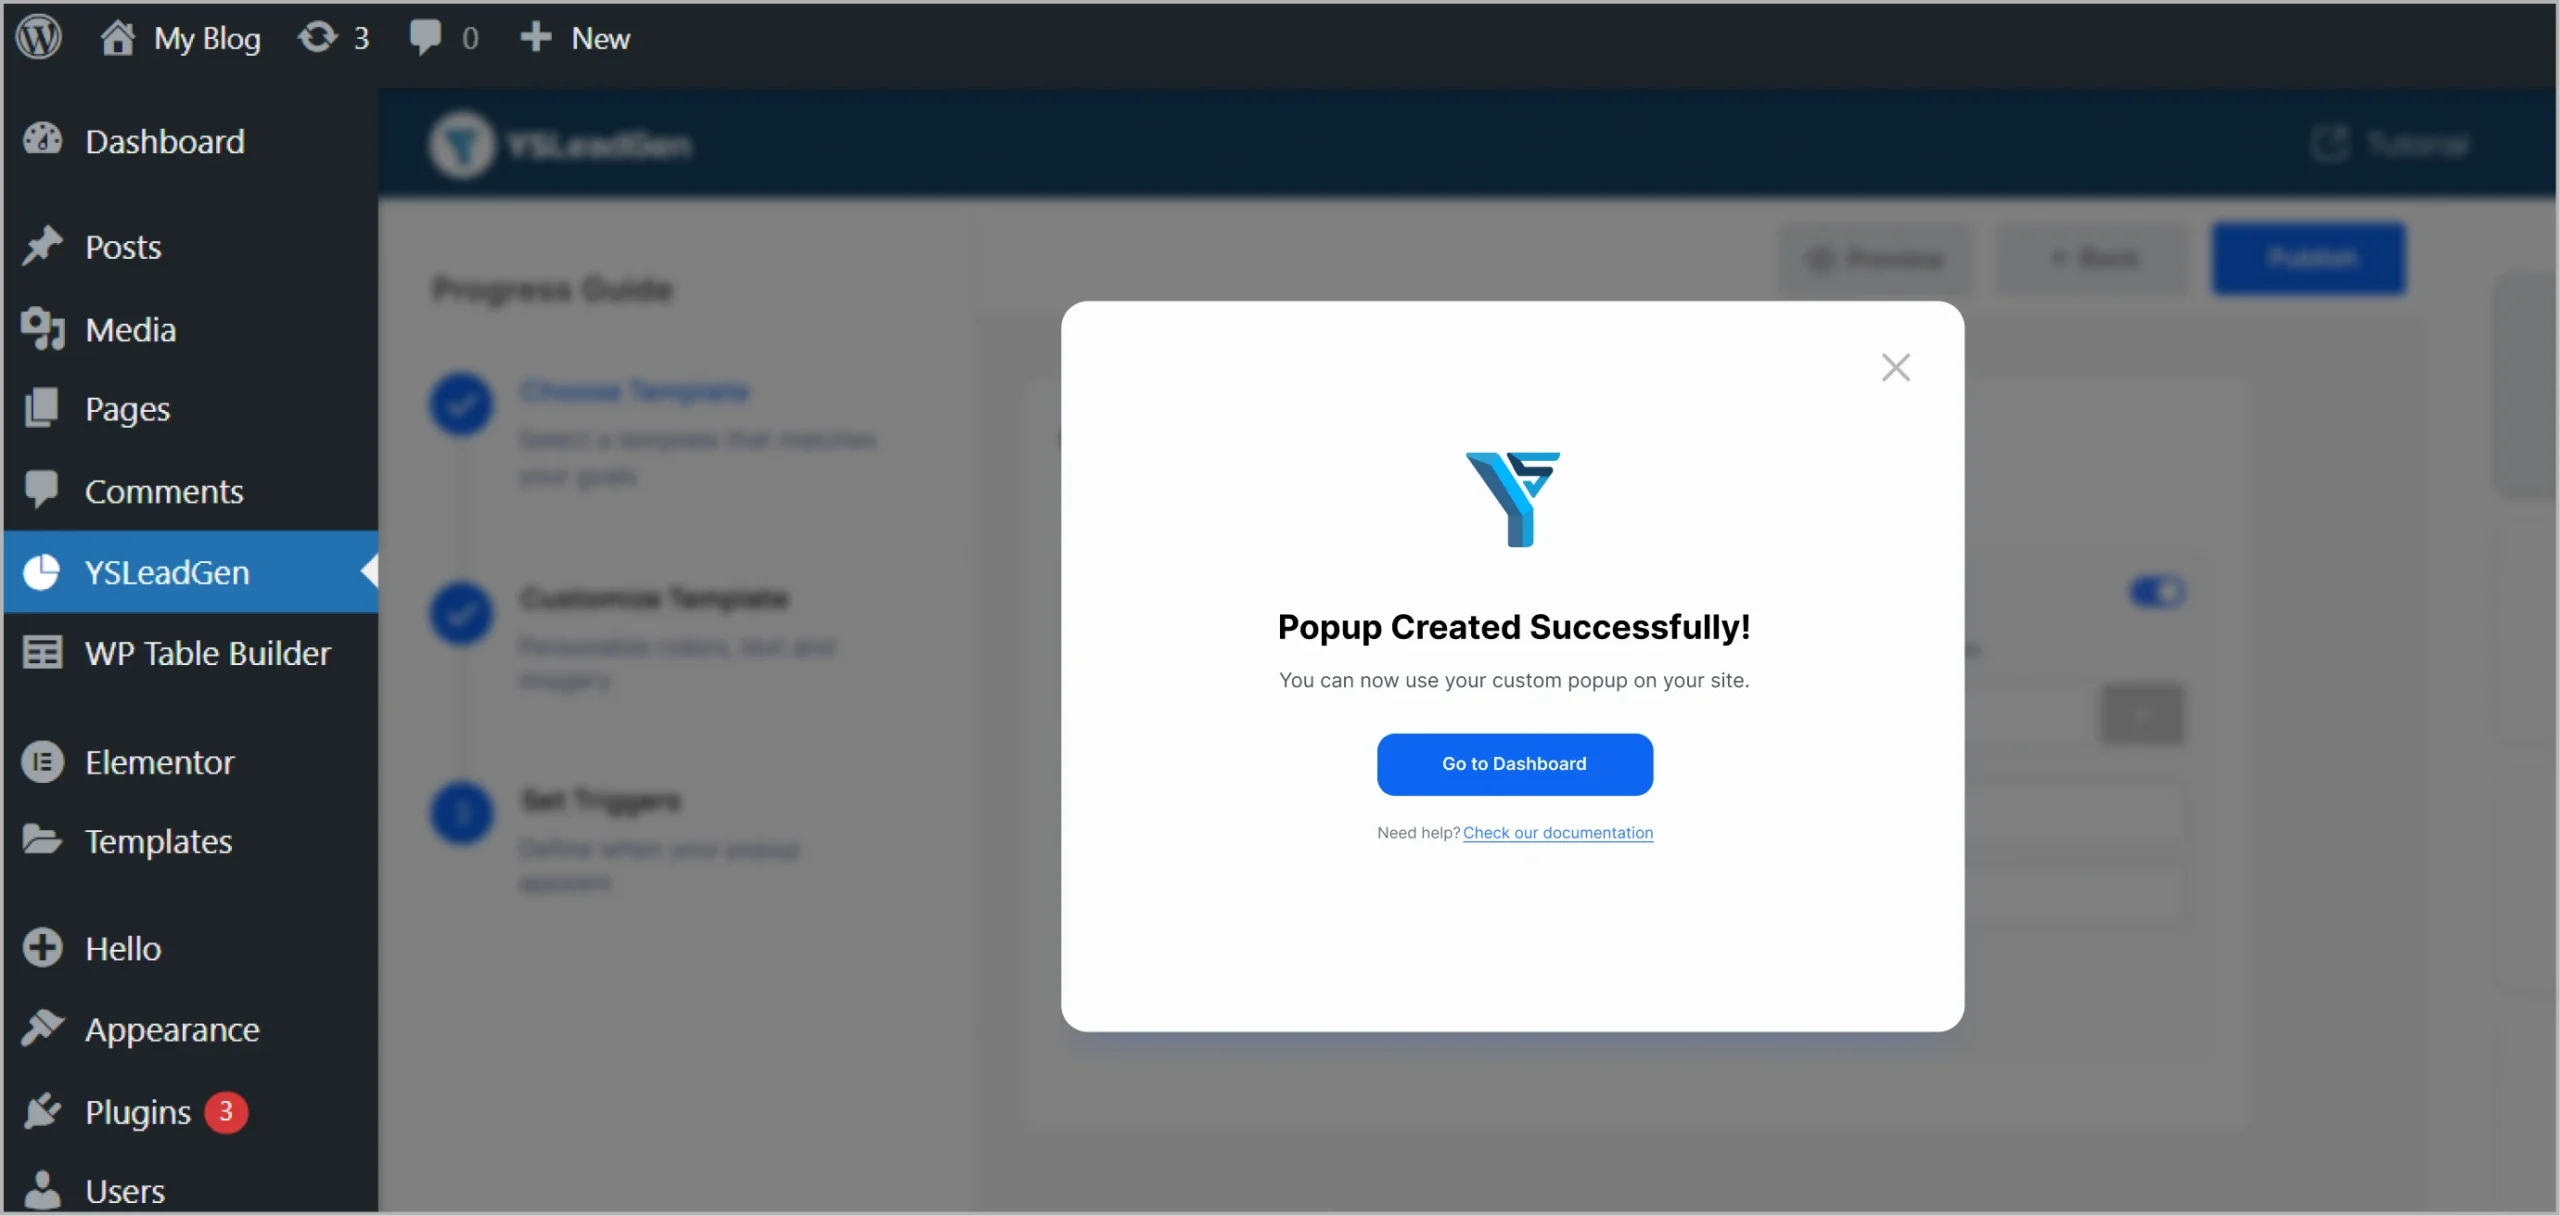
Step 12: Click Publish
Once everything is ready, click Publish. ✅
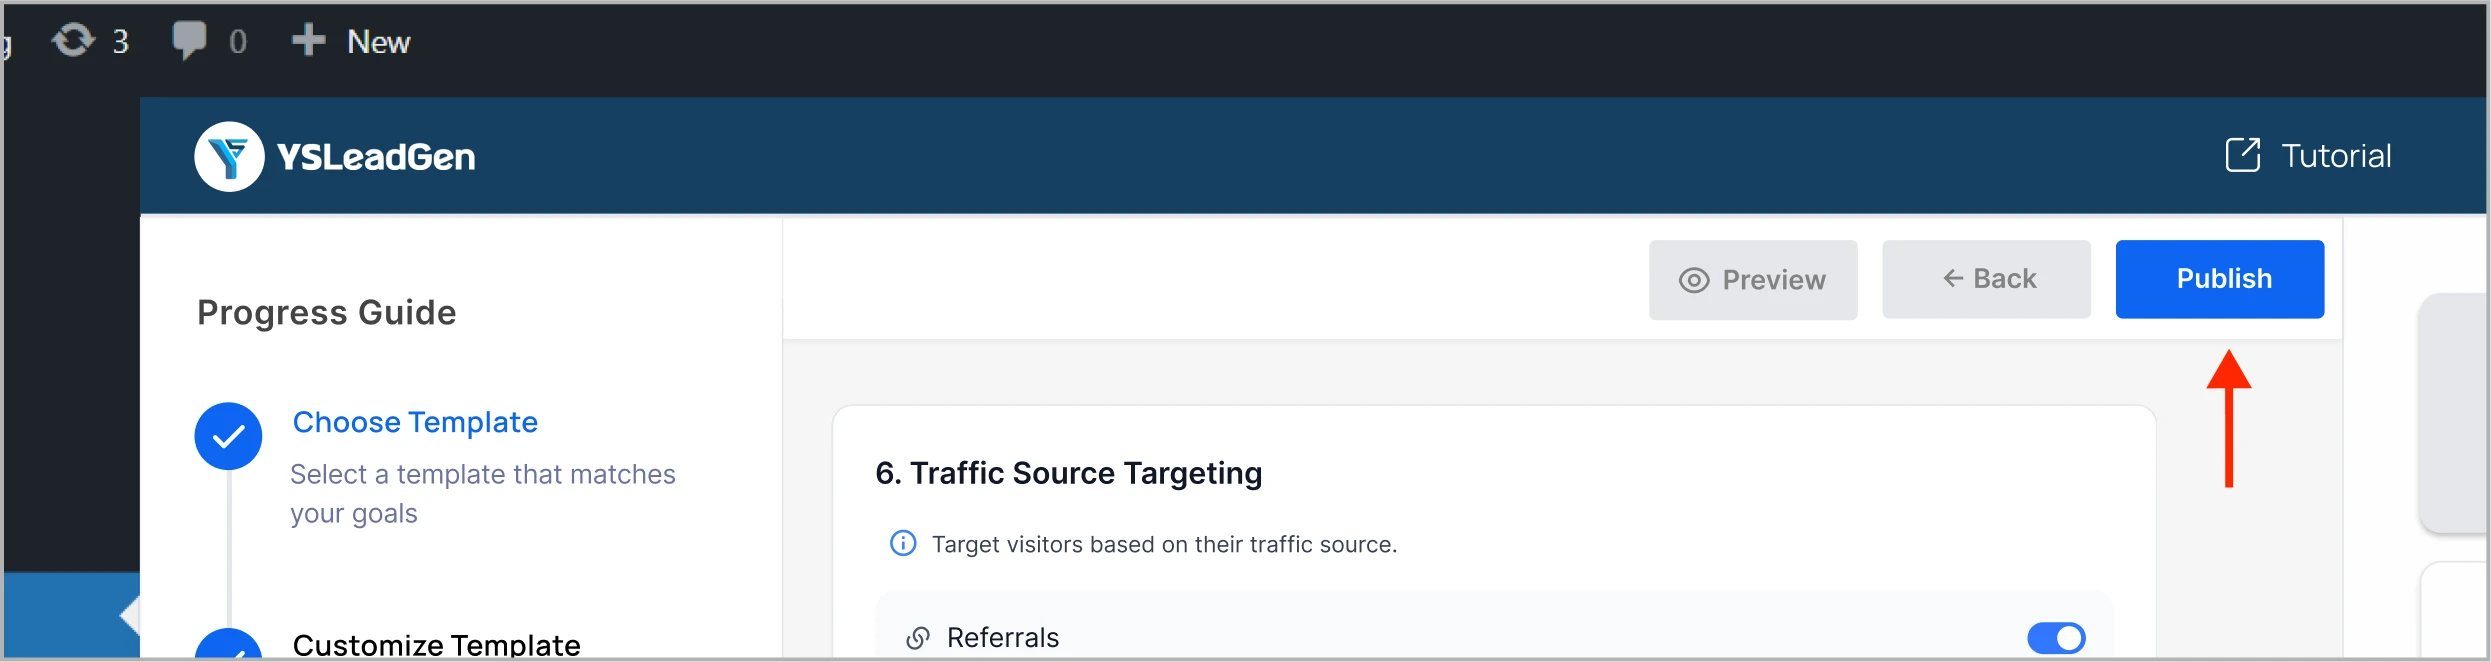
Your popup is now live and will appear after X seconds on site, just as you set.
Pro Tips
- Keep your message short and valuable when using delay triggers.
- Test different time intervals (e.g., 10 sec vs 20 sec) to find what converts best.
- Don’t combine too many triggers unless necessary — it may confuse the user.
Need Help?
Reach us at: support@ysleadgen.com
Visit our full Documentation Hub